31 March 2008

My Very Sweet Not-So Vegan


I always feel guilty when I do this, but that only lasts until I actually taste the result. What is "this," you ask? Well, de-veganize a recipe that seems like its owner tried very hard to veganize in the first place.

In this case, I took the Almond Avalanche Bars recipe from My Sweet Vegan and used butter instead of margarine. Although I grew up with margarine in the house, I haven't liked it since I first tried butter as a child at my great grandmother's apartment in the Bronx. That also was the first time I remember eating white bread and using a toaster oven as well.

My version of Ms. Kaminsky's recipe also included a few other big changes:

1. Agave nectar for the brown sugar, corn syrup, and granulated sugar.
2. Cashew butter and cashew macadamia nut butter for the almond butter (so rich!).
3. Unsweetened carob chips for the chocolate chips.
4. 2/3 cup coconut flour added to the topping.


OK, for those of you who have the cookbook and have already made these by the recipe and are saying to yourselves, "Why on Earth would she add coconut flour to the topping?" I say, my mixture was pretty wet. Really wet and goopy. It might be because I had just opened the cashew butter and mixed the oil into the butter while it was still room temperature. Maybe it was because there isn't any flour to hold the topping together, and I used agave instead of sugar. Regardless, my topping turns out super-rich and candy-like.

The butter crust was (ehem) too buttery for me. I know. Laugh all you want, my vegan friends. Nonetheless, if I make this again, I'd use about half the butter for the crust.

The bars as I made them were a bit too sweet for me, but I'm bringing a big plate of the bars for a gathering tonight and let you know what the taste testers think of my reworking of My Sweet Vegan's Almond Avalanche Bars.

24 March 2008

E for Excellent


One of the nicest honors is to be given the "E for Excellent" award from another blogger whose blog you admire. Ricki, of the wonderful Diet, Dessert and Dogs blog presented me with this and asked me to name five others worthy of the same distinction.

The big challenge is to select blogs that had not yet been granted that distinction. If you have been named previously, good for you for continuing to uphold your excellence in blogging. If not, please take this honor and give it to five others who are equally deserving.

1. Eat me, delicious. I really enjoy this blog's photos, writing and recipes. This blogger also participates in the Daring Bakers and Tuesdays with Dorie events, both of which are highly entertaining for us lowly novices.

2. Baking and Books. Ari writes great reviews of a wide variety of cookbooks. She takes lovely photos, and her baked goods always look so professional!

3. Ice Cream Ireland. Ever since Kieran Murphy started this blog, I've had it in my Google Reader. I really enjoy his stories about how his little ice cream shop is such an integral part of the life in Dingle, Ireland. He posts delicious recipes and just has such a lovely tone to his writing. One of my all-time favorites. Definitely read his "Caught with Ice Cream, election" series.

4. The Girl Who Ate Everything. Frankly, I'd be surprised if Robyn didn't already have one of these, but she certainly deserves one. One of the funniest bloggers around, she eats everywhere, travels the world, writes about her amusing adventures and (thankfully) takes great photos of most of it. She's also part of the crew at Serious Eats, a must-read for any food blogger. On two occasions, I've even had the pleasure of dining with her (once with her mom!). She's a great resource when it comes to finding tasty food in NY, and is the person to see if you're looking for gelato and/or macarons.

5. Lunapads Blog. Completely off food topics, but truly worthwhile and interesting nonetheless. The Lunapads folks are on a great mission to provide sustainable options to African schoolgirls who have been missing school due to the inability to deal with their monthly menses. They've set up a Goods 4 Girls donation so that if you're interested, you simply buy the package of washable pads online and they'll ship it directly to Goods 4 Girls who will ensure that the pads will be given to a girl who needs them. It's truly an important cause, especially when you see how many days per school year these girls miss just because they have their periods.

Hope you enjoy visiting these blogs!

18 March 2008

Book Review: The Sweet Melissa Baking Book


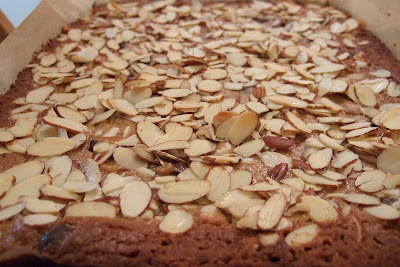
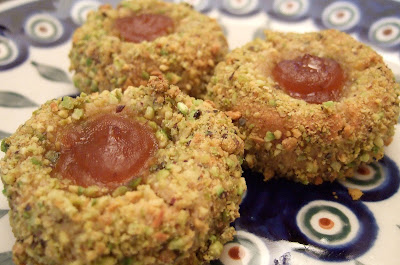
For this review, I picked a cookie that turned out to be far more delicious than I expected. The Pistachio Linzer Thumbprints didn't remind me of linzer tarts, but they were crisp on the outside, thanks to the pistachios, and buttery, lemony, and pistachio-y on the inside. The plum topping is just the right foil for the richness of the cookie. In fact, next time I make these (and you can bet big money I'll be making these again soon), I plan to flatten the cookies a bit more to add more of the plum spread.

My alterations produced fewer cookies, but not by much. If you watch how you scoop your cookie dough (unlike me and my occasional uneven sizing), you'll get your 4 dozen. The coconut flour was surprisingly evident, yet very pleasing in these cookies. You could hide it by adding a bit more vanilla and a little nut extract, but be selective because the flavor of the pistachios is important (and highly addictive) here. Although the recipe calls for dusting the cookies with confectioners' sugar, I can't even imagine adding a thing to these delicious cookies.

They were a huge hit with my friends yesterday, even a day after baking. If you're going to make these, you should definitely serve them the same day, just an hour or two out of the oven. They're just that good.

The kind folks at Viking Studio / Penguin Group (USA) have given me permission to reprint the recipe here with my alterations, which are in bold. The foregoing is excerpted from The Sweet Melissa Baking Book by Melissa Murphy. All rights reserved. Copyright © Melissa Murphy, 2008.

Pistachio Linzer Thumbprints

Makes about 4 dozen cookies

Ingredients:

1 cup shelled, unsalted pistachios, plus 2/3 cup shelled, unsalted pistachios, finely chopped for rolling (mine were raw)
2 1/4 cups all-purpose flour (here I used 2 cups of ap flour and 1/4 cup coconut flour)
2/3 cup sugar (I used agave nectar)
1 teaspoon baking powder
1 teaspoon ground cinnamon
1/4 teaspoon kosher salt (I used 1/8 teaspoon regular salt because I used salted butter)
1/2 pound (2 sticks) very cold, unsalted butter, cut into 1/2-inch pieces (again, salted butter right from the freezer)
1 tablespoon freshly grated lemon zest (I used the zest from an entire lemon, closer to 1 1/2 tablespoons)
2 large eggs, separated (in both cases, I lightly whisked the eggs prior to using them)
1 teaspoon pure vanilla extract (I used vanilla paste)
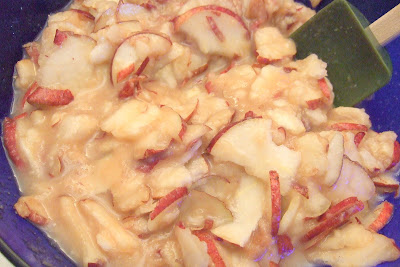
1/2 cup seedless raspberry or apricot preserves (I used a really nice no-sugar added plum spread)
Confectioners' sugar (I omitted this for obvious reasons)

Directions:

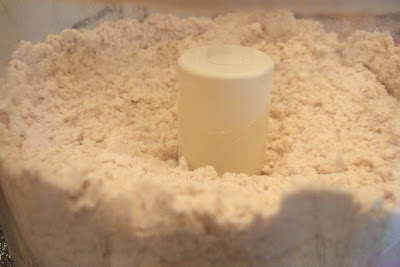
1. In a food processor fitted with a metal blade, pulse the 1 cup of pistachios with 1/2 cup of the flour until fine but not powdery. Add the remaining 1 3/4 cups flour, the sugar, baking powder, cinnamon, and salt. Pulse to continue. (Here I left out the agave, adding it after the butter, later.)

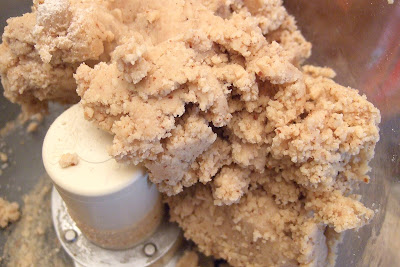
2. Carefully add the butter cubes and zest and toss with your fingers to coat with flour. (I let the food processor do it for me, pulsing just enough to get the crumbly appearance.) Pulse until the mixture looks like cornmeal. Add the egg yolks and vanilla and pulse until the dough just holds together. (I added the agave nectar right before the yolks and vanilla.)

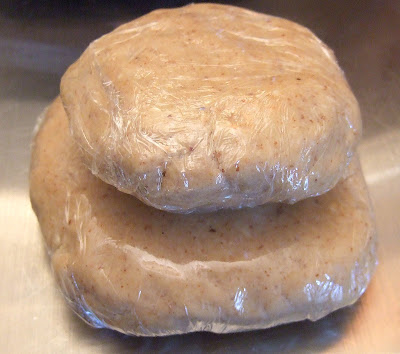
3. Refrigerate the dough until firm, about 1 hour. (At this point, the dough can be wrapped tightly in plastic wrap and then aluminum foil and frozen for up to 3 weeks.)

4. Position a rack in the center of your oven. Preheat the oven to 350 degrees F. (I used 325 degrees F.) Line two cookie sheets with parchment paper or aluminum foil. (I used parchment paper.)

5. Using a 1-ounce cookie scoop or a tablespoon, scoop the dough into 1-inch balls. Roll each ball in the egg whites and then in the chopped pistachios. Place the cookies 1 1/2 inches apart on the prepared cookie sheets, and press down lightly with your fingers so that they stay put. (This is a messy, sticky procedure, so make sure that you don't have to do anything else for about 15 minutes while you're rolling. Also, the nuts didn't go as far as I would have liked, so I had to process another 1/2 cup of pistachios for rolling.) Using a floured thumb (or the finger of your choice), press an indentation into the center of each cookie. (I used the second knuckle of my index finger to make the indentations without any flour. This worked very well, giving me a true circular indentation. You also could probably achieve this with the end of a wooden spoon.)

6. Keep the cookies chilled while you fill a pastry bag fitted with a 1/4-inch round pastry tip (I use an Ateco #801) with the preserves. (Alternately, put the preserves in a resealable plastic bag, squeeze it down to the bottom, and snip off a little bit of one corner -- instant piping bag!) (I elected to use a snack-sized ziplock bag for this part. Worked like a charm.) Fill each cookie (indentation) with about 1/4 to 1/2 teaspoon preserves. (Here I also had to add a bit more of the plum spread to the bag.)

7. Bake for 20 minutes, or until lightly browned. (I baked mine for 9 minutes, then turned the cookie sheet and baked them for another 9 minutes.) Remove to a wire rack to cool.

8. When cool, generously dust with confectioner's sugar. Using your finger dipped in water, tap on the centers of each cookie so that the jam shines through the sugar. (I skipped this step and went straight to the sampling!)

The cookies keep in an airtight container at room temperature for up to 3 days. For longer storage, wrap in plastic wrap and refrigerate for up to 5 days, or freeze well wrapped in plastic wrap and then aluminum foil for up to 3 weeks. Do not unwrap before defrosting. Dust with confectioner's sugar before serving. (Or don't.)

I'm really looking forward to trying out more of Melissa's great recipes from her new book. The only thing I'd want from a future book from her would be more photos. It would have been nice to see how her Pistachio Linzer Thumbprints look.

10 March 2008

It's All About the Crust, Baby


Kitchen Parade
is celebrating Pi day (14 March) with a great, big event linking together pie makers from across the globe. You still have a few days in which to include your favorite pie entry, but just so you know, you'll need to focus heavily on the crust.

My favorite pie crust is a slightly different take on Elise's All-Butter Crust (a true work of art). My version omits the brown sugar and the water, and uses agave nectar instead. Additionally, I use coconut flour for a portion of the all-purpose flour. It's still super-buttery, and very much like a shortbread crust. It's a huge hit with everyone who tries it. My friend Ken even said that he could just eat the crust alone. I often do, since there is usually enough to make a few cut out cookies as extras for "tasting" purposes.

The great thing about this recipe is that it can be made in the food processor. Since I recently acquired an awesome Cuisinart 14-cup food process, I felt that it was time to put it through its paces.

In this case, I made two pies, a pear pie with a spiced crust and a cherry berry pie with a citrusy crust. I've made pear pies before, but I'd definitely make this crust again.

Here's the Pear Pie Shell:


Prior to making your crust, place all the ingredients in the freezer for at least an hour. It makes all the difference.

In the food processor, place the following ingredients:
1/4 teaspoon freshly grated nutmeg
1/4 teaspoon ground cinnamon
1/4 cup coconut flour, sifted
3/4 cup whole wheat pastry flour
1/2 cup almond flour/meal/finely processed almonds
1 cup all-purpose flour

If you're making the cherry pie crust, omit the nutmeg and cinnamon.

Pulse the dry ingredients 5-6 times to evenly incorporate the flours.

Add 2 sticks of very cold butter (I freeze mine), cut into cubes. Pulse until the ingredients resemble very coarse meal.


Adding a tablespoon at a time, pour 4 tablespoons of agave nectar through the liquid holder in the processor until the dough just comes together. If you're making the cherry pie crust, use 3 1/2 tablespoons of agave, and add 1/2 teaspoon fiore di Sicilia flavoring. You're going to love it. Makes the whole house smell like a creamsickle.


Divide the dough into two parts, one larger than the other. Form each into a flat, round shape, wrap in plastic and refrigerate for at least 2 hours.


While the dough is chilling, make the fillings.

For the Pear Pie, I combined the following in a large bowl:

6 large red ripe pears, sliced
2 tablespoons freshly squeezed lemon juice
1/4 cup agave nectar (although you really won't need it if your pears are sweet, mine weren't that sweet)
3 tablespoons tapioca flour (you could just as easily use arrowroot or corn starch)


For the Cherry Berry Pie, I combined the following in a large bowl:
(I used frozen fruit because here in NJ, it's still winter, but if these are in season by you, definitely use fresh.)

2 16 oz frozen packages of cherries, thawed
1 8 oz frozen package of mixed berries, thawed
3 tablespoons freshly squeezed lemon juice
1/4 cup agave nectar (again, not needed if your fruit is sweet)
3 tablespoons tapioca flour (or corn starch or arrowroot)


Either way, your filling should be a little soupy, especially if you use the agave nectar, which will make the fruit run a bit.

Take the dough out of the fridge and let it warm enough to be able to roll it out. Some folks even knead their dough a bit before rolling. I've done this and it lends an even flakier feel to the crust.


Fit the crust into your pie dish. You may need to patch some, but don't worry, none of it will show to your eaters. Wrap the crust in the plastic you used for the disc and chill for 30 minutes.

Pour the filling into the crust and dot with a tablespoon of butter cut into tiny pieces.


Again, wrap the pie in plastic and chill while you roll out the other dough disk and use your favorite cutter to cut pieces for the top crust. Take the pie out of the fridge and decorate the top as you wish.


Just remember to leave spots for steam to escape. Cover the edges with foil and bake at 325 degrees F. for about 40 minutes. Then remove the foil and bake until you have a nicely golden brown top and the filling is bubbling.


Let cool completely, then enjoy!

04 March 2008

Ping Pong

Normally I try not to ping pong between my blogs, but I just wanted to let you know that I've reviewed a new product on my other blog that you might find useful in your baking and cooking, the SideSwipe. If you've had experience with this new gadget, please let me know. I'd like to hear your feedback as well.

Here and There blog review of the SideSwipe mixer blade.