29 October 2007

A Mighty Tasty Pear Pie


This was indeed one of the best pies I've tasted (if I do say so myself). I brought it to a baby shower yesterday, and the mommy-to-be ate two pieces. One of the outstanding features of this pie is that the only butter (or for my vegan friends, margarine) is on the pan. It's a no-butter crust! The key is that the recipes uses the naturally buttery flavor of walnuts instead.

I've made a short movie (yes, I know it's been a while) to show you how to make the pie. The recipe follows below the film.


adapted from Pear Pie with Walnut Crust, from "Still Life with Menu" by Mollie Katzen

Ingredients:

Crust:
1 tablespoon soft butter or non-dairy buttery spread
2 cups walnuts
1/2 cup all-purpose flour
2 tablespoons agave nectar
dash salt

Filling:
5 ripe red pears
2 tablespoons all-purpose flour
1 teaspoon cinnamon
2 tablespoons agave nectar
zest of one lemon
juice of half the lemon
dash salt

Directions:

Make crust first:
1. Generously grease 9-in. pie pan.
2. In your food processor, pulse the walnuts until they're in 1/4 in. chunks.
3. Add the flour, salt and cinnamon to the processor and pulse until the walnuts are down to a mealy texture.
4. Slowly add the agave nectar, one tablespoon at a time until the dough just comes together.
5. Remove the crust from the processor and gently press it into the prepared pie pan. Reserve 1/4 cup of the crust for topping the pie. Set the shell aside while making the filling.

Make the filling:
1. Preheat the oven to 350 degrees F.
2. Core and slice the pears. Don't peel if they're as nice as the ones in my little film.
3. Toss the pears gently with the flour.
4. Add the cinnamon, lemon zest, lemon juice and salt. Toss gently.
5. Add the agave nectar and toss gently.
6. Scoop the pears into the crust and bake for 20 minutes, loosely covered with a piece of aluminum foil that has a hole cut for the middle. (This is done to keep the shell from burning.)
7. After 20 minutes, pull out the pie, crumble the reserved crust to make a nice, even topping. Bake for 17 more minutes.
8. The pie will be pretty wet, but as it cools, it will set nicely. Let cool completely on a wire rack.

Enjoy!

22 October 2007

The Perfect Vegan Scoop


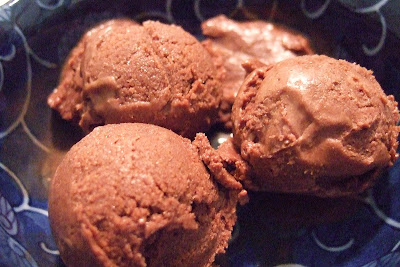
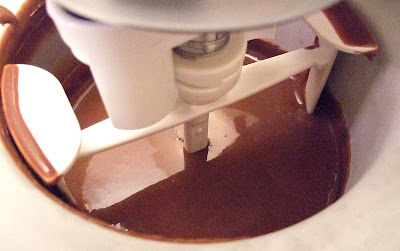
This is a double review of sorts, although not so much a review of "The Perfect Scoop," as much as a confirmation of its recipes' flexibility. I was able to completely veganize and make a carob version of David Lebovitz's "Chocolate Ice Cream, Philadelphia Style" without much of a fuss at all. More importantly, I was able to produce a rich, fudgy carob ice cream that is just about the tastiest dessert I've had in a while.

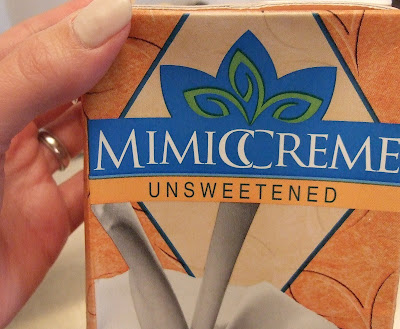
To do this, I used Mimicreme, a new non-soy, non-dairy cream substitute and almond milk for the dairy products. According to the Mimicreme site, the ingredients of the unsweetened version I used comprise: Purified Water, Almonds, Cashews, Bicarbonate Soda, Rice Starch, and Salt. After trying this recipe, I have to say that for the ice cream trial, Mimicreme lived up to its promises. I plan to try it in different applications soon since I have a bit of it left over from this recipe. Any requests for trial recipes??


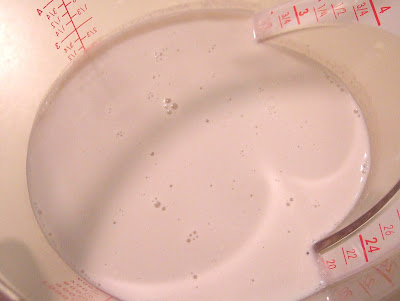
At first, I had my doubts about Mimicreme since it appeared so gray.


But, I poured out some almond milk and saw that it was around the same hue, and I realized that the color would be completely carob-y when all was said and done. Thus, I stopped fretting about Mimicreme.


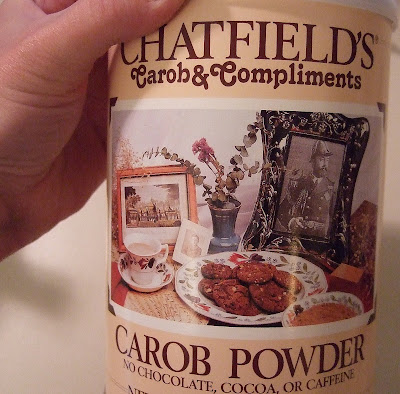
One of the primary reasons this recipe is so rich and fudgy is that it contains both carob powder (Dutch process cocoa in the original) as well as unsweetened carob chips. It's a pretty easy recipe, and the most time consuming part of it is waiting for the mixture to chill before freezing it in the ice cream maker. That always takes too long for my taste, so it's best to make it before going to bed, so you can chill your soon-to-be vegan frozen delight over night.

Here's the recipe as I made it:

Ingredients:

2 1/4 cups Mimicreme
6 tablespoons sifted carob powder
3/4 cup agave nectar
Pinch of salt
6 oz unsweetened carob chips
1 cup unsweetened vanilla almond milk
1 teaspoon vanilla paste

Directions:

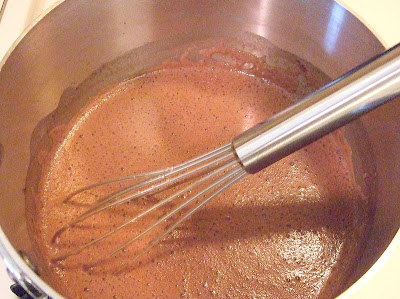
1. Whisk together the Mimicreme, carob powder, agave nectar, and salt in a large saucepan, heating until it just boils.


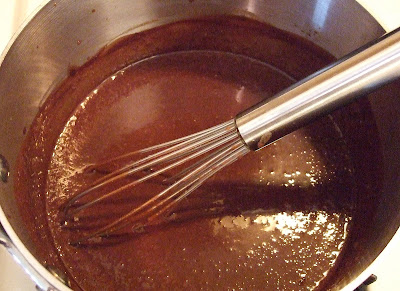
2. Cut the heat and whisk in the carob chips until they melt completely. Make sure you use a silicone spatula to get the carob that might stick in the corners of your saucepan.


3. Whisk in the milk and vanilla until completely incorporated.
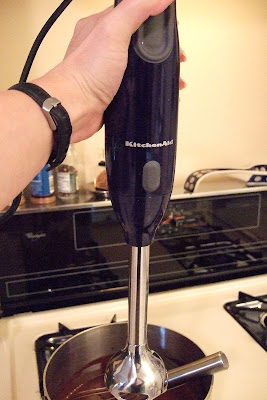
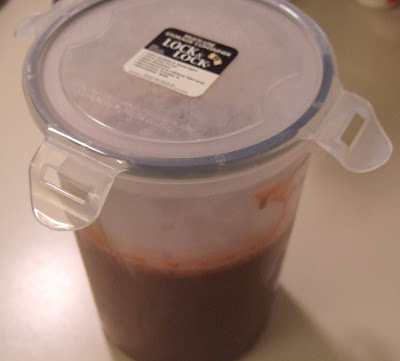
4. Using an immersion blender or a regular blender, blend the mixture until completely smooth. (I used an immersion blender, but I poured my mixture into the container I would chill it in before blending.)


5. Chill the mixture for at least 6 hours.


6. Freeze according to your ice cream maker's instructions.


7. Enjoy!
21 October 2007

Altering A "Baking Sheet" Recipe -- Carrot Cream Cheese Muffins


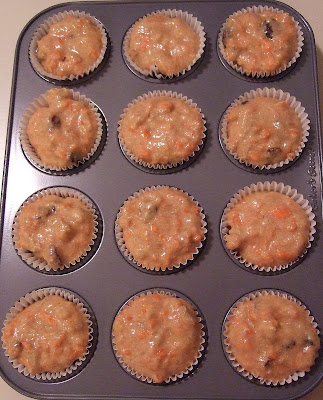
Not long ago, I became a subscriber to the King Arthur Flour Baking Sheet newsletter. The first recipe that caught my eye was a carrot cake muffin filled with a sweet cheese filling. Like the author of the printed recipe, I too made a few tweaks to suit my tastes (and dietary restrictions). The result is a soft, sweet muffin that is more carrot cake than muffin.

When I took my mini-muffins to a gathering recently, I had a lot of filling left over. I scooped it into a pastry bag with a star tube at the end so I could pipe out frosting for the muffins. Yes, I know you don't normally frost muffins, but these were so cakey that I simply had to do it. And, my tasters were very happy that I did. These were a big hit.

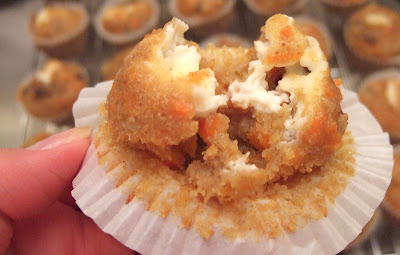
Caveat: Be careful to use enough muffin batter to top the filling. My filling ended up coming up and out the top of the muffin, so I didn't have a creamy filling the way the photo displayed on the recipe page shows.

Here's the recipe the way I made it:

Ingredients:

Filling:
1 8-oz package Neufchatel cheese
1/4 cup agave nectar
1 teaspoon tangelo zest (use oranges, they are probably easier to find)

Muffin Batter:
1 cup all-purpose flour
3/4 cup whole wheat flour
3/4 teaspoon salt
1 1/2 teaspoon baking powder
3/4 teaspoon cinnamon
1/2 teaspoon nutmeg
1/2 cup (1 stick) butter, softened
3/4 cup agave nectar
3 large eggs
2 tablespoons tangelo zest (see suggestion above)
1 oz freshly squeezed tangelo juice
1 3/4 cups finely grated carrots
3/4 cup raisins
3/4 cups chopped walnuts

Directions:

1. Preheat oven to 325. Line two mini muffin pans with liners (you will have extra, so line 4 cups of a regularly sized muffin pan with liners as well).
2. To make the filling, heat the cheese in the microwave for 40 seconds. Then, whisk in the agave nectar and tangelo zest until smooth. Set aside while making the muffin batter.


3. Whisk together the dry ingredients.


4. In a separate bowl, cream the butter and the agave nectar until light and fluffy.


5. Mix in the eggs one at a time. The butter will appear to "break," but don't worry, it will be fine. Just make sure to beat it all well so that the eggs are incorporated into the butter mixture.
6. Mix in the zest and the juice. The zest may stick to your beater, so clean it frequently.


7. Add the dry ingredients until just combined.


8. Mix in the carrots.
9. Mix in the raisins.
10. Mix in the walnuts.


11. Place one tablespoon of batter into each muffin cup (two for the large cups).


12. Place one tablespoon of filling on top of the batter in each cup.


13. Distribute the remaining batter over each cup.


14. Bake for 18 minutes, or until the tops of each muffin spring back when lightly touched.


15. Let cool in the pan for 5 minutes, then remove the cups from the pans, cooling completely on a wire rack.
16. Frost with remaining filling. Keep refrigerated until they disappear into happy hands!

Cherry Lime Bread


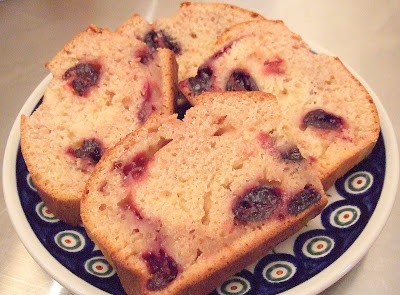
I've made a few of Nic's great recipes before, but this one is probably my new favorite of her baked stylings. I made a few alterations to her original recipe beyond substituting agave nectar for sugar. But, like her experience, this quick bread far exceeded my expectations (and those of a few friends who served as tasters for this recipe).

Zesting the limes was fun. The kitchen smelled fresh, and I had the opportunity to use my favorite tools (my Global utility knife and my Microplane grater).


Interestingly, the frozen cherries were hard for the tasters to discern as cherries. However, the recipe proved flexible enough to use different fruits, so I might just try it with peaches next time. This soft, tasty bread is excellent alone or spread with whipped cream cheese (I enjoy Temptee).

Here's the recipe as I made it:

Ingredients:

1 cup all-purpose flour
1 cup white whole wheat flour
1/2 teaspoon baking soda
1/2 teaspoon baking powder
1/2 teaspoon salt
1/2 cup freshly squeezed lime juice
1 cup agave nectar
1 1/2 tablespoon lime zest
2 tablespoons melted butter
1 large egg, beaten
1 cup frozen cherries

Directions:

1. Preheat oven to 325 and butter a 9 x 5 in. loaf pan.
2. Mix together the dry ingredients in a medium bowl.
3. Mix together the wet ingredients in a large bowl.
4. Mix the dry ingredients into the wet ingredients until just blended.


5. Fold in the cherries.


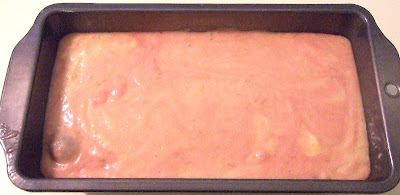
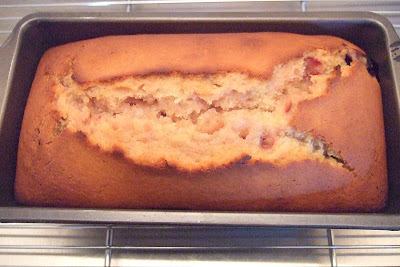
6. Pour the batter into the loaf pan and bake for 40-45 minutes, covered with foil for the first 20 minutes.


A toothpick inserted into the center should come out clean when it's done. It should be golden brown (not quite as brown as the one below).


7. Cool on a rack for 10 minutes, then turn out onto a wire rack to cool completely before serving.


By the way, this quick bread also makes a great host/hostess gift, especially if you're spending the night. Bring along some spreads, and you'll be the life of the party!

14 October 2007

Pistachio Apple Peach Pie


Since apples are very much in season here, I've been making pies. More importantly, I've been experimenting in fun ways with the pies.

Typically, I'll use my agave variation of Elise's All-Butter Crust. While I did keep the recipe handy this time, I took a big departure with the recipe, using pistachio nuts for the almonds and splitting the flour three ways between white whole wheat, all-purpose, and coconut. The result was one truly tasty, cookie crust.

The key, I think, was using really good pistachios (from Trader Joe's).


These were roasted and lightly salted, so I used unsalted butter in the crust, but still had the nice, sweet/salty flavor profile.


The dough itself was tougher to roll out, so I wound up pressing it into the pie dish, then adding a bit more ap flour when making the apple cut-outs for the top.

For the filling, I used 3 lbs of gala apples, 1/2 lb of Trader Joe's dried peaches,


4 teaspoons of corn starch, 2 tablespoons of agave nectar, a variety of spices, and the juice of one lemon.


To make the peaches usable, I chopped them in the food processor, then rehydrated them with boiling water. I mixed the soaked peaches and the other ingredients with the apples until they were well coated.


Then, I filled the pie shell and covered the filling with tiny apple cut-outs to form the top crust.


I lightly glazed the pie crust with Elise's recommended cream and egg yolk glaze, then baked it until it was lightly browned.


The pie was gone in seconds when I brought it to my friends' gathering. My friend Monika said I have to make that one again soon. I told her that I try not to repeat recipes often, but I'll think about it.

12 October 2007

Weight Loss Progress Update -- Big Milestone

Back in August, I shared with you the progress I've made in my weight loss plan since I started it on 17 July. Since August, I've only lost another 5 lbs (and finally broken into the 130s after more than three years). But, I dropped 2 in. off my waist, 1 in. off my hips, 1 in. off my chest, and 1 in. off my thigh (I only measure the left one since I exercise both)! My guess is that I've built some muscle, which weighs more than fat.

Importantly, I've dropped my body fat percentage by 4 points, down to 32%. Body fat estimators (this one is done purely on measurements of the neck, waist, and hips, along with height) are not necessarily the way to go. But since I don't have a little digital estimator or one of those fancy labs, I have to use the U.S. Marine Corps Height and Circumference method.

All that progress is great, but I still have a long way to go -- 14 more lbs and 10 more body fat percentage points to lose. Dropping the inches is rewarding, though. Earlier this week, I wore clothes I haven't worn in more than a year. And they fit the way they should, not tightly!

So, I'm still keeping up with the exercise, but I haven't been as dedicated on the calorie counting. Back to it!

Another possible explanation for the size change is that I had more than my share of dental work in the past few weeks. Those visits to the dentist always put me on smaller portions and really soft food (read: non-fat yogurt, low-calorie soups, and pureed beans and squash). More than likely, that helped.

The end of the year is coming up quickly. Hope I can make my goal!

09 October 2007

Perfect Vanilla Creamy Goodness


David Lebovitz wasn't kidding when he called his book "The Perfect Scoop." I know I'm a bit late to the table with my review and recipe alteration, since he released the book earlier this year, but better tasty and late than never.

Reading David Lebovitz's gorgeous ice cream (and desserts, mix-ins, and more) cookbook, I was so happy to see that he included great little stories to go along with each recipe. He gives great tips and instructions in the beginning (after a very well-written introduction), so you'll be hard pressed to fail in your efforts to make your own perfect scoop. "The Perfect Scoop." makes for an excellent read even before going into the kitchen to try a recipe or two. It's a definite must-read for anyone with an ice cream maker.

For my first try at a David Lebovitz recipe, I thought John's favorite, Vanilla, would be a good choice. Since I was unsure how the agave nectar for sugar substitution would work out, I halved the recipe. It was definitely enough for multiple servings (especially when you add mix-ins).

Here's the recipe as I made it, with two substitutions (agave and half and half for heavy cream):

Vanilla Ice Cream (inspired by David Lebovitz's "The Perfect Scoop.")

Ingredients:

1/2 cup whole milk
A scant 1/2 cup agave nectar
1 cup half and half
Pinch of salt
1/2 vanilla bean split lengthwise
3 large egg yolks
1/2 teaspoon vanilla extract

Directions:

1. Warm the milk, agave nectar, 1/2 cup of the half and half and salt in a medium saucepan.
2. Scrape the seeds from the vanilla bean into the saucepan and add the bean.


3. Stir the mixture, turn off the heat and cover for 30 minutes.


4. Pour the remaining half and half into a bowl and set a strainer on top of the bowl.
5. Whisk the egg yolks in a separate bowl.


6. Slowly, whisk the vanilla mixture into the eggs. Do not stop whisking until it is all evenly incorporated.


7. Pour the warmed egg yolk/vanilla mixture back into the saucepan and turn the heat on medium. With a silicone spatula, stir the mixture constantly until it thickens and coats the back of your spatula.


8. After it thickens, take it off the heat and pour the mixture through the strainer, into the cream. You may need to stir it in the strainer to get all the custard through. Stir the mixture well.
9. Stir in the vanilla extract.
10. Place the bowl into an ice bath and stir until cool.


11. Chill the mixture in the refrigerator for up to 8 hours.
12. Freeze the mixture in your ice cream maker as directed by the manufacturer.


You could freeze it at this point, but I'd scoop out a serving first, then freeze the rest.

The agave nectar ensures that your ice cream will not become rock hard in the freezer. Depending on how sweet you like your ice cream, you may wish to use less.

Your final result should be wonderfully creamy, ultimately vanilla-tasting custardy ice cream. I enjoyed mine sprinkled with unsweetened carob chips. They make an excellent foil for the sweet cream.

04 October 2007

Not-Samoas

It's nice to be home after our vacation in Maine. Prior to our departure, I had made a batch of what I might call "Not-Samoas."

The primary reason for making drop cookies was to use a new utensil I recent bought:


The recipe comes from a vegan site, Where's the Revolution. However, I made only minimal changes, but had a very different resulting cookie. Please visit Bazu's site for the original recipe.

My alterations:

1. Used 1 1/2 cup white whole wheat and 1/2 cup whole wheat pastry flour.
2. Used unsweetened coconut.
3. Used 1/2 cup unsweetened carob chips in addition to the nuts.
4. Added 1/2 teaspoon vanilla.
5. Used 1 cup of agave nectar for the sweetener.
6. Used canola oil instead of coconut oil.
7. Baked the cookies at 325 degrees F.
8. With the scoop, my yield was 45, more than twice Bazu's. I'm guessing she meant tablespoons instead of "spoonfuls." But, I could be wrong.


My cookies did not spread at all. Hers spread quite a bit, she said. I baked mine for 6 minutes before turning the pan, then another 6 minutes.


Finally, they didn't taste like samoas at all to me. Just tasty, nutty, a-bit-on-the-hard-side oatmeal cookies. I followed the directions, careful not to overmix or over bake.


On the other hand, they were popular with my friends, who don't normally like carob. I might noodle around with this one a bit more.