23 June 2008

Product Review: Agave-Sweetened Bumble Bars

BumbleBar is such a cool company. They use only organic ingredients, and more than 70% of those ingredients come from worker-owned cooperatives. Not only that, but their bars are very tasty.

Recently, the 13-year-old company added four new agave-sweetened bars to their collection: Awesome Apricot, Chunky Cherry, Tasty Tropical, and Cherry Chocolate.

Since chocolate is on my no-eat list, I just tried the apricot, cherry, and tropical flavors. When I opened the first package, I noted that the bar is pretty flat. Also, it tends to bend pretty easily, so it's handy for pulling off small bits at a time.

All of the bars are pretty seedy -- and by that I mean that they have plenty of sesame seeds. They're also a bit on the sweet side (for me, so I just had a small portion at a time) and quite sticky from the agave nectar. Keep that in mind for car eating. You might want to put a couple of wet naps in your glove compartment.

Overall, I really enjoyed the flavors and the seediness of the bars. They also tasted so fresh. It was nice to try a new choice for a healthy, organic energy bar, especially from family-run, ethical company.

20 June 2008

Great Craters of Almond and Raspberry Joy


In honor of Michael Ruhlman's pronouncement that Baking with Agave Nectar by Ania Catalano is a "book worth reading and using," I made another recipe from the book.

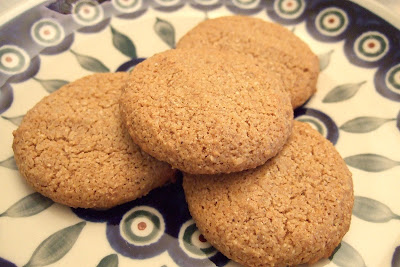
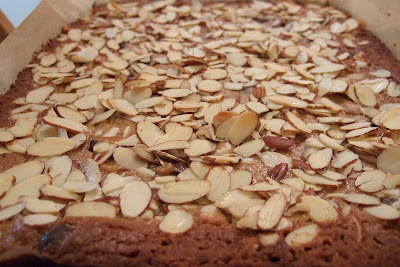
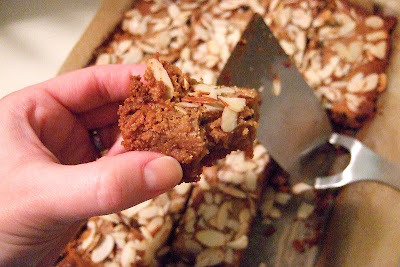
The cookies above are found on page 21 of her book, under the title "Raspberry Linzer Torte Cookies." The folks at the George Street Co-op's Outreach Committee said many complimentary things about them, however none of them said the cookies reminded them of linzer anything.


Most of the samplers remarked that the texture was appealing -- crumbly and soft. They also had lovely things to say about the fruit-sweetened raspberry spread I used from Trader Joe's. Because it's a nice little vegan recipe with only 7 ingredients, and because it's done completely in the food processor, I'd bet the raw folks could easily make it in a dehydrator. I went the traditional route and baked them for 12 minutes.

Because I didn't make any alterations to the recipe (other than toasting the almonds prior to processing them), I won't list it here. Instead, I'll encourage you to order the book, especially since it's only $10.85 new on Amazon.com. I agree with Ruhlman, it's well worth the money.

18 June 2008

Back to the Beginning, or Close to It

This morning, I finished reading "Julie & Julia," indeed a book all food bloggers should read, if they haven't already. Although I never bought Mastering the Art of French Cooking (not the book of choice for vegetarians, vegans and folks who prefer not to eat offal for their own reasons), I still recognize the mastery of Julia Child. I also have a great admiration for Julie's tenacity as well as her writing.

Yes, the book is three years old already and yes, I know (and am so excited to hear) that Julie's book will be made into a film with Meryl Streep playing Julia Child (can you imagine?). However, reading about how the Julie/Julia Project originated and what it did to change Julie Powell's life reminded me of why I started this Altered Plates project in the first place. Albeit, I wasn't quite in the middle of an existential crisis 14 months ago when I began this blog as an alternate to Here and There so I could focus solely on the agave-nectar side of my life.

But, there are some similarities. At the end of 2006, my life changed dramatically in three different ways:

1. John proposed (well, this wasn't so much of a huge change, but a fait accompli, since we were already living under the same roof the way married folks do).
2. I lost my job (technically, it was a "mutual separation," but the details are a lot more murky than that).
3. My life became filled with more interesting work than I'd ever imagined.

At the same time, I re-focused my energies on my tiny chocolate business, Deb's Delectables. Because the chocolate I use for Deb's Delectables is already sweetened, and because the fillings I created were made using sugar, I couldn't actually taste any of them. It's the great irony of that tiny business. Of course, I had many willing (and quite critical) volunteers to taste all the creations, but what I found myself focusing more on was the appearance of the candy, rather than the taste (since most folks seemed to really enjoy the chocolates).

But ever since I started Deb's Delectables, I wanted to make carob candy sweetened with something other than those artificial sweeteners and natural sweeteners that had such negative effects on my digestive and central nervous systems. It's taken quite a while, but I'm finally doing it.

As of last week, I began selling my carob-agave candy at my local health food co-op, George Street Co-op. I still need to update the Deb's Delectables site to reflect that, but I will soon. Additionally, the store manager, Janet, told me that she'd be very happy to carry my agave-sweetened baked goods as well, but preferred that I stick to vegan recipes, if possible.

Well, that's where the challenge comes in, doesn't it? I need to develop a carob coating from scratch that doesn't contain dairy or non-agave sweeteners. But, as you know, I love a challenge.

So, chronicling my baking/cooking adventures with agave nectar here has brought me all kinds of positive change -- from the remarkable folks who continue to visit and read the blog on a regular basis (and leave such nice comments -- really you people are lovely!) to the numerous opportunities I wouldn't have had otherwise. Visiting other bloggers along the way, I've noticed an increasing frequency of agave nectar in recipes, which makes this even more worthwhile.

Most of all, keeping this blog has given me a weekly focal point, even updated while I was in bed recovering from surgery (I'd baked like a madwoman prior to it in order to have blog topics for weeks while I was off my feet). Despite all the exciting and not-so-exciting (and perhaps downright scary) events of my life in the past year, keeping the Altered Plates project (as well as the Here and There blog) running reminds me that I'm really not so different from the talented Julie Powell and the other food bloggers who keep their readers and their online projects as high priorities in their lives.

As always, thanks for visiting and thanks for your feedback in the comments section.

14 June 2008

Agave Nectar Article in Time Magazine

For those of you who have been following the meteoric rise of agave nectar in the past 6-12 months, you might be interested in reading this article in Time magazine.

The story mentions that agave nectar represents a $10.3 million market (up 50% from 2006). It also discusses the difference between the Madhava brand and Wholesome Sweeteners (which might also be the private labeler for Trader Joe's, but I'm not solid on that).

Recently, someone asked me to provide sales figures on agave nectar, and I'll tell you, I'm glad Time did my homework for me. ;D

I'm not sure how long they'll leave the story available for free, but if the link expires, just let me know, and I'll email you a PDF of the story.

10 June 2008

Product Review: Gaby's Gourmet Granola

I'm fortunate to be a working member of my local health food co-op, the George Street Co-op. During one of my working days late last month, I sampled a package of Gaby's Gourmet Granola in the Pine Nut Anise flavor. I was happily surprised to read that Gaby uses agave nectar (along with brown rice syrup) to sweeten the granola. Although I could have done without the brown rice syrup, I really enjoyed the flavor of the granola straight from the bag.

I didn't have many pine nuts in my package, but could definitely taste the anise flavor with the nuts, oats and sesame seeds.

As the year progresses, I see more and more companies adopting agave nectar as a sweetener. It's heartening to see because it gives folks like me (sensitive to sugar) many more options. On the other hand, it just makes it that much more challenging to count calories.

What about you? Have you noticed more news articles and products with agave where you live? Please let me know.

05 June 2008

Carob Almond Fudge


It's been quite a stretch since I made carob fudge this good. It's rich, nutty, and worthy of tiny bites. OK, big bites, too. But, be mindful of the calories. It's not low fat.

This fudgy candy is a breeze to make:

Ingredients:

1.5 cups unsweetened carob chips
1/2 cup cashew macadamia nut butter (or your favorite nut butter)
scant 1/2 cup agave nectar
3/4 cup toasted almonds

Directions:

1. Melt the chips in the top of a double boiler (or a bowl on top of a pot half filled with simmering water). Stir until smooth.
2. Mix in the nut butter until smooth.
3. Mix in the agave until well blended.
4. Fold in the nuts. I didn't chop mine, but next time I will.
5. Either press the fudge into an 8-in pan lined with parchment paper or mini muffin pans lined with mini liners.
6. Chill until set, then let come back to room temperature to enjoy.

03 June 2008

Zippy, Fizzy, Agave-Sweetened Soft Drink

It's hard to say if drinking Brain Toniq has sharpened me up any after drinking it, but what I can say without hesitation is that it tastes great and I enjoy it. I also like the fact that it's not overly carbonated or sweetened, as most soft drinks tend to be. Brain Toniq reminds me of freshly squeezed pink grapefruit juice with lemon and lime overtones.

The 8.4 oz wee cans are just right for a quick pick-me-up and are only 80 calories each.

Besides the fact that Brain Toniq is gently sweetened with organic agave nectar, I like that it's made with pure herbs such as Eleuthero Root extract and Rhodiola root powder. It also contains Choline, blue-green algae, and DMAE. It's important to note that all the ingredients used in Brain Toniq come from plant sources, so my vegan friends can try this without any worries.

Overall, it's a pleasure to drink Brain Toniq, and if it's able to help me focus in any way, that's just a bonus I'm willing to accept.

02 June 2008

Ricki's Cookies


I saw these cookies on Ricki's blog and thought "I have got to make these. They're simple and I can substitute agave nectar 1 for 1 with the maple syrup."

They're really a breeze to make. My only substitution was the agave for the maple syrup. And, I dropped the oven temp to 325 degrees F to avoid the quick browning that seems to happen with agave recipes. That only added two extra minutes to the baking time.

The result? Well, they're all gone. I made them yesterday and ate all 15 of them in the last 24 hours. Thank goodness the only fat comes from a small amount of tahini and the walnuts.

Go visit Ricki's blog for the complete recipe (and to see her gorgeous dogs).

29 May 2008

Mmmmmmmango Sorbet!


This absolutely simple and delicious sorbet is another remake from David Lebovitz's The Perfect Scoop. After trying several of the recipes from his frozen dessert book, I am now convinced he can do no wrong.

This sorbet is wonderfully smooth and tangy from both the mango and freshly squeezed lime juice. It's completely vegan, so have at it, my vegan friends.

While I usually prefer creamy frozen desserts, I can now say this mango sorbet tops my list of lovely light sweets to end a meal.

I didn't veer too afield of David's original recipe when I made it except for the following alterations:

1. I halved it,
2. I used frozen mango cubes from Trader Joe's (definitely worth it!),
3. I used agave nectar instead of sugar,
4. I used a LOT more lime juice, and
5. I omitted the rum and the salt.

Here's the recipe as I made it:

Ingredients:

1 1-lb package of frozen, cubed mango
Scant 1/2 cup agave nectar
1/3 cup filtered, very cold water
The juice of 2 limes

Directions:

1. Use a blender to puree the mango until smooth. (I used an immersion blender, and it worked like a charm.)
2. Blend in the remaining ingredients until well mixed.
3. Chill overnight in the refrigerator.
4. Freeze in your ice cream maker according to the manufacturer's instructions.

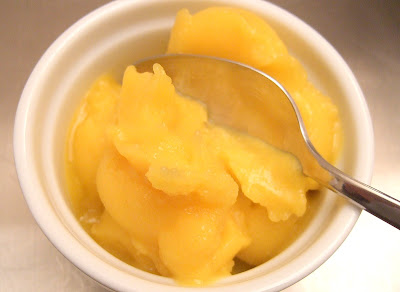
This is what mine looked like fresh out of the Kitchen Aid ice cream maker attachment. I couldn't resist tasting just a small amount.


5. Pack the sorbet into small containers for single-serving, mango-loving experiences. It should make 5-6 ramekin-sized servings.

Please go visit David's blog for great information about living in and visiting Paris. He has such a great take on life, food, and culture.

27 May 2008

Book Review: Food 2.0


Charlie Ayers, former chef of search giant (and Blogger originator, for that matter) Google, has published "Food 2.0," a really useful cookbook packed with tips, recipes, and amusing stories. The dishes are as diverse as the employees at Google, but always healthy (or at least using whole, fresh ingredients). The recipes are very easy to follow and pretty simple to prepare. Those lucky ducks at Google!

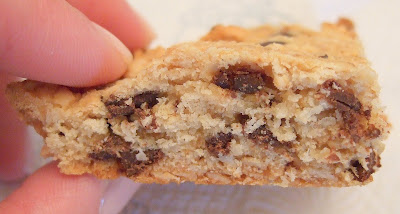
The photo above is of the Coconut-Oatmeal Squares with Chocolate Chips recipe from "Food 2.0" that I've altered for this blog. I didn't fiddle with it too much so that I could get a true feeling for how Charlie's squares would taste. Aside from using agave instead of sugar, I substituted unsweetened carob chips for the chocolate chips, and added a small amount of coconut flour to account for the extra liquid.

Although I enjoyed the square I tasted (as did my regular Monday night tasters club), I'd probably noodle around with the recipe a bit more next time. For instance, I'd start by veganizing it, using oil for the butter and ommitting the egg. I'd definitely add some chopped nuts and substitute whole wheat pastry flour for the white flour. Finally, I'd add a touch more vanilla and some freshly grated nutmeg. Because the prep and cook time for this recipe is so short, I would definitely make these again soon (with the alterations noted above).

For now, here's the recipe as I made it:

(Inspired by Charlie Ayers' recipe for Coconut-Oatmeal Squares with Chocolate Chips, published in "Food 2.0.")

Ingredients:

1/2 cup unbleached all-purpose flour
1 tablespoon coconut flour
1/4 teaspoon baking powder
1/4 teaspoon fine sea salt
1 cup rolled oats
1/2 cup agave nectar
1/2 cup dried, unsweetened, shredded coconut
1/2 cup unsweetened carob chips
6 tablespoons melted butter cooled to room temperature
1 large egg beaten
1/4 teaspoon vanilla extract

Directions:

1. Preheat the oven to 325 degrees F. Line a small baking pan (I used 7 x 11 in., the original called for 8 in. square) with parchment paper, using weights to make sure the paper stays put.
2. Sift together the flours, baking powder and salt.
3. Stir in the remaining dry ingredients until well combined.
4. Whisk together the butter, egg, and vanilla.
5. Stir the wet ingredients into the dry, making sure not to over mix the dough.
6. Press the dough evenly into the prepared pan (of course, taking the weights out first).
7. Bake until just golden brown on the top (about 20 - 25 mins).
8. Using the parchment paper, pull the finished cookie flat out of the pan and let cool completely on a wire rack before cutting into squares.

Makes about 16 cookies, depending on how wide your cuts are.

20 May 2008

More on the Spicy Side -- Pumpkin Muffins

When you're working on a cookbook, you often look at the market to see if others are writing the same type of book or something slightly similar. Well, earlier this year, Ania Catalano published Baking with Agave Nectar, so I signed right up and bought it.

It's a lovely little book with very nice photos and a variety of interesting recipes. For the first try, I thought I'd give her Spicy Pumpkin Muffins a go. First, it was so nice to find and use a recipe that uses oat and barley flour. I've had some barley flour in my fridge for a while and was happy to use it in such a tasty recipe.

Second, this was my first time making muffins with pumpkin. I would definitely do it again. The muffins were really moist, yet not really heavy. The spices were a great touch, as were the add-ins. I used cranberries for raisins though, since I don't seem to tolerate raisins all that well anymore.

I made a little (8 minutes and change) movie of my experience baking the muffins, which I've included below.

It was awfully nice not to have to tinker too much with a recipe for agave nectar. Good show, Ania! I'll definitely be trying another recipe from the book soon. Enjoy the video. More notes follow it below.


In the baking portion, you probably noticed that I said 325 degrees F. I was mistaken, it was 350 degrees F. Also, when I tasted the muffin in the movie, I said that it was "gummy," and have since ate several of the muffins -- none of which were gummy at all. I'm thinking that it was just a single faulty muffin. Sorry about that.

Finally, those other muffins I've had since I made them on Sunday did not have the same stick-to-the-muffin-liner issue that the first one had. Could be that I should have waited until the muffin cooled completely. But that would have been very hard since the muffins smelled great.

Oh well. Live and learn.

What muffins have you made recently?

13 May 2008

Spicy Cookies!


These wonderful 5-Spice Almond Cookies are from the truly excellent Eat, Drink & Be Vegan cookbook by Dreena Burton. It's fast becoming one of my favorite books, despite not having nearly enough photos for my liking. However, her recipes are wonderful.


I wasn't sure about this one at first. Right after they came out of the oven and were just cool enough to touch, I gingerly broke one in half to taste it. It tasted like it had too much salt or baking soda. So, I let the other half cool completely before trying again.

A huge improvement. In fact, I didn't taste the salt or the baking soda at all on the second try. There was an even greater improvement the next day. When my friend Andrea tried them on Monday night (the day after they were baked), she gave me the thumbs up and declared them "yummy!" Oh, and gave me the thumbs-up signal to show she really enjoyed the cookies.

I won't print the recipe here because you really ought to go buy the book if you don't have it already -- you won't regret it in the least. The only changes I made to the recipe were:

1. Doubling the recipe because the yield seemed a little small for the place I was taking them.
2. Using an oven temperature of 325 degrees C.
3. Using 3 oz. of oil instead of 1/2 cup (for a doubled recipe).
4. Cutting the amount of sweetener to 3/4 cup of agave nectar instead of 1/2 cup of unrefined sugar and 2/3 cup of maple syrup.

The five-spice powder gives the cookies such an interesting flavor profile. I'm sure it's the fennel or the white pepper that took folks by surprise on Monday night. Lots of raised eyebrows, but many approvals as well. Mind you, someone else brought a very fancy carrot cake from Calandra's bakery, so there was mighty competition that night.

By the way, a few folks have asked where my little movies are. Glad you asked.

I recently tried making vegan marshmallows with agave nectar. The recipe, as I filmed it, failed so miserably that I had to make something else in the short time allowed without running the camera.

However, I'm planning to film the next Altered Plates recipe. So, you'll be getting some new wee films soon enough. I'll be doing the same for some reviews at Here and There, so check there too.

04 May 2008

Parsnips in a Cake?


Why yes! And they taste delicious in this fruity spice cake from Moosewood Restaurant Book of Desserts. Well, to be truthful, I couldn't tell they were there. Instead, I tasted the raisins, pineapple, and spices. I've made quite a few adjustments to "Anna's Country Spice Cake," but I'd bet I captured the spirit of this cake.

Why would one want to eat parsnips in the first place? Well, for one thing, they are very high in vitamin C and folic acid. Parsnips also provide a lot of fiber and potassium to their eaters. Overall, this white root has more bang for the buck than it's cousin the carrot. So, if you want to make a carrot cake, rethink it in favor of the humble parsnip.

Speaking of cakes, this one reminds me a LOT of a carrot cake, but without the carroty flavor. Next time, I'll make it with fruit-sweetened cranberries instead of raisins. Raisins seem too sweet to me these days. The best part about the cake is that it is moist and light, despite all the liquid and seemingly heavy ingredients. It seems like it could easily do without the eggs in order to veganize it. Just substitute the appropriate amount of flaxseed meal.

Finally, I used a 7 x 11 in. pan instead of the 8 in. square pan called for in the recipe. This yielded a much shorter baking time, even at a lower temperature.

Here's the recipe as I made it:

Inspired by "Anna's Country Spice Cake" from Moosewood Restaurant Book of Desserts.

Ingredients:

2.5 oz vegetable oil (a tablespoon shy of the 1/2 cup of vegetable oil in the original)
scant 3/4 cup agave nectar
2 eggs
1 1/2 cups peeled and grated parsnips
1 tablespoon finely grated lemon zest
1/2 cup crushed pineapple (do not drain; this is contrary to the original)
3/4 cup minus two tablespoons white flour
2 tablespoons coconut flour
3/4 cup whole wheat pastry flour
2 teaspoons baking powder
1 teaspoon baking soda
1/2 teaspoon salt (I mistakenly left this out -- it was fine without it)
2 teaspoons cinnamon
1/2 teaspoon cloves
1/2 cup raisins
1/2 cup walnut pieces

Directions:

1. Preheat the oven to 300 degrees F. Oil the pan and dust it with flour. (I'd like to say this made a difference, even with the non-stick pan I used, but it didn't. You're probably better off just lining your pan with parchment paper.)
2. Beat the oil, agave, and eggs until well combined.
3. Mix in the parsnips.
4. Mix in the lemon zest and crushed pineapple.
5. In a separate bowl, sift together all the dry ingredients except the raisins and nuts. Mix until combined.
6. Add the dry ingredients to the wet mixture in two batches until there isn't any more dry mix.
7. Fold in the nuts and raisins.
8. Pour the batter into your pan and bake for 35 minutes, until a wooden skewer comes out clean.

Just a tip, be sure to pay attention to the oven temperature. If it winds up in the 330s, lower the temperature so that it averages around 315.

Enjoy!

02 May 2008

Slow Oats for Breakfast


When I found out a recent blood test (not fasting, mind you) discovered an elevated cholesterol level, I went on the offensive. Breaking out the slow-cooker, I made enough steel-cut oatmeal for 8 breakfasts.

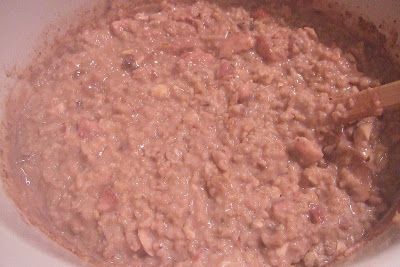
The pink color in the slow cooker above isn't a trick of the light, it's due to the Trader Joe's freeze-dried strawberries I added to the mixture. Actually, I added a lot of stuff to this oatmeal: almond milk, extra oat bran, flax meal, hazelnuts and more. To sweeten it a bit, I added some agave nectar. That really made a difference -- since then, I've made different versions with other dried fruit, but without the agave, and it's just not as good.

But it's still crunchy from the nuts; chewy from the oats; sweet and tangy from the fruit; and chock full of healthy, cholesterol-lowering goodness.

Here's my recipe:

Deb's Slow Oats

Makes 8 portions.

Ingredients:

4 cups unsweetened vanilla almond milk
1 cup steel-cut oats
1/2 cup freeze-dried strawberries (or any dried fruit)
1/4 cup museli (chose one with lots of nuts, seeds and dried fruit)
1/4 cup toasted hazelnuts chopped coarsely
1 tablespoon vanilla
2 tablespoons agave nectar
2 tablespoons flax meal
1/4 cup oat bran
1/2 teaspoon cinnamon
1/2 teaspoon nutmeg
1 cup water

Directions:

1. Add all the ingredients to your slow cooker. Stir well.
2. Turn the cooker on high and leave it for 2 hours.
3. Spoon into 8 containers and heat for breakfast when desired.

I added a little water to the chilled oatmeal each day to loosen it up.

By the way, I had blood drawn today and will find out next week what my number should be. I'll certainly post it here.

What do you put in your oatmeal?

24 April 2008

Product Review: Bella's Cookies


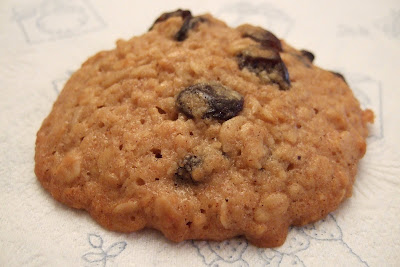
Don't they look just like homemade cookies? A far cry from your typical store-bought cookie, that's for sure. Better yet, Bella's Cookies are made with agave nectar instead of cane sugar. And they're fresh, fresh, fresh. They're so fresh in fact, that John needed to keep these Oatmeal Raisin cookies in the fridge for me while I was out of town for a few days.


When I opened the box, I pulled out the little bag containing three Oatmeal Raisin cookies. The directions said to let the cookies come to room temperature before eating, so I did (later, I found that I preferred them cold) before digging in.

While I waited, I read the ingredients and nutritional facts included in the box. While Bella's don't contain hydrogenated fats or trans fats, they still contain a LOT of saturated fat per cookie (4 g of sat fat for 7 g of total fat in the Oatmeal Raisin variety). On the other hand, it comes directly from the butter and eggs used to make the cookies -- just like homemade. It's just something to keep in mind if you're watching your fat intake or cholesterol (unfortunately, I now fall into that group -- yes, my vegan friends are now laughing at me for using all that butter).


The cookies made me think longingly of of some I made nearly a year ago. While I give great kudos to Bella's for using agave nectar in their products and for using simple, pure ingredients, these weren't my favorite cookies. I had high hopes for them since they looked just like homemade and smelled like Oatmeal Raisin cookies.

However, in comparison to my cookies, Bella's were just too sweet for me (and I like sweets!) and bland -- as if the ones they sent me had been part of the mix that missed out on the spices. Also, my homemade cookies taste buttery rather than fatty. I'm not sure how to explain it except that in Bella's, I could feel the butter in the texture rather than tasting it in a pleasing way.

The cookies might be good for kids, who seem to be a bit sensitive to spices and not as finicky about flavor or texture. And, please, just as I don't take the word of reviewers as gospel, go try these for yourself before making up your mind. Bella's offers plenty of other flavors of their cookies that might just be wonderful.

If you've tried Bella's and think I'm way off base, please let me know. Or, if you agree, please leave a comment. Otherwise, have you ever been disappointed by a cookie you thought would be great?

20 April 2008

Happy First Birthday to Altered Plates!

Happy Birthday to Altered Plates! One year ago today, I posted my first entry on this blog -- the one I created as an alternative to my Here and There blog so I could have a place to focus on baking and cooking with agave nectar instead of sugar.

It's hard to believe that just one year ago, I embarked on a journey to chronicle the alterations required to change some of my favorite recipes into glycemic-friendly versions. Time flies when you're in the kitchen!

This year, I plan a few more product reviews, more heart-healthy recipes, and generally a lot more fun. And, yes, I promise, more cooking videos because you love them so. I'm working on losing a bit more weight (and bringing my cholesterol down a bit as well) so you might just see me on camera this year for a change.

Thanks so much for visiting and commenting. More than anything else, thanks to the regular readers who are more than just readers and commentators. You're friends. Thanks especially to the vegans who continue to inspire me to improve my health and the way I live each day. You DO make a difference!

Happy Passover!


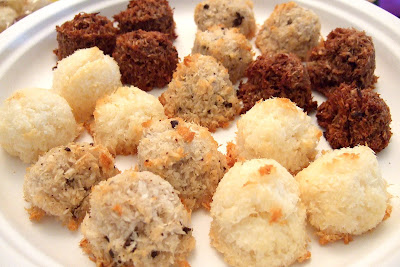
Yes, once again, it's time to remake Martha's macaroons. Since it's such a simple recipe, I started off with a plain version (well, not so plain, as I'll explain below) for 1/3 of the recipe, then I added chopped, unsweetened carob chips after I'd scooped out a pan and one half, and finally, I added 1/4 cup of carob powder to the remaining mixture. The resulting macaroons were moist, with a very special flavor, thanks to Fiore di Sicilia.

I tripled the recipe, but my substitutions below apply directly to the original measurements for your ease of use:

1. 2/3 cup of agave for the 3/4 cup of sugar
2. Organic lite unsweetened shredded coconut for the regular kind (it's much more finely shredded, too!)
3. Chopped, unsweetened carob chips for the chocolate
4. 1/4 teaspoon Fiori di Sicilia for the vanilla
5. I used a teaspoon-sized cookie scoop instead of 1 1/2 teaspoons of the mixture to make my macaroons. This way, they're truly bite sized.

The Fiori di Sicilia did magic things to the macaroons. It made the carob ones taste just like dark chocolate! It also gave the non-carob chip/powder variety a lovely orange flavor that you just can't get from orange zest.

These moist little clumps of coconut went over well at Passover last night. And, I'm bringing more to a party this afternoon. Tripling the recipe allows you about three days' worth of desserts to bring with you to seders. Best of all, this recipe is really a no-brainer and takes only the time to mix, bake, and cool. It's definitely one of my go-to Altered Plates.

Special tip: What the recipe doesn't tell you is that you should let the macaroons cool a bit on the baking sheet parchment paper prior to moving them to cooling racks. This way, you'll have less of a chance of crumpling the little guys.

For those celebrating, I wish you a meaningful and happy Passover!

08 April 2008

My Pottery Is Being Shown On Shelterrific

Well, not mine in the sense that I threw it, but mine in the sense that I collect it. Polish pottery, that is.

This isn't the first time one of my blogs (or both in this case) has been spotlighted on Shelterrific. They really liked my pies.

If you haven't visited Shelterrific before, you should definitely give it a look. The site features all kinds of neat home design stuff as well as a few good recipes. My specific mention is here.

31 March 2008

My Very Sweet Not-So Vegan


I always feel guilty when I do this, but that only lasts until I actually taste the result. What is "this," you ask? Well, de-veganize a recipe that seems like its owner tried very hard to veganize in the first place.

In this case, I took the Almond Avalanche Bars recipe from My Sweet Vegan and used butter instead of margarine. Although I grew up with margarine in the house, I haven't liked it since I first tried butter as a child at my great grandmother's apartment in the Bronx. That also was the first time I remember eating white bread and using a toaster oven as well.

My version of Ms. Kaminsky's recipe also included a few other big changes:

1. Agave nectar for the brown sugar, corn syrup, and granulated sugar.
2. Cashew butter and cashew macadamia nut butter for the almond butter (so rich!).
3. Unsweetened carob chips for the chocolate chips.
4. 2/3 cup coconut flour added to the topping.


OK, for those of you who have the cookbook and have already made these by the recipe and are saying to yourselves, "Why on Earth would she add coconut flour to the topping?" I say, my mixture was pretty wet. Really wet and goopy. It might be because I had just opened the cashew butter and mixed the oil into the butter while it was still room temperature. Maybe it was because there isn't any flour to hold the topping together, and I used agave instead of sugar. Regardless, my topping turns out super-rich and candy-like.

The butter crust was (ehem) too buttery for me. I know. Laugh all you want, my vegan friends. Nonetheless, if I make this again, I'd use about half the butter for the crust.

The bars as I made them were a bit too sweet for me, but I'm bringing a big plate of the bars for a gathering tonight and let you know what the taste testers think of my reworking of My Sweet Vegan's Almond Avalanche Bars.

24 March 2008

E for Excellent


One of the nicest honors is to be given the "E for Excellent" award from another blogger whose blog you admire. Ricki, of the wonderful Diet, Dessert and Dogs blog presented me with this and asked me to name five others worthy of the same distinction.

The big challenge is to select blogs that had not yet been granted that distinction. If you have been named previously, good for you for continuing to uphold your excellence in blogging. If not, please take this honor and give it to five others who are equally deserving.

1. Eat me, delicious. I really enjoy this blog's photos, writing and recipes. This blogger also participates in the Daring Bakers and Tuesdays with Dorie events, both of which are highly entertaining for us lowly novices.

2. Baking and Books. Ari writes great reviews of a wide variety of cookbooks. She takes lovely photos, and her baked goods always look so professional!

3. Ice Cream Ireland. Ever since Kieran Murphy started this blog, I've had it in my Google Reader. I really enjoy his stories about how his little ice cream shop is such an integral part of the life in Dingle, Ireland. He posts delicious recipes and just has such a lovely tone to his writing. One of my all-time favorites. Definitely read his "Caught with Ice Cream, election" series.

4. The Girl Who Ate Everything. Frankly, I'd be surprised if Robyn didn't already have one of these, but she certainly deserves one. One of the funniest bloggers around, she eats everywhere, travels the world, writes about her amusing adventures and (thankfully) takes great photos of most of it. She's also part of the crew at Serious Eats, a must-read for any food blogger. On two occasions, I've even had the pleasure of dining with her (once with her mom!). She's a great resource when it comes to finding tasty food in NY, and is the person to see if you're looking for gelato and/or macarons.

5. Lunapads Blog. Completely off food topics, but truly worthwhile and interesting nonetheless. The Lunapads folks are on a great mission to provide sustainable options to African schoolgirls who have been missing school due to the inability to deal with their monthly menses. They've set up a Goods 4 Girls donation so that if you're interested, you simply buy the package of washable pads online and they'll ship it directly to Goods 4 Girls who will ensure that the pads will be given to a girl who needs them. It's truly an important cause, especially when you see how many days per school year these girls miss just because they have their periods.

Hope you enjoy visiting these blogs!

18 March 2008

Book Review: The Sweet Melissa Baking Book


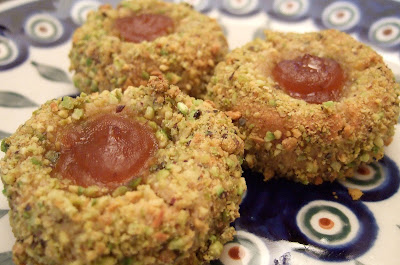
For this review, I picked a cookie that turned out to be far more delicious than I expected. The Pistachio Linzer Thumbprints didn't remind me of linzer tarts, but they were crisp on the outside, thanks to the pistachios, and buttery, lemony, and pistachio-y on the inside. The plum topping is just the right foil for the richness of the cookie. In fact, next time I make these (and you can bet big money I'll be making these again soon), I plan to flatten the cookies a bit more to add more of the plum spread.

My alterations produced fewer cookies, but not by much. If you watch how you scoop your cookie dough (unlike me and my occasional uneven sizing), you'll get your 4 dozen. The coconut flour was surprisingly evident, yet very pleasing in these cookies. You could hide it by adding a bit more vanilla and a little nut extract, but be selective because the flavor of the pistachios is important (and highly addictive) here. Although the recipe calls for dusting the cookies with confectioners' sugar, I can't even imagine adding a thing to these delicious cookies.

They were a huge hit with my friends yesterday, even a day after baking. If you're going to make these, you should definitely serve them the same day, just an hour or two out of the oven. They're just that good.

The kind folks at Viking Studio / Penguin Group (USA) have given me permission to reprint the recipe here with my alterations, which are in bold. The foregoing is excerpted from The Sweet Melissa Baking Book by Melissa Murphy. All rights reserved. Copyright © Melissa Murphy, 2008.

Pistachio Linzer Thumbprints

Makes about 4 dozen cookies

Ingredients:

1 cup shelled, unsalted pistachios, plus 2/3 cup shelled, unsalted pistachios, finely chopped for rolling (mine were raw)
2 1/4 cups all-purpose flour (here I used 2 cups of ap flour and 1/4 cup coconut flour)
2/3 cup sugar (I used agave nectar)
1 teaspoon baking powder
1 teaspoon ground cinnamon
1/4 teaspoon kosher salt (I used 1/8 teaspoon regular salt because I used salted butter)
1/2 pound (2 sticks) very cold, unsalted butter, cut into 1/2-inch pieces (again, salted butter right from the freezer)
1 tablespoon freshly grated lemon zest (I used the zest from an entire lemon, closer to 1 1/2 tablespoons)
2 large eggs, separated (in both cases, I lightly whisked the eggs prior to using them)
1 teaspoon pure vanilla extract (I used vanilla paste)
1/2 cup seedless raspberry or apricot preserves (I used a really nice no-sugar added plum spread)
Confectioners' sugar (I omitted this for obvious reasons)

Directions:

1. In a food processor fitted with a metal blade, pulse the 1 cup of pistachios with 1/2 cup of the flour until fine but not powdery. Add the remaining 1 3/4 cups flour, the sugar, baking powder, cinnamon, and salt. Pulse to continue. (Here I left out the agave, adding it after the butter, later.)

2. Carefully add the butter cubes and zest and toss with your fingers to coat with flour. (I let the food processor do it for me, pulsing just enough to get the crumbly appearance.) Pulse until the mixture looks like cornmeal. Add the egg yolks and vanilla and pulse until the dough just holds together. (I added the agave nectar right before the yolks and vanilla.)

3. Refrigerate the dough until firm, about 1 hour. (At this point, the dough can be wrapped tightly in plastic wrap and then aluminum foil and frozen for up to 3 weeks.)

4. Position a rack in the center of your oven. Preheat the oven to 350 degrees F. (I used 325 degrees F.) Line two cookie sheets with parchment paper or aluminum foil. (I used parchment paper.)

5. Using a 1-ounce cookie scoop or a tablespoon, scoop the dough into 1-inch balls. Roll each ball in the egg whites and then in the chopped pistachios. Place the cookies 1 1/2 inches apart on the prepared cookie sheets, and press down lightly with your fingers so that they stay put. (This is a messy, sticky procedure, so make sure that you don't have to do anything else for about 15 minutes while you're rolling. Also, the nuts didn't go as far as I would have liked, so I had to process another 1/2 cup of pistachios for rolling.) Using a floured thumb (or the finger of your choice), press an indentation into the center of each cookie. (I used the second knuckle of my index finger to make the indentations without any flour. This worked very well, giving me a true circular indentation. You also could probably achieve this with the end of a wooden spoon.)

6. Keep the cookies chilled while you fill a pastry bag fitted with a 1/4-inch round pastry tip (I use an Ateco #801) with the preserves. (Alternately, put the preserves in a resealable plastic bag, squeeze it down to the bottom, and snip off a little bit of one corner -- instant piping bag!) (I elected to use a snack-sized ziplock bag for this part. Worked like a charm.) Fill each cookie (indentation) with about 1/4 to 1/2 teaspoon preserves. (Here I also had to add a bit more of the plum spread to the bag.)

7. Bake for 20 minutes, or until lightly browned. (I baked mine for 9 minutes, then turned the cookie sheet and baked them for another 9 minutes.) Remove to a wire rack to cool.

8. When cool, generously dust with confectioner's sugar. Using your finger dipped in water, tap on the centers of each cookie so that the jam shines through the sugar. (I skipped this step and went straight to the sampling!)

The cookies keep in an airtight container at room temperature for up to 3 days. For longer storage, wrap in plastic wrap and refrigerate for up to 5 days, or freeze well wrapped in plastic wrap and then aluminum foil for up to 3 weeks. Do not unwrap before defrosting. Dust with confectioner's sugar before serving. (Or don't.)

I'm really looking forward to trying out more of Melissa's great recipes from her new book. The only thing I'd want from a future book from her would be more photos. It would have been nice to see how her Pistachio Linzer Thumbprints look.

10 March 2008

It's All About the Crust, Baby


Kitchen Parade
is celebrating Pi day (14 March) with a great, big event linking together pie makers from across the globe. You still have a few days in which to include your favorite pie entry, but just so you know, you'll need to focus heavily on the crust.

My favorite pie crust is a slightly different take on Elise's All-Butter Crust (a true work of art). My version omits the brown sugar and the water, and uses agave nectar instead. Additionally, I use coconut flour for a portion of the all-purpose flour. It's still super-buttery, and very much like a shortbread crust. It's a huge hit with everyone who tries it. My friend Ken even said that he could just eat the crust alone. I often do, since there is usually enough to make a few cut out cookies as extras for "tasting" purposes.

The great thing about this recipe is that it can be made in the food processor. Since I recently acquired an awesome Cuisinart 14-cup food process, I felt that it was time to put it through its paces.

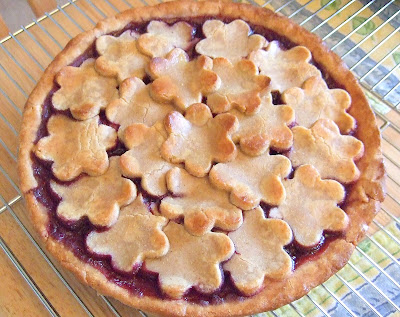
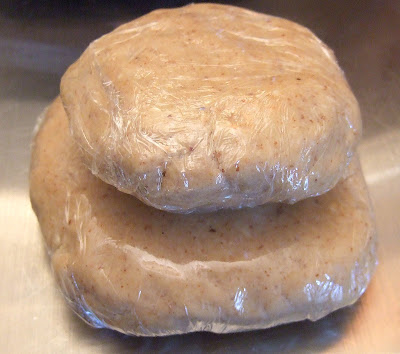
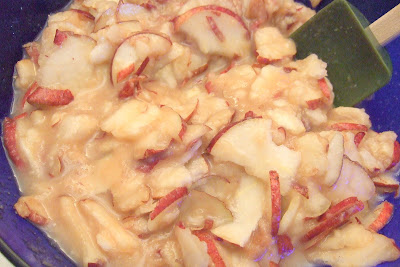
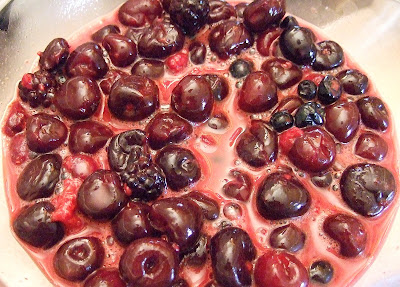
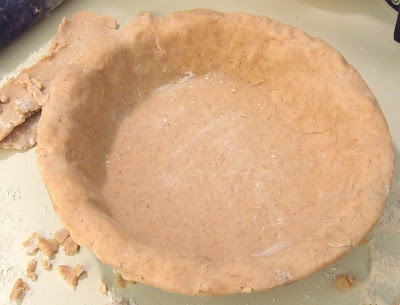
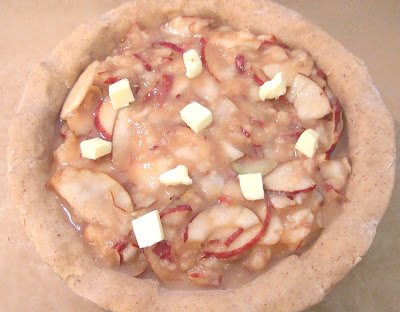
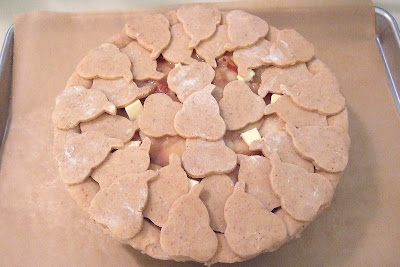
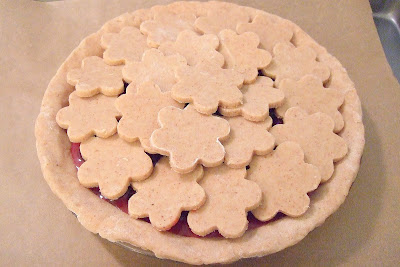
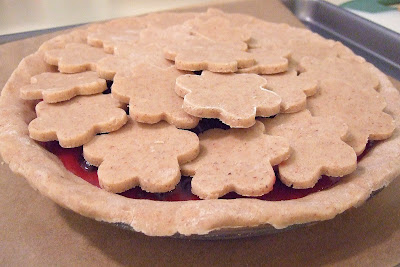
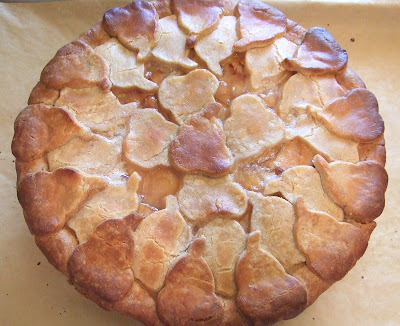
In this case, I made two pies, a pear pie with a spiced crust and a cherry berry pie with a citrusy crust. I've made pear pies before, but I'd definitely make this crust again.

Here's the Pear Pie Shell:


Prior to making your crust, place all the ingredients in the freezer for at least an hour. It makes all the difference.

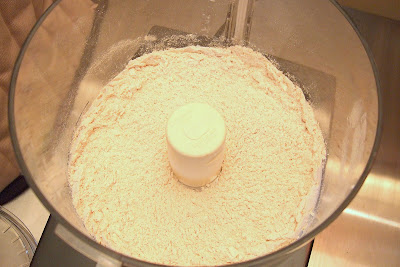
In the food processor, place the following ingredients:
1/4 teaspoon freshly grated nutmeg
1/4 teaspoon ground cinnamon
1/4 cup coconut flour, sifted
3/4 cup whole wheat pastry flour
1/2 cup almond flour/meal/finely processed almonds
1 cup all-purpose flour

If you're making the cherry pie crust, omit the nutmeg and cinnamon.

Pulse the dry ingredients 5-6 times to evenly incorporate the flours.

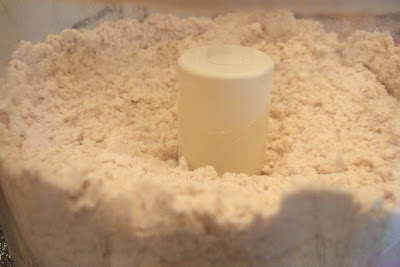
Add 2 sticks of very cold butter (I freeze mine), cut into cubes. Pulse until the ingredients resemble very coarse meal.


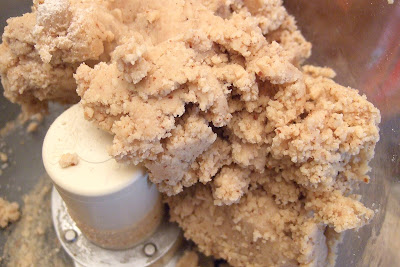
Adding a tablespoon at a time, pour 4 tablespoons of agave nectar through the liquid holder in the processor until the dough just comes together. If you're making the cherry pie crust, use 3 1/2 tablespoons of agave, and add 1/2 teaspoon fiore di Sicilia flavoring. You're going to love it. Makes the whole house smell like a creamsickle.


Divide the dough into two parts, one larger than the other. Form each into a flat, round shape, wrap in plastic and refrigerate for at least 2 hours.


While the dough is chilling, make the fillings.

For the Pear Pie, I combined the following in a large bowl:

6 large red ripe pears, sliced
2 tablespoons freshly squeezed lemon juice
1/4 cup agave nectar (although you really won't need it if your pears are sweet, mine weren't that sweet)
3 tablespoons tapioca flour (you could just as easily use arrowroot or corn starch)


For the Cherry Berry Pie, I combined the following in a large bowl:
(I used frozen fruit because here in NJ, it's still winter, but if these are in season by you, definitely use fresh.)

2 16 oz frozen packages of cherries, thawed
1 8 oz frozen package of mixed berries, thawed
3 tablespoons freshly squeezed lemon juice
1/4 cup agave nectar (again, not needed if your fruit is sweet)
3 tablespoons tapioca flour (or corn starch or arrowroot)


Either way, your filling should be a little soupy, especially if you use the agave nectar, which will make the fruit run a bit.

Take the dough out of the fridge and let it warm enough to be able to roll it out. Some folks even knead their dough a bit before rolling. I've done this and it lends an even flakier feel to the crust.


Fit the crust into your pie dish. You may need to patch some, but don't worry, none of it will show to your eaters. Wrap the crust in the plastic you used for the disc and chill for 30 minutes.

Pour the filling into the crust and dot with a tablespoon of butter cut into tiny pieces.


Again, wrap the pie in plastic and chill while you roll out the other dough disk and use your favorite cutter to cut pieces for the top crust. Take the pie out of the fridge and decorate the top as you wish.


Just remember to leave spots for steam to escape. Cover the edges with foil and bake at 325 degrees F. for about 40 minutes. Then remove the foil and bake until you have a nicely golden brown top and the filling is bubbling.


Let cool completely, then enjoy!

04 March 2008

Ping Pong

Normally I try not to ping pong between my blogs, but I just wanted to let you know that I've reviewed a new product on my other blog that you might find useful in your baking and cooking, the SideSwipe. If you've had experience with this new gadget, please let me know. I'd like to hear your feedback as well.

Here and There blog review of the SideSwipe mixer blade.

24 February 2008

Biscotti Three Ways

I'm still catching up on some recipes I made prior to the surgery (nearly a month ago!), but luckily, I'll be working on some new bits very soon.

In the meantime, I hope you'll enjoy this 10-minute long feature on how I made three different types of biscotti using the same basic recipe, but with some slight changes.

The original "Italian-Style Biscotti" recipe is found in the King Arthur Flour Cookie Companion, although I made a few alterations. These alterations include agave for sugar, coconut flour for a portion of the all-purpose flour, and some key additions (carob powder, toasted almonds and toasted hazelnuts).


By the way, if you're interested in seeing how the kitchen looks since I've made a few changes, please visit my other blog for the updates.

19 February 2008

My Newest Favorite Cookie Ever -- Speculaas


Oh, these are buttery, spicy, crunchy, nutty cookies that greatly surpass the crisp, windmill-shaped cookies known as Speculaas. They are what I've been searching for all my life in a cookie. They'd also be ideal for ice cream sandwiches.

I started making a film of how to make these prior to my surgery, but it appears that I left out a few steps, so I'll just have to write it for you here for the moment. John has something up his sleeve regarding the little cooking videos, so I'm going to keep those to a minimum for a bit.
In the meantime, I invite you to try making these incredible cookies. They are truly some of the best I've ever tasted, if I do say so myself. ;D

Speculaas (adapted from the King Arthur Flour Cookie Companion)

Ingredients:

1 stick unsalted butter at room temperature
3/4 cup agave nectar
1 teaspoon vanilla
1/2 teaspoon ground cardamom
1/2 teaspoon ground cloves
1/2 teaspoon ground mace or nutmeg (I used freshly grated nutmeg)
1 1/2 teaspoon ground cinnamon
1/2 teaspoon salt
1/2 cup coconut flour, sifted
1 cup all-purpose flour
1/2 cup toasted almonds, finely ground
1 teaspoon baking powder (I always sift mine)
2 to 4 tablespoons milk

Directions:

1. Cream together the butter, agave, vanilla, spices and salt.
2. Stir in the remaining ingredients, reserving the milk to use as a way to smooth out the dough if it is too dry.
3. Make the dough into a flat disk, wrap it in plastic and chill for at least 1 hour.
4. While you preheat the oven to 300 degrees F, take the dough out of the fridge. Line two baking sheets with parchment paper.
5. Flour your rolling surface and your rolling pin well. Keep a little (a tablespoon's worth) pile of flour to the side to dip your cookie cutters in before you use them.
6. Roll out the dough to 1/4 in. thick and start cutting your shapes. Get as much as you can out of the dough because it will get tougher with each roll out. I used the little flower shapes shown in the photo, and it made about 4 dozen of them.
7. Bake the cookies for about 10 minutes, then turn the pans and bake them again for 8-10 minutes, until they are medium brown, but not too dark.
8. Let cool completely. They should really snap when you break them!
9. Enjoy!

15 February 2008

I've Joined the Great Cooks

Jill at Simply Daily Recipes has started a new Great Cooks blogroll. If you're not sure what a blogroll is, allow me to explain. Remember the term "roll call?" Well, it's sort of like that, except it exists on a blog.

Jill's blogroll lists the names of great cooking blogs that may or may not be in the general foodie blog-reading publics' conscious. Ricki, from Diet, Dessert and Dogs, whose blog I read loyally, mentioned Great Cooks today, so I thought I'd go check it out. I liked Jill's blog as well as the idea of getting a bit more exposure. Didn't take much effort to join either.

The best part is, I get to learn more about new food blogs and their bloggers. Go pay Jill a visit, and join up if you're a Great Cook, too!

14 February 2008

Hey, If It Works for LeAnn Rimes...

How to know when you've hit the big time -- LeAnn Rimes mentions you in Fitness magazine and it ends up in People magazine. No, she isn't endorsing me or Altered Plates, much as I would be delighted if she visited and tried a recipe or two. LeAnn shares her very sensible diet, which includes using agave nectar to sweeten her breakfast oatmeal.

Now, I bet you'll see a much greater demand for agave.

Good for you, LeAnn Rimes! You look mighty fit.

12 February 2008

Product Review and Yummy Vegan Cupcake Recipe

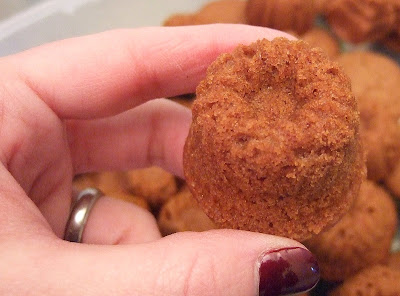
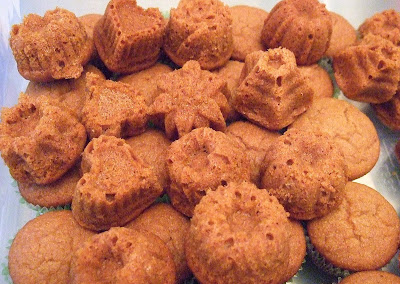
Back in December, John's mom and I had a very nice shopping day together, during which, she took me to her local, enormous Spoons 'n Spice store. In addition to finding many handy tools, I purchased this great decorative Nordic Ware tea cake pan. A week or so before my recent surgery, I decided to test this lovely pan with a recipe I hadn't tried previously from Vegan Cupcakes Take Over the World.

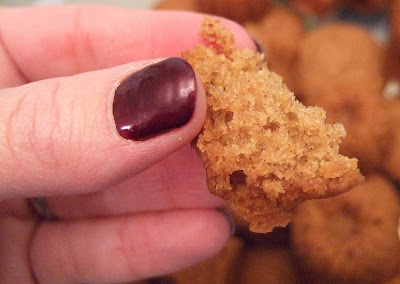
Cashew Butter Cardamom Cupcakes was the recipe I chose for the new tea cake pan. I had no idea I'd chosen such a winner because these tiny cakes were so moist and tasty that they didn't need any frosting. However, next time, I'll make the batter a tiny bit thinner because the pan has so many detailed depressions that didn't make it into many of the cakes. Other than that, I can tell you that the Nordic Ware pan worked terrifically. The cakes were evenly colored and very pretty. Next time, I'm trying a brownie tea cake in the pan.


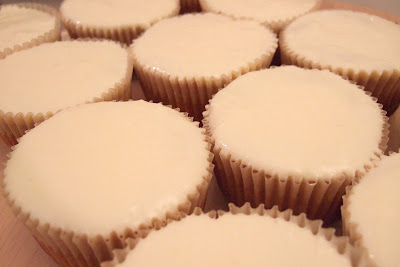
The recipe made enough for the entire new pan and 24 traditional mini cupcakes.


As you can see, the resulting tea cakes were tiny. These light and airy treats were a huge hit with my friends (and with me!). The cardamom was fantastic -- an ideal pairing for the cashew butter.


I made a few big changes to the recipe, so here's how it worked for me:

Cashew Butter Cardamom Tea Cakes

Ingredients:

1 cup plus 2 tablespoons almond milk (I used vanilla unsweetened)
1/4 cup freshly squeezed orange juice
2 teaspoons flaxseed meal
1/3 cup vegetable oil
2/3 cup agave nectar
1/3 cup crunchy cashew butter
2/3 cup whole wheat pastry flour
1/3 cup coconut flour, sifted
3/4 teaspoon baking powder
1/2 teaspoon baking soda
1/2 teaspoon salt
1 teaspoon ground cardamom
1/2 teaspoon ground cinnamon
1 tablespoon orange zest

Directions:

1. Preheat oven to 325 degrees F. Lightly grease tea cake pan, making sure there are no big drops of oil in the depressions. Use cupcake cups in your cupcake pans, if you're using them.
2. Whisk together the almond milk, orange juice and zest, and flax meal until very well blended and frothy.
3. Mix in the oil, agave and cashew butter. Beat until well blended.
4. In another bowl, whisk together the remaining ingredients for 1 minute.
5. Add the dry ingredients to the wet mixture and beat only until just mixed.
6. Fill the cake pan depressions 2/3 full with the batter (do the same for mini cupcakes).
7. Bake for 15 minutes or until a tester poked into the middle of one of the cakes comes out clean.

These won't take long to bake as minis. If you decide to make them full size, it may take up to 25 minutes to bake them.

Overall, I'd rate the Nordic Ware pan a 9 out of 10 (it's a bit heavy, but only because it's well made) and the recipe an 11+ for it's flexibility and deliciousness.

08 February 2008

Product Review -- Wholemato Organic Agave Ketchup


While this may seem a bit off topic, I just had to share with you a fantastic new agave-sweetened product -- ketchup from Wholemato. This really tasty stuff is the first I've seen of its kind.

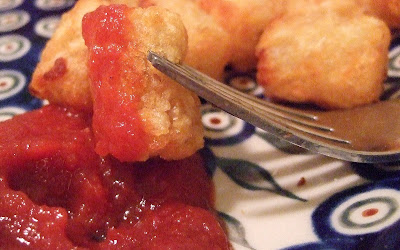
Last night, when the sample bottle arrived, I baked some Tater Puffs (under the Whole Foods 365 brand) to test the new ketchup.


By the way, Tater Puffs are sweetened with apple juice concentrate, so you can try this at home!

After I'd shaken the Wholemato bottle a bit, I poured some out onto a plate. Actually, it doesn't truly pour, it kind of plops. Although that turned John off to it (because he's loyal to Heinz 57), I didn't rule out anything until I'd tasted it.


The texture, while not smooth like Heinz, made me think of it more like a sauce. However, upon tasting Wholemato on my first Tater Puff, I was utterly convinced it was ketchup. Tangy, fresh, and tomato-y, Wholemato was flavorful and not noticeably sweet in the least. More importantly, it was far superior to Westbrae Natural Vegetarian Unsweetened Ketchup, the brand I normally buy.

I'm really looking forward to adding some horseradish to it for shrimp dipping.

My rating: 9 out of 10, but only because I think I'd like a slightly smoother texture . The flavor was great.

07 February 2008

A Great Excuse to Alter a Quick Bread Recipe


As you can see, I've acquired another fun kitchen tool, a Microplane nutmeg grater. As an excuse to use the grater, I decided to rework a recipe from "The Baking Sheet" newsletter from the King Arthur Flour folks. The recipe I altered, "Cranberry Apricot Quick Bread," is a pretty standard quick bread, but with some tasty dried fruit.

I added even more variety by also adding dates and dried cherries to my version. My main alterations were the dried fruits, coconut flour for a portion of the all-purpose flour, almond milk for the cow's milk, and agave nectar for the sugar. My vegan friends can easily veganize this by adding baking soda, flaxseed meal, and apple cider vinegar for the three eggs, although you may need to noodle around with the amounts to get it right, and vegetable shortening for the butter.

After I'd waited until the loaf had cooled, I sliced it and tried some. It was very fruity, with a nice tangy flavor from the dried cranberries and sour cherries. It would be excellent with some whipped cream cheese or thick jam. I probably wouldn't change much, if I made it again, except maybe try it veganized. It's a nice quick bread and makes a fine hostess gift.

Here's the recipe according to my alterations:

Fruity Quick Bread

Ingredients:

1 stick softened butter
3/4 cup agave nectar
1 tablespoon orange zest
1/4 teaspoon salt
1 teaspoon baking powder
1 teaspoon cinnamon
1 teaspoon freshly grated nutmeg
3 large eggs, beaten
1 cup whole wheat flour (I used white whole wheat)
2/3 cup all-purpose flour
1/3 cup coconut flour
1/2 cup almond milk (I used unsweetened vanilla)
1/4 cup chopped dates
1/4 cup dried cherries
1/4 cup dried cranberries (I used fruit-sweetened ones)
1/2 cup chopped dried apricots
1/2 cup walnuts

Directions:

1. Lightly grease a standard sized loaf pan. Preheat oven to 325 degrees F.
2. Cream together the butter, agave nectar, orange zest, salt, baking powder, and spices until well blended.
3. Add the eggs and mix well.
4. Mix in the flour until just blended.
5. Add the almond milk and stir well.
6. Fold in all the dried fruits and nuts.
7. Using a silicone spatula, scoop the mixture into your loaf pan and bake for 1 hour, or until the top is golden brown and a tester comes out with the barest minimum of crumbs.
8. Let the loaf cool in the pan, on a rack for about 10 minutes before turning it out and letting it cool completely on the rack.
9. Slice and enjoy!

Here's a short film of my loaf right before I popped it into the oven and after it had finished baking.

03 February 2008

On the Mend

Greetings Friends!

I know it's been a while since the last update, but I had surgery on 29 Jan. and have been pretty much confined to my bed for the past five days. Don't worry, though. It was minor surgery -- bunion repair on my left foot. The surgeon is very pro-active, and yesterday I was already putting a little pressure on the foot while it was protected in this giant ski-boot-looking device.

That said, prior to the procedure, I baked and cooked like mad to prepare for when I wouldn't be able to stand for any length of time. I also didn't want to stress out my dear husband who has been such a saint taking care of me.

While I baked, I filmed nearly all the recipes, so now I have a small stockpile of them to share with you while I'm recuperating. While most of them come from the King Arthur Flour Cookie Companion, there is one for cupcakes from Vegan Cupcakes Take Over The World. So far, my favorites are the Speculaas from KAFCC. But, I will extol their virtues when I post about the recipe and my alterations to it.

I'll be posting the new recipes here and there in the coming weeks. I hope you'll enjoy them!

Aside from tasting a cookie or two here and there, I've been on a very strict, low-calorie, low-fat, high-fiber diet to keep my weight steady (and possibly lose a pound or two) while I'm not active at all. So far, so good.

Last, but not least, go Giants! I'm not a big sports fan (although I very happily watched a fencing tournament from my bed a few days ago), but I do root for the underdog. Hope you enjoy your Superbowl Sunday.

24 January 2008

Altering Martha's Rugelach


These wrapped cookies filled with peach spread, carob chips, walnuts and cinnamon were very easy (and messy!) to make. I just followed the recipe for Rugelach in the Martha Stewart Baking Handbook, substituting agave nectar for the sugar, no-sugar added peach spread for the apricot jelly, and carob chips for the chocolate chips. I also used 1/3 cup of coconut flour (sifted) for 1/3 cup of the ap flour. I baked them at 300 degrees F for a bit longer than the recipe suggested, but they were light, flaky and very tasty!

One of the reasons why I adore Martha Stewart recipes is that they are so well tested. This means that there is enough "give" in a recipe that you can noodle around with it significantly without ending up with a big mess or waste.

These rugelach didn't physically resemble the pastry of my youth, but they were so good that I almost didn't bring them to a party, wishing to keep them for myself. I over-stuffed them, but the result was fine. At the party, there was so much food and so many desserts that I did wind up taking a few home. They didn't last long!

16 January 2008

Yummy Carob Brownies

This recipe originally came from Cafe Fernando, but I've made so many changes to it that my version follows the wee movie showing how I made them. They're uber-fudgy brownies with a nice spicy flavor due to some cinnamon and nutmeg I added. The coconut flour does the trick with the agave nectar and lends a mellowness to the brownies. Next time I make these, I'm going to make a carob ganache to drape on top for even more deliciousness.


Carob Pecan Fudgy Brownies

Ingredients:

10 oz. unsweetened carob chips
1/2 stick butter (4 tablespoons)
4 tablespoons pureed white beans
1 1/2 cups agave nectar
4 eggs (you could easily just use the whites here)
1 teaspoon vanilla
1/2 cup whole wheat pastry flour
1/4 cup coconut flour, sifted
1/2 teaspoon salt
1/2 teaspoon nutmeg
1 teaspoon cinnamon
1/3 cup lightly toasted pecans

Directions:

1. Preheat oven to 325 degrees F. Lightly grease an 8 in. baking pan.
2. In a double boiler, melt the butter with the carob, whisking until smooth. Set aside to cool.
3. Transfer the carob mixture to your mixer bowl and start whisking. Slowly add the agave nectar and whisk until fully combined.
4. Add the eggs and vanilla, whisking until fully combined.
5. Switch to the paddle and fold in the dry ingredients except the pecans.
6. Add the pecans and mix until just combined.
7. Pour into the baking pan and bake for 35 minutes. After 35 minutes, drop the temperature to 300 degrees and bake for 10-12 more minutes until a tester comes out with just the smallest amount of batter.
8. Cool the brownies on a rack until room temperature then frost or cut and enjoy!

11 January 2008

Congratulations Francie Salle -- You're My Menu For Hope Raffle Winner

The winner of my prize for the Menu for Hope raffle is Francie Salle! Congratulations, Francie -- you've won a copy of Veganomicon and a six-pack of organic, raw agave nectar.

So, please contact me ASAP so that I can send you your prize. And, thanks for helping us raise more than $91,000 to help the kids of Lesotho, Africa.

06 January 2008

And then Rich said, "This Tastes Like Tahiti."


Not long ago, I made Pineapple Right-Side-Up Cupcakes from "Vegan Cupcakes Take Over The World." While I didn't unveganize the cake, I did make a dairy-based frosting made from drained canned pineapple, unsweetened coconut, Neufchatel cheese, agave nectar and butter. It was delightful.

As far as my alterations to the original recipe go, I simply substituted 1/3 cup of coconut flour for 1/3 of the flour in the recipe in order to deal with the agave for sugar substitution. The success of the recipe can be judged by my friend Rich's reaction. He said, biting into a miniature cupcake topped with tasty coconut frosting, "This tastes like Tahiti."

Now there's a compliment!

I thought the cake was very sweet and pineapple-y, while moist. When I make this again, I plan to add a little baking powder to the recipe to give it a bit of lift. That ought to do it. The icing was tart, sweet and creamy all at the same time. When I make that again, I'd add a pinch of salt to take off the sweet edge a bit.

Recently I acquired some agar flakes, so next on my cupcake list are the Brooklyn vs. Boston Cream Pie Cakes. Mmmmmm. Can't wait!

03 January 2008

No One Expects The Dried Pear Noodle Kugel

Yay! We're back from our holiday trip to Utah to visit John's parents (you will be able to find more on that at my other blog as soon as I update it). Prior to our departure (well, most of December, actually) I made loads of recipes that will now make it to the blogs for public consumption.

The little movie below (and I apologize for having to switch back to YouTube after loving Brightcove--they stopped allowing uploads!) is one of those great all-purpose recipes for a tasty, sweet noodle kugel. I served this yummy dish at Mom's Channukah party the day after I made it, and it was a big hit. Between the latkes and the kugel, it's no wonder we were all sluggish after the meal!

This kugel is a conglomeration of several recipes plus my own touches; it's more mine than anyone else's at this point. So, after the little movie, the recipe follows.


Recipe: Deb's Dried Pear Noodle Kugel

Ingredients:

1 12-oz bag of thin egg noodles
2 tablespoons of softened butter, plus 1/2 tablespoon for buttering the pan
1 lb of low-fat or fat-free cottage cheese blended until smooth
1 1/2 cups non-fat Greek-style yogurt
1/2 cup low-fat or fat-free whipped cream cheese
1/2 cup agave nectar
3/4 teaspoon nutmeg
1 teaspoon cinnamon
3/4 cup chopped dried pears
3/4 cup chopped dried apricots
1 cup chopped walnuts

Directions:

1. Preheat oven to 350 degrees F. Butter baking dish.
2. Boil the noodles until al dente. Drain and set aside.
3. Mush the softened butter in a large bowl for 1 minute. Add noodles and mix until the noodles are coated with the butter.
5. Mix in the yogurt and cream cheese for about a minute.
6. Mix in the cottage cheese and the agave nectar for about two minutes.
7. Mix in the nutmeg and cinnamon just until blended.
8. Mix in the dried fruit for about a minute.
9. Mix in the walnuts for one minute.
10. Pour the mixture into the prepared baking dish and bake for 35 minutes, until golden brown on top.
11. Let cool for 25 minutes or serve immediately. Enjoy!