29 September 2008

Final Making Over Martha Month Entry and The Very Good News
From Making Over Martha


The very good news first -- my biopsy results were fine. All was benign. Thanks again for all your support and positive energy.

OK, back to the biscotti...

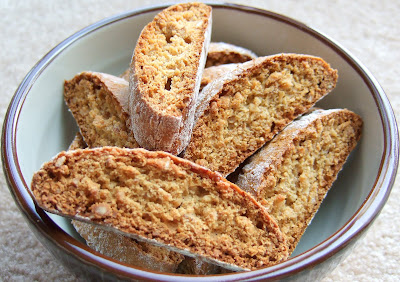
For my final Making Over Martha Month recipe, I selected the Cardamom Biscotti from the July 2008 issue of Martha Stewart Living magazine. I've made biscotti plenty of times to know that it's a doubly baked cookie with a distinctive crunch. However, I thought these would be very cardamom-y. They weren't. Which leads me to believe that perhaps I need to replace my cardamom powder. On the other hand, these made perfectly serviceable almond biscotti.

I'm not sure I'd make these again because I have a nice biscotti recipe, but nonetheless, they were worth making.

Per usual, I substituted agave nectar for sugar and whole wheat pastry flour for the ap flour. Also, I skipped the final step of brushing the tops with egg wash and sprinkling with sugar because, well, this is no cane sugar land.

Here's the recipe as I made it.

Cardamom Biscotti
(inspired by the Cardamom Biscotti recipe from the July 2008 issue of Martha Stewart Living magazine).

Ingredients:

1 1/4 cups whole wheat pastry flour (plus 2 tablespoons more for shaping the logs)
2 teaspoons baking powder
1 cup almonds, ground to 1/8 inch sized pieces
2 tablespoons ground cardamom
2 large eggs
1/2 cup agave nectar
1 teaspoon vanilla

Directions:

1. Line a baking sheet with parchment paper.
2. In a large bowl whisk together the dry ingredients.
3. In a smaller bowl beat the wet ingredients until well combined.
4. Add the wet ingredients to the dry and mix until well combined.
5. Cover and refrigerate the dough for 15 minutes.
6. Preheat oven to 300 degrees F.
7. Divide the dough in half. On a well-floured surface, shape each half of the dough into a long log. Transfer the logs onto the prepared baking sheet and lightly pat down their tops so that they are slightly flattened. There should be at least 3 inches between the logs.
8. Bake the logs for 25 minutes. Take the logs out of the oven and let them cool for 15 minutes on a wire rack (tip: slide the entire thing -- logs and parchment paper onto the rack to cool. It's much easier to deal with this way.)
9. Transfer the logs onto a cutting board one at a time and make 1/2 to 1/4 inch slices (depending on your preference) of each log.
10. Transfer the slices back to the baking sheet and bake again for 22 minutes. Remove from oven and let cool completely on a wire rack.
11. Enjoy these crunchy cookies with your favorite cold or warm drink!

26 September 2008

We Interrupt Making Over Martha Month for an Important Health Update

I usually like to keep my personal stuff to my other blog, Here and There. However, sometimes it's important to share.

Lately, on Here and There, I've been chronicling my current health challenge -- microcalcifications discovered in my left breast. Yesterday, I underwent a stereotactic breast biopsy to discover if those microcalcifications mean I have some malignant cells there or not. I described the experience in detail on Here and There, so if you or anyone else in your family or your network of friends could benefit by reading it, please send them the link.

For many years, people did not talk about breast issues and died from their silence. I'm committed to sharing about this, no matter what the results because early detection is key to survival.

Next post, I wrap up Making Over Martha Month with a delicious treat -- biscotti!

22 September 2008

Making Over Martha Month: Much Lighter, Nearly Vegan Carob Brownies

From Making Over Martha


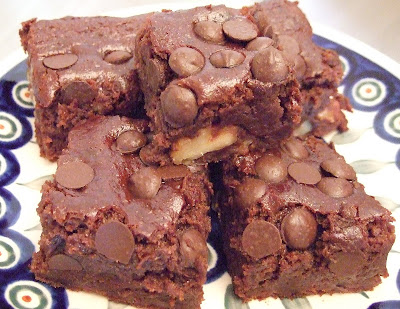
It's been a while since I made a nice batch of agave-nectar-sweetened, carob brownies. So, I dug into my Everyday Food magazines and unearthed this recipe for Light Chocolate-chunk Brownies. As you can see from the link, the recipe resides on Martha Stewart's site and Everyday Food is her publication, so this definitely qualifies for Making Over Martha Month.

Before making the recipe, I decided to try to veganize these, and came just shy of doing it because I don't use soy yogurt. If you do, you'll find these easy to veganize simply by substituting the dairy yogurt for soy. The original recipe uses sour cream, but I find that using the Greek-style yogurts does just as well.

I made a lot of alterations to this recipe in an attempt to veganize it, but I also made it even "lighter" by using carob powder and fat-free yogurt. To further increase the health value of these brownies, I added walnuts and used whole wheat flour instead of all-purpose. I know there are some folks who refuse to eat nuts in their brownies. Well, I LIKE walnuts in my brownies, especially when they're as fudgy as these were.

My resulting brownies were definitely "light" while remaining fudgy and moist, thanks to the yogurt and applesauce. Between the carob powder, melted chips and chips sprinkled on top, there was a good amount of carob flavor. The vanilla brought out some of that flavor as well. The best part was that during the time I waited for the oven to come to temperature (about 10 minutes), the whole wheat flour was leveled by the protein in the yogurt. No one, including me, could tell these were made with traditional whole wheat flour. Overall, they were a big hit at the co-op. Nancy even hid my container so that she could take a few home!

Here's the recipe as I made it.

Much Lighter, Nearly Vegan Carob Brownies (inspired by Light Chocolate-chunk Brownies from the Jan/Feb 2008 issue of Everyday Food)

Ingredients:

2 tablespoons olive oil
3/4 cup whole wheat flour
1/2 cup carob powder
1/2 teaspoon salt
1/2 teaspoon baking soda
1/2 teaspoon baking powder
3/4 cup agave nectar
1/2 cup fat-free yogurt (I actually used Cascade Fresh's fruit-sweetened, blueberry yogurt, but couldn't tell at all afterward)
1 teaspoon vanilla
1/2 cup unsweetened applesauce
4 oz. unsweetened carob chips (melt half the chips and reserve the other half for sprinkling on top)
3/4 cup walnuts (I used halves)

Directions:

1. Lightly oil a 9 or 8 in. baking pan.
2. In a large measuring cup (4 cups or larger), sift together all the dry ingredients.
3. In a large mixing bowl, combine all the wet ingredients, including the melted chips, until well blended.
4. Add the dry ingredients to the wet and mix for about 2 minutes.
5. Preheat your oven to 325 degrees F.
6. Gently fold the walnuts into the batter.
7. Spread the batter into the pan, making sure to get it all in the corners. Sprinkle the remaining chips on top of the batter. It's OK if they don't sink.
8. For the first 20 minutes, bake at 325, then lower the heat to 300 and bake the remaining time (about 15 minutes) or until a tester comes out almost clean. You still want a few moist crumbs on the tester.
9. Let the brownies cool completely in the pan before cutting them and removing them with a spatula.
10. Enjoy!

Just as an Aside...
I'll have one more recipe for Making Over Martha Month before September comes to a close, but I made it in advance (this past weekend) because I'm having a procedure done on Thursday, and I probably won't feel like doing much of anything for a little while afterward. I made a commitment to myself (and a few others) to write about the experience and the results, which you can follow that on Here and There.

11 September 2008

Making Over Martha Month: Pâte Sucrée Meets Deb's Magic Plum Pies

From Making Over Martha


I've often seen Martha Stewart's recipes for Pâte Sucrée and Pâte Brisée in all manners of pies, tarts, and things pie-like. However, I've been too intimidated to ever try to make them because I'd have to adjust too much due to the agave nectar substitution. And, to be perfectly honest, I already have a great pie crust recipe.

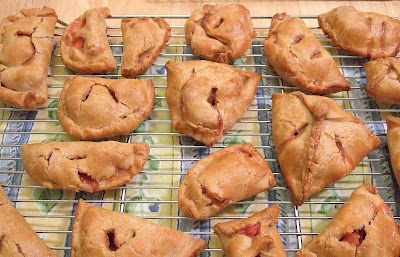
But, in the spirit of Making Over Martha Month, I dove in to a recipe for Pâte Sucrée in the August issue of Martha Stewart Living magazine. My intent was to make hand pies -- small, fruit-filled pies I could hold in a single hand.

From Making Over Martha


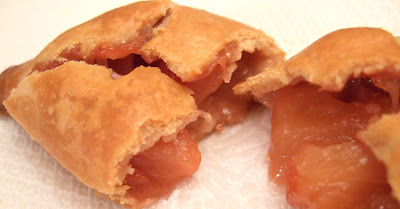
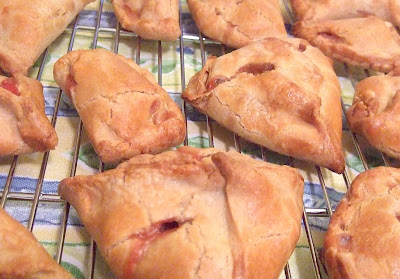
I knew I'd have some challenges with the dough, and I did, but the resulting crust was flaky, buttery, and light -- just as you'd expect of a good pie crust. Most of the directions ended up being pretty similar, but I'll include the way I made it work because there are some important differences.

For example, I used whole wheat pastry flour instead of all-purpose flour. It's a great flour and allows you to add more fiber to your diet (even if it's ensconced in 8 oz of butter). I also used agave nectar for the sugar, dividing the amount in half, as well as cutting the amount of water by half. I also omitted an egg yolk in favor of using the whole egg.

From Making Over Martha


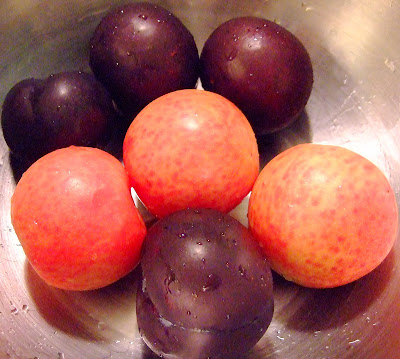
As far as the filling goes, I kept it really simple, using just the fruit, a little corn starch, lemon juice, and agave nectar. The resulting pies were a big hit at the co-op and a gathering last Sunday that my friend Thom hosted. The sweet/tart flavor of the plum filling did a fine job of showcasing the buttery crust. On the other hand, I'd probably fiddle with this a bit more to make the crust more sturdy, yet pliable for hand pies. But, my guess is that it would make an excellent apple pie crust.

Here's the recipe as I made it.

Deb's Magic Plum Handpies, featuring Pate Sucree, inspired by Martha Stewart Living's August 2008 issue.

Makes 12-14 pies, depending on size and shape.

Ingredients:

Crust
1 egg
1 oz cold water
1 1/2 tablespoons agave nectar
2 1/2 cups whole wheat pastry flour
Pinch of salt
2 sticks very cold, unsalted butter

Filling
4 plums peeled and chopped
3 pluots (a new variation on the plum bred with apricots, if your store doesn't carry them, use more plums) peeled and chopped
2 tablespoons cornstarch
Pinch salt
Juice of 1/2 lemon
1 tablespoon agave nectar

Egg Wash
1 egg
1/2 cup half and half
1/2 teaspoon agave nectar


Directions

1. Make crust:
a. Beat together the egg, water, and agave nectar in a small bowl.
b. In your food processor, process the flour, salt, and butter until you see a crumbly texture.
c. While the processor is running, add the liquid to the mixture and process just until the dough forms a ball.
d. Divide the dough in half and wrap each half in plastic, forming a rectangle as you go. Refrigerate the dough for at least one hour.

2. Make filling:
a. In a large bowl, mix together all the filling ingredients until they are
well combined.

3. Make egg wash:
a. Beat together all the egg wash ingredients in a small bowl.

4. Make pies:
a. Preheat the oven to 375 degrees F. Line two baking sheets with parchment paper.
b. On a well-floured surface, roll out the pie crust dough until 1/8 inch thick.
c. Cut either 5-inch ovals or squares, depending on the shapes you want your pies to take.
d. Spoon a small amount of the filling (about a teaspoon or less) into the center of each cut-out.
e. Using a small pastry brush, lightly brush the egg wash along the edge of the top surface of your pie so it can act as a glue when you make your folds.
f. Fold up the edges of your cut-out so that you have an enclosed pie. You may need to crimp your edges if you choose to use an oblong cut-out. Using a sharp knife, make two slits in the top of your pie for steam to escape.
g. Lightly brush the top of your sealed pie with the egg wash until the entire top has a light coating.
h. Repeat steps d - g for each pie.
i. Place each pie on the lined baking sheets and bake for 20 minutes.
j. After 20 minutes, turn down the heat in the oven to 325 degrees F, rotate your pans, and continue to bake for 35 minutes.
k. Let the pies cool on their baking sheets for 5 minutes before gently moving them to racks to cool completely.
l. Enjoy!

From Making Over Martha

07 September 2008

Making Over Martha Month: Veganized Cranberry-Zucchini Muffins

From Making Over Martha


As you may know, during the month of September, I am making over a selection of Martha Stewart's recipes to make them suitable for Altered Plates (my dietary restrictions). This lovely recipe comes from her legendary Baking Handbook. It's one of my favorite cookbooks for a number of reasons:

1. Loads of photos.
2. Great tips and advice.
3. Well-tested (and flexible) recipes.
4. Classic as well as uncommon recipes.

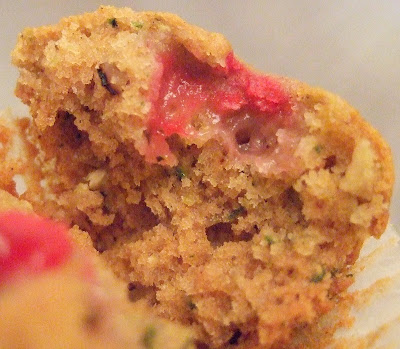
Martha's original recipe for Cranberry-Zucchini Muffins is not vegan, however it didn't take much to rework it to make it super-healthy and vegan. The resulting agave-sweetened muffin is excellent. I received high marks from friends who tried these today, just one day after baking. Right out of the oven (OK, about 20 minutes out of the oven), I couldn't resist trying one since they smelled and looked divine. I was not disappointed.

From Making Over Martha


I could see plenty of green flecks from the fresh, organic zucchini as well as the oozing cranberries that had burst while baking. I could definitely taste the vanilla and nutmeg, while the tangy cranberries and rich, crunchy walnuts made these muffins worth munching.

You really can't ask for a more tender crumb. I'm going to blame it on the olive oil (which you can't taste at all in these, as well as the whole wheat pastry flour). Overall, I'd probably give these an A for sneaky healthiness in a truly tasty muffin.

I made a few changes not only to the ingredients, but also to the instructions. Please bear in mind that I doubled the recipe because I had to feed a room full of friendly faces. So here is my version.

Cranberry-Zucchini Muffins
(based somewhat loosely on Martha Stewart's recipe in her Baking Handbook).

Makes 42 mini muffins and 12 regular-sized muffins.

Ingredients:

3 1/2 cups whole wheat pastry flour
2 teaspoons baking powder
2 teaspoons baking soda
1 teaspoon cinnamon
1 teaspoon nutmeg
1/2 teaspoon salt
1 cup chopped walnuts
1 1/3 cups agave nectar
3/4 cup olive oil
1 teaspoon vanilla
2 cups grated zucchini (I used 2 1/2 small ones)
1 cup frozen whole cranberries

Directions:

1. Line all your muffin pans with nice paper liners.
2. Preheat oven to 325 degrees F. If you're just making large muffins, set your oven to 345 degrees F. The mini muffins take much less time to bake, so the lower temperature helps prevent burning.
3. Sift together dry ingredients (except walnuts) into a large bowl with a lip or a very large measuring cup.
4. Fold in the walnuts making sure to mix them in well. They also help to better distribute all the dry ingredients.
5. In a separate, large bowl, mix together the agave nectar, olive oil, and vanilla until well blended.
6. With a big spoon or silicone spatula, mix in the zucchini.
7. Add the dry ingredients, mixing until just blended.
8. Fold in the cranberries for about a minute.
9. Using a small cookie scoop, scoop out even amounts into your prepped mini muffin pans. Use a regular ice cream scoop for the large muffin pans. Your muffins will rise a bit, so make sure not to over-fill the cups. You're looking for about 3/4 full.
10. Bake for 20 minutes, then rotate the pans and bake another 20 minutes, or until a bamboo tester comes out clean.
11. Let the muffins rest in their pans for 10 minutes, no more. Then remove them from the pans to cool completely on wire racks.
12. Break 'em open and enjoy!

01 September 2008

Making Over Martha Month: Peach Sherbet


Just for fun, I've declared September 2008 to be Making Over Martha Month. That means instead of pulling recipes from a variety of sources as I usually do, I'll just be focusing on altering recipes from Martha Stewart's cookbooks, magazines, and Web pages.

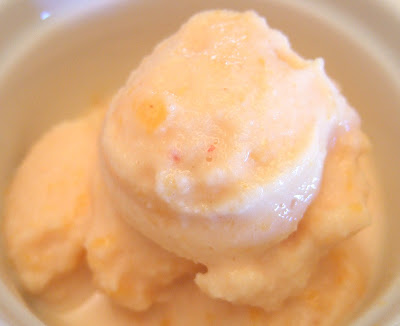
To kick off the month in true summer style, I found a recipe for White Peach Sherbet on Martha's Web site. My agave-nectar-sweetened version is really peachy, rich, and creamy stuff. I noodled around with the recipe quite a bit to the point where it's not really the original at all. Therefore, I've provided my altered version below. Oh, and I didn't use white peaches. The local organic peaches here are yellow and quite delicious.

A note to my wonderful vegan and lactose-intolerant friends: You can easily make this a non-dairy recipe by using a soy creamer, cashew cream, or Mimicreme instead of the half and half.

Peach Sherbet (inspired by Martha Stewart's White Peach Sherbet version)

Ingredients:

5 to 6 large, very ripe peaches
1 large lemon, juiced thoroughly
scant 1/2 cup agave nectar
1 cup half and half

Directions:

1. Using a serrated knife or peeler, gently peel the skin from the peaches and pit them.
2. Put the peach flesh into a food processor and process just until there are no very big chunks left.
3. Pour the peaches into a large bowl and add the remaining ingredients. Hand mix until well combined.
4. Cover the bowl with plastic or pour the mixture into a container with a matching top, then chill overnight in the refrigerator.
5. The next morning, use your ice cream maker (or in my case, your mixer attachment) to freeze the ice cream batter until it is at soft-serve consistency.
6. Serve and enjoy immediately or pack in a freezer-safe container until you can enjoy it later. Just take it out 5 minutes before you intend to serve it so it softens enough to serve easily.