19 September 2007

Of New Tools, New Year's, and New Locales


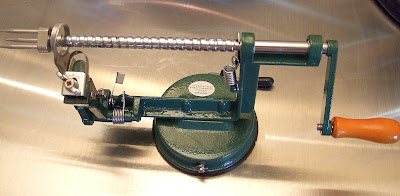
In honor of the Jewish New Year (late last week), I bought an apple, peeler, slicer device from Bed, Bath and Beyond. John and I receive those ubiquitous 10% and 20% coupon mailers nearly every week, and I was ready to take advantage of a deal. Normally, these things sell for about $30 elsewhere. However, this store has them for $19.99. I wound up getting mine for about $16.

The symbolism about eating apples and honey for the holiday is said to be tied to wishing people a sweet and healthy new year. Since I'm no longer a honey-eater, my holiday honey would be agave nectar.


I'd thought about bringing an apple pie to Mom's for dessert, but since John and I have been preparing daily for our road trip to Maine, we haven't had all that much time to do anything else. So, I searched for a very easy apple recipe. I found this one at epicurious. While it doesn't live up to it's name "Heavenly Apple Cake," it was enjoyed at Mom's nonetheless. Please refer to the original (linked above) when you make the alterations below.

My alterations were pretty extensive, down to the style of cake itself. I turned it into a tri-layer, upside-down apple cake, hence the apples on the top. To make this again successfully, I'd probably just keep the top layer and mix the apples in with the batter to get a more even consistency. Layering them this way (in a Bundt pan, no less) led to gaps. I'm not sure I'd use a Bundt pan again either, and now understand why the original recipe called for a 9-inch springform pan. But I didn't feel like digging out my springform pan from the cabinet by the fridge. It's just one of those cabinets with too many items in it. You know how it is. In the next house...

Here are my changes to the original:

1. 2 cups of all-purpose flour and 1 cup of whole wheat instead of 3 cups of ap
2. Oat bran for the wheat germ
3. 4 large Braeburn apples for the 6 small Rome, Granny Smith or Yellow Delicious apples
4. 2/3 cup of canola oil for the 1 cup of vegetable oil
5. 1 2/3 cups of agave nectar for the 2 cups of sugar (next time, I'd use 2 whole cups, the cake could have been a little sweeter, even with the sweet apples)
6. 1/4 cup of pineapple juice for the 1/2 cup orange juice
7. Baked at 325 degrees F for 55 mins instead of at 350 degrees F for 1 1/4 hours. In fact, I'd probably bake it for five fewer minutes next time, just because it would make the cake moister yet.

Here's my process:

Peel,


core,


and slice the apples. (I'm so impressed with this simple device! It took just minutes to peel, core and slice 4 apples. Just wish I knew how to slice them thinner. If you have any tips on this, please post them in the comments.)


Sprinkle with lemon juice, mix well, then add 1/4 cup of the agave nectar and the sugar. Make sure that the apples are completely coated. Set aside.


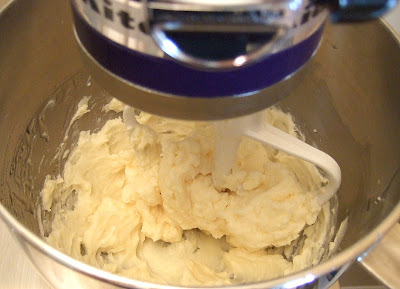
Mix the dry ingredients.


In a separate bowl, beat the eggs until foamy.


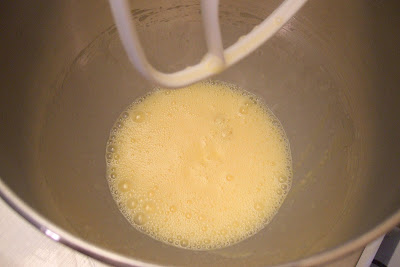
Add the oil, vanilla and the remaining agave nectar. Mix well.


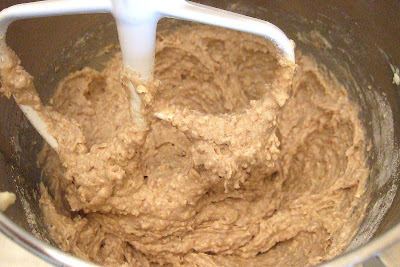
Add the dry mixture to the wet, alternating with the juice, until the batter is well blended.


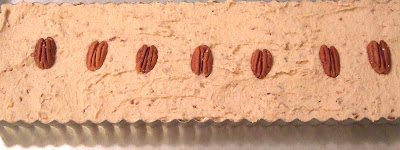
In a prepared pan, place a layer of the apples.


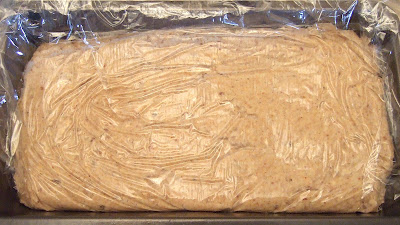
Then, add the cake batter.


Then, another layer of apples.


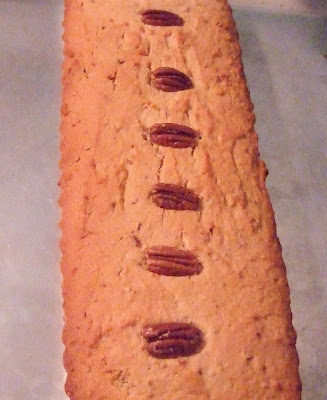
Bake until golden brown and a wooden skewer comes out clean.


Let cool in the pan for at least an hour before turning the cake out onto a rack to cool completely.


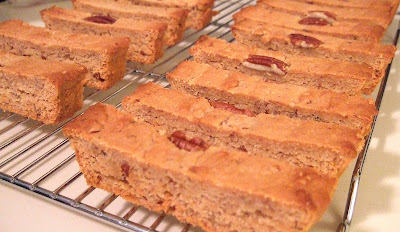
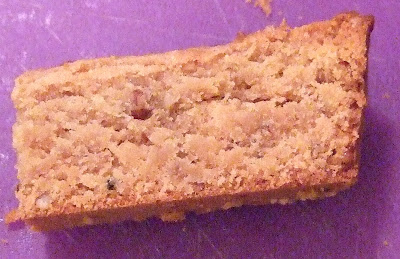
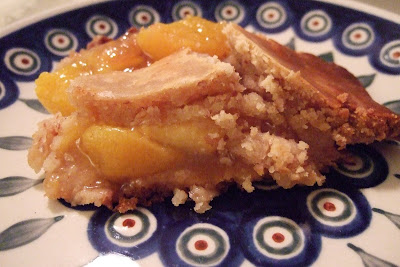
The top should have a carmel-like quality to it around and on top of the apples. When the cake is cool, slice and serve. Oh, and enjoy!


The cake has a very tender crumb, cinnamony flavor and delicious apple bits throughout. It's a great cake to bring to any party because it's light, healthy and tasty.

Just as an aside, no posts next week since we'll be in Maine, specifically on Mount Desert Island. Yes, it's a great name, but it's pronounced Mount "Dessert" Island. We've been there before, and had a lovely time. Here's our photo journal from our last trip (you'll have to scroll down just a tiny bit to get to the Maine part). I hope you'll enjoy it while I'm away.

Have a great week!

P.S. If you're keeping up with the weight loss story, I'm still losing -- 15 lbs total!

15 September 2007

Summitting My Own Everest


Yes, indeed, after much noodling with many recipes, I have conquered the Everest that is shortbread. If you're new to this blog, my main challenge is to alter recipes, specifically desert recipes, to fit within my dietary restrictions. Where this comes into play with shortbread is in the ingredients. Traditional shortbread does not contain any liquid ingredients (butter is still solid at room temperature, and sugar, while considered a liquid ingredient in the most technical sense, still behaves as a dry ingredient in terms of strict liquid/dry ratios).

So, how did I manage those gorgeous shortbread slices above? Well, I turned once again to one of my favorite cookbooks, Sundays at Moosewood Restaurant. If you've been here before, you might remember the Moosey Hamantaschen I altered. Given the success rate with Moosewood recipes, I thought I ought to give their "Halvah Shortbread" a try.

I grew up (for the most part) with my Dad. When my Mom would come to pick me up for a visit, sometimes we'd drive into Caldwell, NJ (not far from Dad's) to the local cheese shop for a treat. That treat was fresh halvah, a sesame treat made with honey and sometimes nuts. The shop owner would carve a thick slice from a giant wheel and pack it in stiff white paper before handing it to me for safekeeping until we could sit somewhere and enjoy it.

When I initially saw the recipe, I put it aside because it seemed like a winter treat. But the nights are growing chillier these days, and I had a hankering for some halvah.

I made quite a few substitutions and changes to get the recipe just right:

1. Cut the butter by 1/4.
2. Used 1 cup of agave nectar instead of 1 1/4 cups of brown sugar
3. Used 1 1/2 cups whole wheat pastry flour instead of 2 cups unbleached pastry flour.
4. Used 1/2 cup coconut flour.
5. Reduced the oven heat to 325 degrees F, and baked it for nearly an hour.
6. Used one tart pan instead of two pie plates, and made mine super-thick (hence the extended baking time).

Just a warning: These are very rich, yet not too buttery so they can become habit forming. The tahini gives the cookies an other-worldly flavor that people just can't put their fingers on when they try them without knowing it's the sesame paste. In short, I think they're heavenly.

When I brought these to a gathering last week, they were snapped up pretty quickly (even though I was late, and folks had already had other cookies). The highest compliment came from actions, not words. As soon as I'd placed the container with the other goodies and took my seat, a friend quickly rose to his feet and headed over for a taste before anyone else could grab a shortbread slice. I guess I'm getting a reputation from my baked goods.

Here's the recipe as I made it:

Ingredients:

1/2 cup butter, softened at room temperature
1/2 cup tahini (I strongly recommend Maranatha brand organic tahini. It's superb.)
pinch of salt
1 cup agave nectar
1 1/2 cups whole wheat pastry flour
1/2 cup coconut flour
1/2 cup toasted pecans, ground
1/4 cup pecan halves (for decorating)

Directions

1. Preheat the oven to 325 degrees F. Butter a tart pan.
2. Cream the butter with the tahini.
3. Mix in the salt and agave nectar until smooth.


4. Slowly add the flours until well incorporated.


5. Mix in the nuts. Your dough should be creamy, but very thick.
6. Spread the mixture into your prepared tart pan and decorate with the pecan halves.


6. Bake in the center of the oven for an hour, but check it every 15 minutes so that it doesn't become too brown.


7. When the edges begin to brown, use a piece of aluminum foil to cover the edges. An easy way to do this is to measure out a piece the size of your pan, fold it in half and cut out a center section an inch or two from the edge, so your middle section can brown in peace.


8. Let it cool in the pan for 20 minutes (it should still be pretty warm, if not hot), then remove it by putting a flat surface (like a cutting board) on top and upending the tart pan so that your flat surface is now on your counter and the pan is face down on top of it. Remove the pan and cut into 1/4 in. slices. Cool the slices on a rack.


9. And, for Pete's sake, try one while it's still warm!


These are now my favorite cookies. Let me know how yours turn out!

09 September 2007

Altering A Food Network Cookie Recipe

Like you, I've amassed stacks of recipes from sites on the web, including the Food Network. The recipe below is one I've had at the front of my to-try book for nearly three-quarters of a year. It came in an e-newsletter, "12 Days of Cookies" that I had subscribed to when I was baking cookies as gifts during the winter holiday season.

It's a whole grain recipe, using oatmeal and whole wheat flour. On the other hand, the cookies comprise 1 1/2 sticks of butter. Oh well. They're very tasty, though. Crisp, rich, pecan-y, and buttery. Right off the pan, they're soft, but as soon as they cool, they develop a carmelized crispness that can't be beat.

Big caveat: the original recipe says to place them an inch apart. Don't believe it. Using agave nectar might have something to do with this, but these little guys spread a lot more than that (as you'll see in the photos below).

Please go see the original recipe for the exact details. Here's what I altered:

1. 1 cup of agave nectar for the sugars
2. Placed the cookies much further apart (after a near disaster).
3. Baked at 325 degrees F.
4. Baked for 7 minutes, turned the pans, then baked 4 minutes before they were golden brown.

Here are some photos of how it went:


First, I processed the nuts and the oats for about 2 minutes until they were well ground.


Then, I whisked the dry ingredients together.


Next, I beat the butter with the agave nectar, vanilla and egg.


Then, I added the dry ingredients to the wet to get the final mixture.


Next, in a plastic-lined loaf pan, I spread the mixture and covered it with a flap of plastic.


Then, I chilled it for about two hours until it hardened.


I removed it from the fridge, peeled of the plastic, and began slicing the loaf into smaller, more manageable blocks. From the blocks, I sliced off 1/4 in. thick slices and placed them onto cookie sheets lined with parchment paper.


Don't place yours as close together as these. That was a big mistake.

However, they baked up well after I'd separated them.


They taste even better than they look!

02 September 2007

The "I Tried" Peach Pie


I really did. I tried to make a rustic crust by using oil instead of butter, but it just didn't fly. In fact, when I tried a bit of the crust before rolling it out, it tasted horrible. John nearly took a photo of the face I made because it was just awful, but I stopped him in time.

Regardless, I did end up making the pie with Elise's all-butter crust that I alter with agave nectar for the sugar. I really did want to make it vegan and cut the saturated fat, but it was not to be.

The original recipe is for "Rustic Raspberry Pie," from the King Arthur Whole Grain Baking book that I love so. I used a combination of frozen peaches for the fruit, used a fraction of the sweetener (agave nectar, of course) and opted for the full 6 tablespoons of cornstarch to prevent any pie oozing when slicing.

Here's a short movie I made of the experience. Please forgive me for opting for the butter crust. It just wasn't worth carrying on with the awful crust. I will try to make the oaty one another day.