04 October 2009

Book Review: Forking Fantastic by Zora O'Neill and Tamara Reynolds -- Veganized Apple Spice Cake


From October 2009 Photos

I'm quite enjoying the quest to veganize as many Altered Plates dishes as possible. This delicious apple spice cake inspired by the one in Forking Fantastic by Zora O'Neill and Tamara Reynolds was a lesson in food chemistry for me. As a result, I'm a full convert to the use of apple cider vinegar with baking powder to create an awesome egg substitute. Additionally, the original recipe calls for dark brown and granulated sugars, and molasses, all of which I don't use, so I called on my creative muse to help me on my journey with this cake.


From October 2009 Photos

I wasn't too worried once I tasted the batter, but I did become concerned when as it cooled, the cake part started separating from the apples a bit.


From October 2009 Photos

But, I carved out a small chunk and was so happily surprised that it took a lot of strength not to eat more of it before I took it to Mom's for her annual family party yesterday. Even though I made my cake with whole wheat and whole wheat pastry flour, as well as a nice amount of flax meal just to be on the safe side in the veganing, no one complained about it being "too healthy" at all.


From October 2009 Photos

I received rave reviews on the cake, especially it's flavor and texture. I'd say it's about half apples and half cake. That makes for interesting serving, but I eventually was able to cut nice squares while my cousin Alan handed out the plates and forks. It's a very most cake with a wonderful spiced flavor and fluffy texture. I would definitely make this one again. Maybe for Thanksgiving.

About the book, while it's really not for vegetarians and vegans (or, very importantly, for folks who do not drink or cook with wine), there are plenty of worthwhile dishes to try and lively stories to read. If rough language also turns you off, you probably will have to exercise tolerance at turns, but generally it's written in a very informal way that is immediately approachable. I prefer more photos, especially of the finished dishes, but the book is targeted at those who want to throw fun dinner parties like the authors, so I supposed they are appropriate. All that aside, making a vegan version of the authors' apple spice cake was a fun thing to do for a dinner party of sorts at Mom's.

Here's the recipe for my version so you can try it for yourself.

Apple Spice Cake (inspired by the one of the same name on page 118 of Forking Fantastic by Zora O'Neill and Tamara Reynolds

Easily serves 20.

Ingredients:

1 cup whole wheat flour
2 cups whole wheat pastry flour + a little extra for the baking dish
2 tablespoons flax meal
1 teaspoon baking powder
1 teaspoon baking soda
1/2 teaspoon salt
1 teaspoon Pumpkin Pie Spice
1 teaspoon Cake Spice
1 teaspoon cinnamon
1 cup oil (I used a mix of olive and canola oils) + a little extra for the baking dish
1 1/2 cup agave nectar
1/4 cup apple cider vinegar
5 Gala apples, cut into 1/2 in. chunks (keep the peels on the fruit)
1 cup walnuts chopped roughly

Directions:

1. In a large bowl, combine all the dry ingredients except the walnuts until very well combined.
2. In a medium bowl, whisk together all the wet ingredients except the apples until very well combined.
3. Oil and flour a 9 x 13 in. baking dish (I used a glass one)
4. Add the wet to the dry ingredients and mix until just combined.
5. Fold in the apples and walnuts and mix until just combined.
6. Pour the mixture into the baking dish and let it rest for 15 minute before baking.
7. Preheat the oven to 350 degrees F.
8. Bake the cake for 30 minutes at 350 degrees F, then tent lightly with foil and bake at 325 for another 30 minutes (or until a tester emerges with moist crumbs attached, but you don't want it to be gooey).
9. Cool for an hour before serving. It's wonderful warm, but will be just as wonderful for the next two days. It won't last longer than that.

Just some procedural notes: once you mix the wet with the dry, the vinegar immediately starts reacting. You'll have to act quickly to get it into the pan and spread it evenly before it becomes challenging to do. Don't worry if you see air bubbles, it all works out fine.

I'm also sure that you could make a chocolate or carob version of this by substituting cocoa or carob for some of the flour. If you try it that way, please let me know how it goes!

25 September 2009

Making Over Martha Month: Veganized Raspberry Tart (nee Linzertorte)

From September 2009 photos

This Linzertorte, inspired by Martha Stewart's Baking Handbook (p. 171), is probably the most time-consuming recipe I've ever made. It also is one of my proudest achievements as far as veganizing challenges go. Why? Well, translating 3/4 of a cup of butter (read: 1.5 sticks) and 1 cup of granulated sugar into appropriate amounts of olive oil (yep, it's olive oil alright) and agave nectar that would mesh with a nut-based crust was almost as rough as my shortbread Everest. Oh, and did I mention an egg? Yes, I had to work out the egg issue too. What I do for my vegan friends.

From September 2009 photos

This cutaway shows just how jammy (or rather, no sugar added spread-y) this luscious linzertorte is. Boy, this is rich stuff. Between the toasted hazelnuts and almonds in the crust, and the thick layer of jam between, a small portion is all you'll need for a great agave-sweetened, vegan fancy dessert. It's really quite the show-stopper for a gathering.

From September 2009 photos

When I served it to my pal Teresa, she almost didn't believe that it was vegan. That says a lot. She's a big fan of butter, so she would know.

OK. I know. You've waited long enough. Here's the recipe as I made it -- a very far cry from Martha's, which is fitting since it's the last of the month. Hope you've enjoyed my Making Over Martha Month. By the way, for you linguists, I know I'm completely misusing nee in the title, but it's the closest I could come to saying that the thing is so completely changed that its previous incarnation was a linzertorte.

Caveat: This takes FOREVER to make due to all the chilling involved. Believe me, you can do it. Just plan to make it on a day when you have lots of small, short-term tasks to accomplish. Like cleaning. Or laundry. Or repotting plants.

Sorry, one last thing -- Martha's original says it's best eaten the day it's baked. Mine improves over time, although eating it the first day is certainly a good thing.

Veganized Raspberry Tart (inspired by the Linzertorte in Martha Stewart's Baking Handbook; p. 171; 2005.

Ingredients:

1/2 cup toasted and rubbed clean of skin hazelnuts
1 cup blanched almond flour (it's OK if you don't have this, just run a cup of blanched almonds through your coffee grinder or food processor until they are powdery)
1 1/3 cups whole wheat pastry flour
1 teaspoon baking powder
1 teaspoon Pensey's Baking Spice
1/4 teaspoon salt
1/2 cup + 1 tablespoon olive oil (use your best light oil)
2/3 cup agave nectar
1 tablespoon flax meal

Nearly 2 10-oz jars of no-sugar-added raspberry spread (I used the 365 brand from Whole Foods, and it was lovely.)

2 tablespoons no-sugar-added apricot spread
1 teaspoon filtered water

Directions:

1. In a food processor, blend together the hazelnuts, almond flour, whole wheat pastry flour, baking powder, Baking Spice, and salt.
2. In a mixer, beat together the olive oil, agave nectar, and flax meal.
3. Add the dry to the wet ingredients above and mix until well incorporated. Expect that it will be wet. Split the dough in two uneven halves (one should be slightly larger than the other -- that will be the bottom crust). Wrap each individually and refrigerate the crust dough for 1 hour.
4. Using the slightly larger half, press the dough into the bottom and sides of a tart pan with a removable bottom. If you don't have one, you could definitely use a springform pan (in fact, next time I make this, that's what I'll use), but only go 3/4 of an inch up the sides with your dough. Cover with plastic and freeze for 2 hours.
5. Meanwhile, between two sheets of parchment paper (and with a LOT of flour on both sides of the dough), roll out the other half of the dough until it is about 1/4 to 1/8 inch thick. Wrap this up in plastic and freeze it for 2 hours.
6. Spread the raspberry spread onto the bottom crust, re-wrap and freeze it again while you work on your top crust cut-outs. (This can take from 30 to 45 minutes, depending upon how well you do keeping your crust from sticking. As it warms, it gets very sticky. And, like any good crust, you don't want to handle it much at all.)
7. Using your favorite cookie cutters, cut out enough pieces of the rolled out crust to cover the top of your tart while leaving air holes (they also provide nice contrast against your crust).
8. Take the bottom of the tart out of the freezer and top the tart with your lovely little cut-outs. Wrap the whole thing up and freeze it until you complete the glaze step.
9. Preheat your oven to 350 degrees F.
10. Whisk the apricot spread with the water until well combined. Then, take your tart from the freezer.
11. Using a pastry brush, quickly spread the glaze on the top of the tart, place the whole thing on top of a rimmed baking sheet topped with parchment paper, and place it in the center of your hot oven.
12. Bake the tart for 30 minutes, then check to see how quickly the edges are browning. Cover any parts that are browning too quickly with foil, then bake it for another 15 minutes or until completely golden brown and bubbling.
13. Let it cool completely before removing the sides of the pan to show off your amazing veganized raspberry tart!

Take some photos and show me how yours turns out!

24 September 2009

Quick Update

No, my friends, I have not fallen off the edge of the earth. I've been a bit over-scheduled between school and associated activities and the Jewish New Year. Regardless, I did make my final MOMM dish, a veganized Linzertorte which came out so much better than I had imagined. I promise to post photos and the recipe very soon because my Linzertorte is a grand departure from Martha Stewart's original and will bring very happy faces to my vegan friends and their tasters everywhere. So, until then, may the new year bring you much "naches". A sweet one to you!

17 September 2009

Making Over Martha Month: Turning Galette into Pie, Altered Plates Style

From September 2009 photos

Oh Martha, you are wonderful, but your Pate Brisee does not hold a candle to Elise's All-Butter Crust as I make it with agave nectar and whole wheat pastry flour. On the other hand, your fillings are killer (at least with the alterations I've listed below).

The original recipe was for Martha Stewart's Apricot-Blackberry Galette, Baking Handbook (2005), pg. 266. but I reworked it with the double-crust (my version) and significantly tarted it up with fresh raspberries. I also changed up the rest of the ingredients a bit, so I've included the recipe as I made it below.

The raspberries make the filling very tart, but it calms down after the first day. I highly recommend enjoying the pie with some delightful vanilla frozen dessert. Also, if you are vegan and wish to make this veganly, you could use a combination of oils, including almond oil, measuring 3/4 cup total, and omit the egg wash on thee crust. Instead, you could brush the top with a jam wash (a few tablespoons of apricot jam and an equal amount of water, whisked together). It will have a nice, glossy finish. Oh, and the crust will give the whole pie the best that almonds can give. I can't think of a better way to eat apricots and raspberries.

Killer Apricot-Raspberry Pie

Ingredients:

1 awesome almond-y double-crust recipe
15 fresh apricots, cut into bite-sized pieces
2 fresh apples, peeled and cut into similarly sized pieces
2 cups fresh raspberries
4 tablespoons arrowroot
1/4 cup agave nectar
pinch of salt

Directions:

1. Press 1/2 the crust recipe into your best pie dish, wrap in plastic and chill in the fridge. Roll out the rest of the crust, wrap in plastic and chill in the fridge.
2. Mix together the remaining ingredients in a large bowl. Make sure that the arrowroot is completely dissolved.
3. Preheat the oven to 350 degrees F.
4. Pour the fruit mixture into your chilled crust in the pie dish. Wrap back in plastic and chill in the fridge.
5. Take the rolled-out crust out of the fridge and use some fun cookie cutters to cut out enough pieces to cover the top. Take the filled pie dish back out of the fridge and place your top pieces on top of the fruit until you have a decorative top crust. Remember to leave air/juice holes. This is very important.
6. Bake your pie for 20 minutes, then tent with foil to prevent the top and edges from browning too quickly. Bake for another 20 minutes, or until the juice is bubbling and the top has become evenly light brown.
7. Let cool completely on a wire rack before serving.

09 September 2009

Making Over Martha Month: Banana Walnut Cookies

From September 2009 photos

Last month, my friend Tanya (the lovely hand model and professional massage therapist above) came to visit and we baked all day long, using up all the black bananas in my freezer. We made banana bread, banana muffins, and these amazing banana-walnut cookies that were originally Martha Stewart's Banana-Walnut Chocolate Chunk Cookies from her Sept. 2006 issue of Living.

I'm sorry to say to my vegan friends that I did not veganize this recipe, but you can easily do it with margarine or oil (but cut the amount by 1/3, if you use oil). And, the egg is easily disposed of with either 1/2 teaspoon baking powder or the flaxmeal trick.

My substitutions were:

1. Agave nectar (amber variety) for the granulated and brown sugars. This gave it a very molasses-y flavor.
2. Whole wheat pastry flour for the whole wheat flour. It lightened up the cookies tremendously.
3. Dried dark sweet cherries for the chocolate chunks, softened first in hot water and drained.
4. The addition of two tablespoons of coconut flour to compensate for the moisture in the agave nectar.

The results of our hard work were wonderful. They were definitely my favorite out of all the banana recipes we made that day. They weren't too sweet or dry at all. In fact, these cookies come out rather cakey in texture and very banana-y in flavor. None of the flavors overpowered the others. And, soaking the dried cherries first is key. Tanya captured that best when she said, "The cherries aren't overly chewey. I'm not trying to chew them down."

What you really can't tell from the photo is that these cookies have oats in them. I love the richness of the walnuts against the oats and the banana in these cookies. I also think that you could definitely use carob or chocolate and they would be winners.

Since I've linked to the original recipe, I'll just include the two exact measurements that are missing:

1. 3/4 cup agave nectar
2. 2 tablespoons sifted coconut flour

I'll have to make them again soon because I'm starting to collect bananas in my freezer again! Any other banana recipe suggestions?

01 September 2009

Making Over Martha Month Begins!

From September 2009 photos

And, what a beginning it is! To kick off Making Over Martha Month here on Altered Plates, I've veganized and spiced up Martha's Oatmeal-Raisin Bars. The original version was printed on page 103 of Everyday Food, Issue 53, June 2008. I made a boatload of changes to this recipe, i.e., it's a actually a new recipe at this point. Some of the highlights include agave nectar (of course!) for granulated sugar, olive oil for butter, whole wheat pastry flour for AP flour, Pensey's Baking Spice for half the amount of cinnamon, and the wonderful addition of walnuts. How she could have made oatmeal raisin cookies without walnuts is beyond me... but I've corrected that here.

The thing about Baking Spice is that it imbues everything with a wonderful anise, cinnamon, and cardamom mix of flavors. And, in this case, it works marvelously with the Fiore di Sicilia, which is itself a magical ingredient. If I ever decide to make a fruitcake, I would definitely use Baking Spice and Fiore di Sicilia in it.

From September 2009 photos

This rather in-your-face close-up of a bar slice shows the texture of this fragrant treat. Mine was a tiny bit dry because I did not let it cool completely in the pan. (That's a lesson for you -- leave it alone!) My pal Teresa suggested that it would make an excellent crumble over ice cream. We each had a bar with some vegan coconut milk ice cream on top. It was a highly satisfying dessert.

Here's the recipe as I made it:

Spiced Oatmeal Raisin Walnut Bars
Yield: 16 bars

Ingredients:

1/2 cup + 1 tablespoon olive oil
3/4 cup agave nectar
1/4 teaspoon Fiore di Sicilia (if you don't have it, just use vanilla)
1 teaspoon Pensey's Baking Spice (if you don't have it, make a mixture of cinnamon, mace, anise, and cardamom -- 1/4 teaspoon each)
1/2 teaspoon baking powder
1/4 teaspoon baking soda
1 cup whole wheat pastry flour
2 cups old-fashioned oats
1 cup golden raisins
1 cup coarsely chopped walnuts

Directions:
1. Beat the oil with the agave nectar and Fiore di Sicilia until very well blended.
2. Whisk together the dry ingredients except for the raisins and walnuts, until very well combined. Add in the raisins and walnuts and mix with a big spoon until well combined.
3. Give the wet ingredients one more beating, then add in the dry ingredients. Mix until just moistened.
4. Preheat your oven to 325 degrees F, and line an 8 in. square baking dish with two lengths (horizontal and vertical) of parchment paper.
5. Spread the batter into the dish and bake for approximately 30 minutes or until a bamboo tester comes out with a few moist crumbs.
6. Let cool completely in the dish, on top of a wire rack, then slice into bars.
7. These will keep in an airtight container for about 5 days, but they certainly won't last that long. They smell and taste terrific!

Overall, this was probably the most fun I've had veganizing a recipe of Martha's. I didn't veganize the other Making Over Martha Month Recipes for September, but if you take the plunge to veganize them, please let me know how it goes. Thanks! Hope you enjoy this recipe.

23 August 2009

A Vacation to Recover from a Vacation

I hope you all are doing very well and enjoying the remains of the summer. Here in Central Jersey, it's hot and HUMID. Well, it's actually wet. I'm sure that's affected some of my baking results, but the new AC has been helping.

Speaking of baking, I'm gearing up for September's Making Over Martha Month. Tanya helped with one recipe, and 2 days ago, Dawn (my Tennessee pal) helped me make another. Because I'm also gearing up for the fall semester, I'll try to get two more done before the end of the month to blog about in September, but it might be a bit of a squeeze.

We dropped Dawn off at the airport at 4 am this morning for her return flight to Nashville, after a week of fun. Well, not all of it was fun. The day she arrived, we had to drive the 5 hrs to the northern tip of Lake George to attend a funeral service for her recently departed Aunt Joy. The lake was lovely, as were the homes of her brothers on the lake. If you go to Lake George, stay in Ticonderoga and eat breakfast at the Hot Biscuit. The biscuits are HUGE. Easily the size of both my fists together. I recommend not eating the night before in order to finish one of them. Excellent with agave nectar.

All that to say, we had a very full week, and now I have a long to-do list to accomplish before settling down with a routine for school. However, I will be back in September, blogging away for Making Over Martha Month. Enjoy your week!

17 August 2009

Guest Blogger: Teresa and Her Magic Banana Muffins

From Aug. 2009 photos


This recipe comes from my pal Teresa, who is studying to become a librarian with me at Rutgers. Originally, I was going to veganize them, but just for fun, I tried them just as she outlines below (except that I didn't make mine in a food processor or process the nuts -- just whacked 'em with a mallet. I also used walnuts, and instead of the cinnamon, I used 1 teaspoon Pensey's Baking Spice.). I made these yesterday with another friend, Tanya, who baked with me all day. We used up all the black bananas in my fridge and freezer. More of those recipes to come.

Tanya had some lovely things to say about these particular muffins -- "A great breakfast muffin with a spinach and feta omelet." I thought that 1. they don't taste like whole wheat muffins at all (thank the stick o' butter for that one), 2. they are very light in texture, and 3. I prefer them with walnuts over cashews. Overall, they are very fine muffins which, if I had a cafe, I would serve them in my muffinry repetoire.

But, for now, please enjoy these delicious banana muffins from Teresa.


From Aug. 2009 photos


Delicious Banana Nut Muffins

I suppose I should start with a little introduction as it is not Deb writing this entry.
My name is Teresa, I go to grad school with Deb, and I am a baker who refuses to follow recipes. The general public may find this shocking, but you, loyal readers of Altered Plates, by now realize that recipes are not set in stone. I bake a good amount, usually at least one breakfasty treat and one desserty treat a week. My father is a processed food addict that seems to hate all sources of fiber, so I constantly struggle to hide good things in yummy tasting snacks. As such, I grind up all sorts of things and use alternative sweeteners a good amount in my baking.

This is a recipe for banana nut muffins. I don't know about everyone else's household, but mine often finds that it buys one or two bananas too many before they are over ripe for eating. Luckily, overripe for eating equals perfectly ripe for baking. Furthermore, if you ever find yourself in such a situation and do not have time to bake, just disrobe your banana, place him in a plastic bag or freezable container, and pop him in the freezer. You can throw chunks in a blender with berries and yogurt for a delicious smoothie, or defrost them to use in any baking recipe.

This recipe is extremely loosely based on a banana nut bread recipe from an old (1980, which is before I was born) food processor bread cook book. I changed the nuts (and ground them to hide from my father), used agave nectar instead of cane sugar, used whole wheat flour instead of white, got rid of the milk, and baked them as muffins because who can wait the 50 minutes for a loaf when you can be eating a yummy muffin in 25?

Anyway enough chatting, you are here for a recipe!

Banana Nut Muffins

Yields 12 regular muffins.

Ingredients

2 ripe bananas
1 tablespoon lemon juice
1/4-1/2 cup nuts (I used raw cashews, but any nut you find yummy will do the job)
2 eggs
1/2 cup room-temp unsalted butter
1 teaspoon vanilla
1/2 cup agave nectar
1 3/4 cups whole wheat flour
1 teaspoon baking soda
1 teaspoon salt
1/2 - 1 teaspoon cinnamon
1/4-1/2 teaspoon nutmeg (I never measure such spices when baking... so this is just a general guess of how much it was)

Directions

Note: I used a food processor for this to grind up the nuts, but it is easy to do by hand if you like more chunks. I would not use beaters, however, because over beating the flour will make the muffin texture more like pucks and less like light fluffy muffins.

1. Mash the bananas and mix with lemon juice.
2. Add the nuts, eggs, butter, agave nectar, and vanilla. Mix until completely combined.
3. In a separate bowl, mix the dry ingredients until homogenous.
4. Add the dry to the wet in 3 or 4 stages, pulsing or mixing until just combined.
5. Preheat your oven to 350 degrees F
6. Grease a muffin pan or line with paper liners.
7. Dole out the batter evenly. The batter should be a little short of the top.
8. Bake in a hot oven 20-25 minutes, until a toothpick comes out clean.
9. Remove from pan when you can touch them (I have crazy baker hands that amaze friends and family with their ability to touch hot things) and finish cooling on a rack.

These muffins can be enjoyed as soon as they are cool enough to eat. Let leftovers cool to room temperature completely before placing them in an airtight container for keeping.

13 August 2009

Vegan Lemmmmmmmon Poppy Seed Muffins

From Aug. 2009 photos


The pre-Altered Plates version of these vegan lemon poppy seed muffins originates in Vegan Brunch. I made quite a few changes to the recipe to make it agave-nectar friendly. I also doubled the recipe because I made "Thank You" muffins for my supervisor at the Zimmerli Museum, and sesame seed (instead of poppy seed) muffins from the same batch for some friends who don't eat poppy seeds.

From Aug. 2009 photos


These muffins definitely improve over time. I had one just after they had cooled enough to split open and try, and immediately had doubts about whether to give them to anyone. So, my advice to you: Let these cool completely and don't cover or refrigerate them overnight. The magic that happens is amazing.

I'm also not sure I'd use AP flour again. When I use whole wheat pastry flour in my baking recipes, they tend to turn out better. I'm not sure why, but they just do. Next time, I'm also going to make these with dried cranberries and pistachios instead of lemon and poppy seeds. I'd bet they would be great.

Here's the recipe as I made it.

Lemon Poppy Seed Muffins

Yields 12 large muffins and 24 mini muffins

Ingredients:

4 cups all-purpose flour
2 tablespoons baking powder
1 teaspoon salt
1 1/4 cup unsweetened vanilla almond milk (feel free to use whatever suits you here)
scant 1/2 cup freshly squeezed lemon juice
3/4 cup canola oil
1 cup agave nectar
4 tablespoons lemon zest
4 teaspoons vanilla
4 tablespoons each of poppy seed and sesame seeds, separated

Directions:

1. Line your muffin pans with paper liners.
2. Combine the flour, baking powder and salt in a large bowl.
3. Whisk together the almond milk, lemon juice, canola oil, agave nectar, lemon zest, and vanilla until very well combined.
4. Mix the wet with the dry ingredients for 1 minute, maximum, until just combined.
5. Split the mix in two parts, and add the poppy seeds to one half and the sesame seeds to the other. Just fold the seeds in, and don't mix a lot.
6. Begin preheating your oven to 350 degrees F.
7. Using a medium scoop, fill your large muffin cups to the edge of the paper. Using a small scoop, do the same with the mini muffins.
8. Bake the muffins 10 minutes for the minis and 20 minutes for the large muffins, or until a tester comes out clean.
9. Let the muffins cool for 5 minutes in the pans before releasing them onto wire racks to cool completely. Very important: Do not cover or wrap these for at least 12 hours. It will make a huge difference in the outcome of the muffins. Trust me on this.

Enjoy!

07 August 2009

Travelogue: Salt Lake City and Park City on Here and There

If you happened to be interested in the rest of my trip to Salt Lake City, please feel free to visit my other blog, Here and There for the complete travelogue. Otherwise, next week, I'll be back to baking as usual. Enjoy the weekend!

04 August 2009

Altered Plates On Location: Salt Lake City, Utah

From Salt Lake City July 2009


Este Pizzeria in downtown Salt Lake City is a very busy spot at 12:30 pm on a weekday. It was even busier than usual on the day Connie (my mom-in-law) and I went. It was a heck of a day, in fact. But I'll get to that later. You did come here for the food.

Above are little puffs of fried dough called zeppoles that are normally sprinkled with granulated sugar and cinnamon. I got gypped on the cinnamon when I asked for no sugar, but the cool thing was that the zeppoles come with a little container of agave nectar in which to dip them. When I say little, I mean this:

From Salt Lake City July 2009


Just a few milliliters, but it turned out to be just enough for the whole box. The box, by the way isn't styrofoam, it's some biodegradable corn container. So was the water cup.

From Salt Lake City July 2009


OK, back to the food.

From Salt Lake City July 2009


These tiny doughnut bites were yummy. I'm sure they would have been a bit crisper and not as chewy if we hadn't such a long walk back to the car and the wee drive to Connie's office. But, we were running out of time on the meter and needed to move the car.

Being able to have another option besides sugar for a dippable dessert is wonderful. And, Este pizza isn't bad either. Well, let me clarify that. For SLC, the pizza is great. Tastes a lot like East Coast pizza. For New Jersey or New York pie, it's pretty average.

Are you still curious about the heck of a day we had? Well, you asked for it. Connie and I saw two people get hit by a train! But, before that happened, we witnessed (in separate instances) a pretty large, and strangely quiet protest at the courthouse.

First, on my way to the main branch of the Salt Lake City Library (I will be blogging about that at length -- as well as much more of the trip -- on Here and There later), Connie called me to say that there was a big gathering of Fundamentalist LDS (read: Mormon for LDS) protesters gathered in front of the City and County Building, and that I shouldn't miss the opportunity to see such a thing. I wasn't sure what this meant until I drove past the building and saw what appeared to be costumed women with poofy hair and men in long-sleeved shirts (in 90 degree F sun) and jeans milling about under the trees and by the steps of the courthouse.

From Salt Lake City July 2009


There were probably around 500 folks (although the paper said there were at least 1000 -- they exaggerated) quietly waiting for news inside the historic building. I did what I always do in these situations, and told the the friendly police bikers that I was a visitor from New Jersey and was curious about what was going on.

From Salt Lake City July 2009


The kind officer on the left told me that the fuss was about a land dispute. He also recommended going to see the cannons fire in Park City that Saturday night during the 1812 Overture. Moving on...

After leaving the protest (mind you, they didn't quite resolve the dispute after all.), I went to the library. I won't blog about the wonderful and gorgeous library here (because that's what Here and There is for), but what I will tell you is important to the rest of the story.

In the atrium of the library is the library store. I know! I'd never heard of a library store before. Next to the library store is a lovely little plant and fancy bits store where I bought my step-father Dave a great gift for his upcoming birthday in September. I can't say what it is because he just might read this.

Connie met me in the atrium and we walked to my rental car to put the gift in the trunk before hoofing it to Este for pizza and agave nectar zeppoles. On our way back from the car, just about to the library, we heard a huge commotion by the Trax station. Trax is the city train that runs along the streets, kind of like the trolleys of San Francisco. People were shouting "Walk! Run!" and some other things that didn't sound good at all. As we approached the Trax station (which looks just like a bus stop, with a plexiglas enclosure), things did not look good at all.

From Salt Lake City July 2009


I know, it was creepy of me to have taken a photo, but I was there before the reporters around the corner at the courthouse came over, so I snapped one. Just one. Turns out, there were two boys (although Connie saw a third running from the scene) slugging it out by the stop, and they ended up in front of the train as it came to a stop. One boy was bumped by the train, and the other was run over. When we had walked up to the front of the library (directly across the street from where the accident happened), someone was taking off his shirt in order to get under the train to pull out the second boy. And, when I say "boy," I should really say "man," because the paper said they were two 20-year-old-men. Seems people get hit by these trains all the time. Just two weeks earlier, a 50-something-year-old man was hit and was in critical condition as a result. These two young guys were pretty cut up, but hardly in critical condition.

The weirdest thing was that three separate people, on three separate occasions during our walk from the car to Estes and back, felt compelled to tell us what had happened, what we, in fact, had witnessed. I'd never experienced that before, nor had Connie nor I felt compelled to share with a stranger what we had seen. On the other hand, we did feel compelled to tell John's sister and Connie's other co-workers the moment we walked into her building.

Anyway, it was a heck of a day -- all before lunch!

26 July 2009

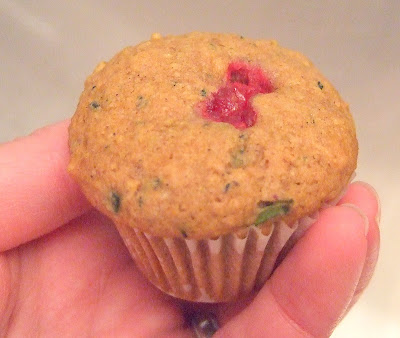
Re-run: Veganized Cranberry-Zucchini Muffins

This isn't my usual M.O., but due to our impending voyage to Utah, here's a re-run of one of my favorite recipes (originally published here during Making Over Martha Month, on Sept. 7, 2008:

From Making Over Martha


As you may know, during the month of September, I am making over a selection of Martha Stewart's recipes to make them suitable for Altered Plates (my dietary restrictions). This lovely recipe comes from her legendary Baking Handbook. It's one of my favorite cookbooks for a number of reasons:

1. Loads of photos.
2. Great tips and advice.
3. Well-tested (and flexible) recipes.
4. Classic as well as uncommon recipes.

Martha's original recipe for Cranberry-Zucchini Muffins is not vegan, however it didn't take much to rework it to make it super-healthy and vegan. The resulting agave-sweetened muffin is excellent. I received high marks from friends who tried these today, just one day after baking. Right out of the oven (OK, about 20 minutes out of the oven), I couldn't resist trying one since they smelled and looked divine. I was not disappointed.

From Making Over Martha


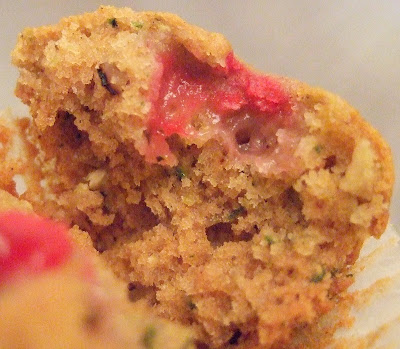
I could see plenty of green flecks from the fresh, organic zucchini as well as the oozing cranberries that had burst while baking. I could definitely taste the vanilla and nutmeg, while the tangy cranberries and rich, crunchy walnuts made these muffins worth munching.

You really can't ask for a more tender crumb. I'm going to blame it on the olive oil (which you can't taste at all in these, as well as the whole wheat pastry flour). Overall, I'd probably give these an A for sneaky healthiness in a truly tasty muffin.

I made a few changes not only to the ingredients, but also to the instructions. Please bear in mind that I doubled the recipe because I had to feed a room full of friendly faces. So here is my version.

Cranberry-Zucchini Muffins
(based somewhat loosely on Martha Stewart's recipe in her Baking Handbook).

Makes 42 mini muffins and 12 regular-sized muffins.

Ingredients:

3 1/2 cups whole wheat pastry flour
2 teaspoons baking powder
2 teaspoons baking soda
1 teaspoon cinnamon
1 teaspoon nutmeg
1/2 teaspoon salt
1 cup chopped walnuts
1 1/3 cups agave nectar
3/4 cup olive oil
1 teaspoon vanilla
2 cups grated zucchini (I used 2 1/2 small ones)
1 cup frozen whole cranberries

Directions:

1. Line all your muffin pans with nice paper liners.
2. Preheat oven to 325 degrees F. If you're just making large muffins, set your oven to 345 degrees F. The mini muffins take much less time to bake, so the lower temperature helps prevent burning.
3. Sift together dry ingredients (except walnuts) into a large bowl with a lip or a very large measuring cup.
4. Fold in the walnuts making sure to mix them in well. They also help to better distribute all the dry ingredients.
5. In a separate, large bowl, mix together the agave nectar, olive oil, and vanilla until well blended.
6. With a big spoon or silicone spatula, mix in the zucchini.
7. Add the dry ingredients, mixing until just blended.
8. Fold in the cranberries for about a minute.
9. Using a small cookie scoop, scoop out even amounts into your prepped mini muffin pans. Use a regular ice cream scoop for the large muffin pans. Your muffins will rise a bit, so make sure not to over-fill the cups. You're looking for about 3/4 full.
10. Bake for 20 minutes, then rotate the pans and bake another 20 minutes, or until a bamboo tester comes out clean.
11. Let the muffins rest in their pans for 10 minutes, no more. Then remove them from the pans to cool completely on wire racks.
12. Break 'em open and enjoy!

19 July 2009

Book Review: The 30-Minute Vegan


Yay! Another great resource for vegans, vegetarians, and the folks who love them. Usually 30-minute recipe books tend to be on the slim side, but The 30-Minute Vegan by Mark Reinfeld and Jennifer Murray is a hefty volume, packed with a wide range of recipes that don't require a lot of special ingredients that vegans will find tough to locate in their local health food store. While there aren't that many desserts included in the book, I was able to select a very tasty one to try out for you using agave nectar here on Altered Plates.

From July_2009_Photos


For my trial recipe, I selected Macadamia Nut-Chocolate Chip Cookies (although I made mine into carob chip cookies). They are a snap to make, and I could easily substitute agave nectar for the maple syrup (although I'm sure they would be just as good with the syrup). Because I used agave nectar, I had to drop the temperature down to 325 degrees F, and that increased the baking time by a few minutes.

Even though they look a little on the light side, trust me, these cookies are done. I tried one about 20 minutes after they had finished cooling and was very pleased with the result. The carob chips make a nice foil for the sweet cookie and rich macadamias. They don't spread, so you can easily make nearly 40 cookies using a tablespoon scoop on three cookie sheets (just stagger your rows). Overall, they remind me of what great chocolate chip cookies should taste like without the 1/2 pound of butter, brown sugar, and bendable chewiness. Best of all, they were a hit with the folks at the museum, when I brought in a bag of them yesterday.

I'm not sure I'd be able to make these in 30 minutes, even if I wasn't trying out the recipe for the first time, but they definitely can be done and on your cooling racks in under an hour. Getting all the ingredients together and preparing the cookies took longer than 15 minutes (chopping the nuts, measuring, etc.), and I just don't like rushing when I'm baking. That's when things tend to go wrong for me. Terribly wrong.

However, most of the recipes in the book are for beverages, meals, and snacks that are very time-friendly. I'm looking forward to making my way through all the recipes that I've already tagged with post-it tags.

And now, here's the recipe. Excerpted from the book The 30-Minute Vegan by Mark Reinfeld and Jennifer Murray published by Da Capo Lifelong, a member of the Perseus Books Group. Copyright © 2009. www.dacapopresscookbooks.com

My changes are in bold.

Macadamia Nut-Chocolate (Carob) Chip Cookies

Makes 24 3-in. cookies (My yield was 38, from tablespoon-sized scoops)

Ingredients:

1 3/4 cups whole spelt flour (whole wheat pastry flour)
1/4 cup tapioca flour
3/4 teaspoon baking soda
1/2 teaspoon sea salt
1/8 teaspoon ground cinnamon
3/4 cup rolled oats
1 cup chopped macadamia nuts (mine were salted and roasted)
1 cup vegan chocolate (carob) chips
2/3 cup pure maple syrup (agave nectar)
2/3 cup safflower oil (canola oil, although I'm sure a light olive oil would be fine as well)
2 tablespoons water
1 teaspoon vanilla

Directions:

1. Preheat the oven to 350 degrees F. (OK, my oven does not take much time to preheat at all, so I actually don't do this until I begin scooping out the cookies. And, most importantly, my oven is set to 325 degrees F.) Sift the spelt flour, tapioca flour, basking soda, salt, and cinnamon through a fine-mesh strainer or sifter. (I didn't do this; I just whisked my dry ingredients together very well.) Whisk well and add the oats, macadamia nuts, and chocolate chips, stirring again.
2. In a 2 cup measuring cup, combine the maple syrup, safflower oil, water, and vanilla, and whisk together. Add to the flour mixture and stir well.
3. If you aren't using a nonstick cookie sheet or baking tray, you will have to lightly oil the tray or lay down aluminum foil (neither, in my case, I'm a big fan of parchment paper, so I used it). Use a spoon to scoop out your preferred size of cookie, leaving enough space in between them to allow the hot air to circulate and the cookie to spread out (at least 2 inches). It will take at least two trays. Bake them for 10 minutes (mine took about 13), until the bottom edges start to brown; do not over bake. Allow them to cool for a few minutes and transfer to a wire rack.

11 July 2009

Kitchen Project: After Photos

Remember all that stuff about the kitchen, well, here are the "after" photos:
Here and There.

I didn't include everything, like John's custom spice cabinet, but at this point, it's a period at the end of a very long paragraph. Just thought you might want to see.

Cobbleriffic -- Vegan Blueberry Apricot Cobbler

From July_2009_Photos


Oh my friends, if you're a fan of blueberries, you must make this cobbler for yourselves. I was inspired (as always) by Elise's Apricot Berry Cobbler, but wanted to veganize it to bring down the fat and make it healthier. I made a lot of changes from the flour to using apple cider vinegar and almond milk instead of buttermilk, so it's now an entirely different recipe.

From July_2009_Photos


This is the most luscious and rich-tasting cobbler you will ever taste (not tooting my own horn, folks -- it was a big surprise to me too). Because I added almond meal to the whole wheat pastry flour, the cobbler topping became cookie/pie crust-like, and less biscuit-like (which was the best part of the surprise). I also wasn't sure if the olive oil would work instead of the butter, but it has now become my fat champion for its performance here. That would be an excellent slogan: "Olive Oil, My Fat Champion."

From July_2009_Photos


The filling is a good mix between quartered apricots and blueberries, but I'd bet anything that it would work just as well with raspberries, strawberries and peaches. In fact, I'd venture a guess that cranberries and apples would be winners as well. And, as always, I used agave nectar for the sweetener in the topping as well as the filling, but added a bit more flour to the filling to thicken it up.

As you can see from the photo above, the filling gets very pie-like. It is a dream to scoop up when serving, keeping together very nicely. You might want to keep some vanilla frozen dessert or topping handy. It makes a nice foil for all that blueberry, although I enjoyed it thoroughly with just a cup of my favorite herbal tea.

Finally, before I launch into the recipe, I wanted to share with you a bit of food chemistry fun. If you've been veganizing recipes for a while, you probably already know this, but you can make vegan buttermilk by adding apple cider vinegar to non-dairy milk to get the same effect. Not only does it tenderize dough, it gives it nice rise.

Just an ingredient/direction note -- when I write a recipe, the ingredients are listed in the order in which they are used. It's a pet peeve of mine when folks don't do that, and then I have to scramble to make sense of a recipe. So, if the list below looks a little weird, that's why. It's for your own good. :)

Ok, here's what you've been waiting for...

Vegan Blueberry Apricot Cobbler (inspired by Elise's Apricot Berry Cobbler)

Yields 12 servings (or 10 large servings)

Ingredients

5 cups fresh apricots, pre-pitted and sliced
4 cups fresh blueberries
2/3 cup agave nectar
Pinch of salt
3 tablespoons whole wheat pastry flour
1 tablespoon apple cider vinegar
2/3 cup non-dairy milk (I used vanilla unsweetened almond milk for mine)
1/2 cup almond meal
1 1/2 cup whole wheat pastry flour
2 teaspoons baking powder
1/2 teaspoon baking soda
1/2 teaspoon salt
1/4 teaspoon freshly ground nutmeg (makes all the difference)
1/2 teaspoon Pensey's baking spice (or cinnamon, if you don't have it, but you might want to consider ordering some because it's really great stuff, and they don't pay me to say that)
3 tablespoons agave nectar
1/2 teaspoon vanilla
1/4 cup + 2 tablespoons good, fruity olive oil (or experiment with another good oil you enjoy)

Directions

1. Lightly oil a glass 9x13x2 in. baking dish.
2. Gently mix together the fruit, agave nectar, whole wheat pastry flour, and pinch of salt in a large bowl and let rest.
3. In a large glass measuring cup, mix together the apple cider vinegar and non-dairy milk. Let this rest as well.
4. In a large bowl, mix together the almond meal, whole wheat pastry flour, baking powder, baking soda, salt, and the spices.
5. Retrieve the vinegar/milk mixture and whisk in the remaining agave nectar, vanilla, and olive oil. Give it at least a minute of whisking.
6. Pour the liquid ingredients over the dry mixture and combine until just mixed. Do not over-mix this because it won't create a nice topping if you do.
7. Give the fruit filling one more mix before pouring it into the prepared baking dish.
8. Take out your small scoop and scoop the topping on top of the filling. You'll probably need to spread it around a bit.
9. Preheat your oven to 325 degrees F while the topping rises. It won't rise a lot, but it will poof up a bit.
10. Bake the cobbler for 40 minutes, then check to see if it isn't getting too brown on top. You're looking for a nice golden brown. The filling should be good and bubbly.
11. Cool on a wire rack for about 20 minutes before serving. It's best warm, but just as good from the fridge 4 days later.

The cobbler will keep at room temperature for 3 days. After that, if there is any left, and my guess is that there won't be, keep it refrigerated until it's gone.

From July_2009_Photos

04 July 2009

Book Review: Vegan Brunch by Isa Chandra Moskowitz

From July_2009_Photos


These delicious and highly healthy pumpkin bran muffins are an Altered Plates version of Isa's Pumpkin Bran Muffins on page 167 of Vegan Brunch. I made 12 large and 12 mini muffins in my version of her recipe, and will undoubtably make them again with other fun modifications.

First, let me tell you a bit about the book. The photos are lovely, and there are many of them. The layout is very effective in that you don't often need to turn pages during a recipe (one of my major pet peeves in cookbooks). And, most importantly, the recipes are fantastic.

You must get this to add to your collection, even if you aren't vegan (which I'm not anymore, but eat veganly most days anyway). The recipes are easy to make for the most part, and like her other books, don't require a lot of hard-to-find or expensive ingredients.

And, if you are like me and have to noodle around with recipes because you have dietary restrictions, be comforted by the fact that her recipes (as in in her previous books) are so flexible that you can tune them quite easily without losing the integrity of the recipe.

From July_2009_Photos


That said, here's the recipe as I made it a few weeks ago (prior to the big fall).

Pumpkin Bran Muffins (greatly inspired by Isa's Pumpkin Bran Muffins on page 167 of Vegan Brunch.

Ingredients:

1 cup pumpkin puree
1/2 cup vanilla flavored, unsweetened non-dairy milk (I used almond)
1 teaspoon apple cider vinegar
1/2 cup canola oil
2/3 cup agave nectar
2 teaspoons vanilla extract
1 cup wheat bran flakes (you could also use oat bran, and I will next time)
1 1/4 cup whole wheat pastry flour
2 tablespoons coconut flour, sifted
1 tablespoon baking powder
1/2 teaspoon salt
3 teaspoons pumpkin pie spice (I used Pensey's)
1 cup chopped walnuts
1/2 cup raisins
1/4 to 1/2 cup pepitas or shelled pumpkin seeds (depending upon how you decorate)

Directions:

1. In a large bowl, mix all the wet ingredients together until well blended.
2. Add the bran flakes and mix until well blended.
3. In a medium bowl, mix together all the dry ingredients except the walnuts, raisins, and seeds.
4. Fold the dry ingredients into the wet ingredients and mix by hand for about 30 seconds.
5. Gently fold in the nuts, raisins, and seeds, then mix for another 30 seconds. Let the mixture rest.
6. Preheat your oven to 350 degrees F. and line 1 standard muffin pan with cupcake cups, and 1 mini muffin pan with mini cupcake cups.
7. Use a standard ice cream scoop to scoop out 12 servings into the lined standard pan, and a mini scoop to scoop out 12 mini servings into the mini muffin pan. Place in the heated oven on different levels.
8. Bake for 12 minutes before turning each pan 180 degrees and switching levels. Bake for another 10 minutes before testing with a bamboo skewer for doneness. When only a few moist crumbs stick to the skewer, take them out of the oven.
9. Let them cool in the pans for 5 minutes before transferring the muffins to wire racks to cool completely.
10. Enjoy!

These will keep for about a week in an airtight container. Since it's been hot out, I've kept mine in the fridge.

01 July 2009

Crutching Around

Just thought I'd stop in and give you fine folks an update on how things are. Also, I'd like to formally thank everyone for their kind thoughts and wishes. You people are just lovely.

Yesterday, I finally went back into the non-doctor-visit world and made my way to the museum for the internship. My supervisor and all the folks in the Registrar's office were super-helpful and very understanding. They even set me up at a low table so I could stay off my feet and handle the smaller artworks at the same time. So far, I've been focusing on condition reporting, but when I'm up and about, I'll be packing these pieces up to send to the N.J. Historical Society.

I felt very badly because I had promised to bring in some vegan muffins for the folks at the Zimmerli, but was injured before I had the chance. Well, as Isa Chandra Moskowitz is my witness, they will get their muffins as soon as I'm able.

Everything at the internship went well until someone made a space out of the non-space next to the handicapped spot where had I parked (with my temp. handicapped permit, courtesy of Franklin Township and the foot doc). The guilty party did not have handicapped parking permits nor a handicapped license plate, and had parked so close to me that I had to walk on my injured foot to squeeze into my car. I should have left an angry note.

All that to say, one inconsiderate person out of many, many truly kind and thoughtful people isn't bad odds at all. When I say many, I mean the professors, students, and museum personnel who have gone way out of their way to help me get through doors, carry my back pack, and generally keep me company while I crutch my way along. Not to mention my dear Art Librarianship professor who sent me a very artistic "Get Well Soon" card.

In the meantime, I have two more new cookbooks to review (one I made a recipe from prior to the sidewalk swallowing my foot, so that will be coming soon, I promise!) and a stack of fiction to review for Amazon Vine (free books, friends, free books -- just review like mad on Amazon and they'll ask you to participate).

I'm still very sore and can't be on my left foot for long just yet (perhaps next week), but I'm trying to heal up because we're going out to visit John's parents in Utah at the end of this month. If you ever plan to get out to Utah, you must use this guide I saw last night. There's even a pizza joint that sells zeppoles with agave nectar!

Well, my friends, stay tuned for a review of Isa's new book, Vegan Brunch.

21 June 2009

Off My Feet AGAIN!

Remember last year when I had the foot surgery and couldn't do anything for a while? Well, I'm off my feet again due to a gigantic pothole (read: missing sidewalk piece) in front of the Metropolitan Museum in NY.

A classmate, my Art Librarianship professor (who is my absolute favorite professor ever -- the most fascinating class), and I were leaving the museum on our way to Penn Station when, not looking at the sidewalk, I fell into the hole and broke my foot.

At the time, I didn't know it was broken, but it hurt very badly as I limped along. Prof. asked if I wanted to go to the emergency room, but I said no, I'd just head home and ask John to drive me to my friend Lon, the doctor. It was a three-hour office visit (!), but they have an x-ray machine there, so we were able to see where the bone had chipped. Thankfully, it's not a big chip at all and doesn't require surgery. It just hurts a lot and, when I'm not in bed or on the sofa with my air-casted leg iced up and elevated, I'm crutching around like a bull in a china shop.

I will go visit the doc who did the surgery last year, at Lon's recommendation, since he may have some special suggestions about how best to handle (or not) things. Fun!

All that to say, it might be even longer than I thought before I'm back standing on my feet all day baking. Great.

However, I do have an update in the hopper for after the semester ends. I just wanted to give you fine folks a quick update and let you know I haven't forgotten you at all.

If it's not one thing, it's another. Oh well.

08 June 2009

Book Review: Vegan Soul Kitchen

From May 2009 photos


Every time I read the title of Bryant Terry's recently released Vegan Soul Kitchen, it makes me think of that Doors song.

There are some very nicely written and very well tested recipes in this collection. I especially enjoyed the one shown above, Candied Sweet Potato Discs and Apple Slices. Unfortunately, the publisher hasn't released permission for me to reprint the recipe, so I cannot share it with you word for word.

However, I can tell you that it's very easily done with a small quantity of good sweet potatoes (or yams, for that matter), your favorite apples, cinnamon, nutmeg, agave nectar, vanilla, lemon juice, orange juice (I used pineapple juice and would definitely recommend it), apple juice and a smidgen of salt.

The trick to it is to roast the sweet potatoes first until they are fork tender, then add the rest of the ingredients as written in the book, and bake for another 2/3 of an hour, basting every 10 minutes. So, if you're cooking something else, or are handy with a kitchen timer, you won't mind the every-10-minutes sauce bath for these babies.

The extra-special treatment is worth it. The potatoes end up tasting like candy. And, because I used granny smith apples, I had a very nice, tart foil for the very sweet potatoes.

After I'd tried these the first time, I decided then and there that I've found my new Thanksgiving dish to bring to Mom's. Yes, I know, I've said that before.

I think I'd also probably try this with alternate vegetables and dried fruits, like parsnips, carrots, and dried cranberries. There are a myriad of ways to use Terry's sauce to candy veggies and fruit.

Just a quick note on regularity, speaking of fruit. No, I'm not going there. What I do need to share with you is that my life is becoming increasingly complex for the next four weeks as I begin my internship at the Zimmerli Art Museum while I continue with two classes at Rutgers. So, I'll need to take a short hiatus from blogging here and at Here and There while I manage my new workload, papers, and household stuff. I expect to be back at it by early July, if not sooner, with lots of yummy new recipes.

One last thing, one of the summer courses I'm taking is called Art Librarianship. It's the best class I've ever taken. Ever. It's given by a fascinating professor, Paul Glassman, who only gives the class during the summers at Rutgers. We've had excellent guest speakers, including the special collections librarian from the Alexander Library at Rutgers. I've contacted him to ask about independent study opportunities and he promptly responded with some really interesting projects working with artists' books for the fall. I can't wait!

Wish me luck!

01 June 2009

Book Review: Ani's Raw Food Desserts

From June 2009 photos


Is that food porny enough for you? You're practically inside this luscious, tropically flavored, raw, vegan dessert fresh from the pages of Ani's Raw Food Desserts. Her Pineapple Icebox Dessert is like a vegan pineapple cheese cake, but way better because the cream is made from cashews, agave nectar, and coconut oil. It's definitely the best cold, non-ice cream dessert I've had in a year.

It's just in time for summer and a perfect bring-along for a party. Although you'll need to pack it in lots of cold packs or ice inside a cooler because this really needs to be kept cold (otherwise it starts losing cohesiveness).

From June 2009 photos


An important thing to remember about this tasty raw dish is that you can serve small portions of it and still be the hit of the party. The Pineapple Icebox Dessert is rich from all the cashews and coconut oil, but the pineapple cuts right through it. While my friend John Leary and I dined on this delectable dessert, I thought aloud about making it with strawberries instead of pineapple. I'm sure it would be equally fantastic.

Just a note about the topping and crust -- I didn't think there was enough, especially in proportion to the pineapple cream. In the future, I'd make more of that and less of the cream. (Although I did double the recipe and put it into a large container rather than the loaf pan she recommends.)

My review comes after the recipe below.

From the book Ani’s Raw Food Desserts by Ani Phyo. Excerpted by arrangement with Da Capo Lifelong, a member of the Perseus Books Group. Copyright © 2009. Find out more at www.dacapopresscookbooks.com.

Pineapple Icebox Dessert

Ingredients:

Crust:
2 cups cashews
Seeds from 1 vanilla bean or 1 tablespoon alcohol-free vanilla extract
2 tablespoons agave syrup

Filling:
1 1/2 cups cashews
1/3 cup agave syrup
1/4 cup liquid coconut oil
1/4 cup filtered water, as needed
2 1/2 cups chopped cored pineapple

Directions:
(In her format, not my usual numbered steps.)

To make the crust, combine the cashews and vanilla in the food processor and chop to a crushed wafer texture. Add the agave syrup and process to mix well. Sprinkle half of the crust onto the bottom of a loaf pan.

To make the filling, combine the cashews, agave syrup, and coconut oil in the high-speed blender and blend until smooth, adding water as needed to create a creamy texture. Spoon the mixture into a mixing bowl, add the pineapple, and stir to mix well. Spoon the filling into the loaf pan and sprinkle the remaining crust on top. Pat lightly. Freeze for 2 hours or until chilled.

Will keep for 4 to 6 days in the fridge or for several weeks in the freezer.

The Review

The minute I saw Ani's book, I felt that there was something familiar about it. It reminded me so much of Vegan Cupcakes Take Over the World that I had to do a side-by-side comparison. The two books are so similar that I looked to see if it was the same designer (it wasn't). Was Ani enamored by Isa and Terry's little book that could? Did they talk to each other about it, I wondered out loud. John (my John, not Leary above) wondered about the legal implications.

I'm sure there's nothing nefarious about this lovely, little raw cookbook. It just greatly resembles VCTOTW in format and style. I just have to be careful about where I put this on the shelf -- especially when I'm looking to make cupcakes.

As far as the recipes go, many are very easily made and look fantastic. I'm going to try carob-ing up the Lavender Chocolate Bars because the photos are drool-worthy.

Overall, if you are in the habit of trying new desserts or want to further your foray into the raw food world, this is definitely the dessert cookbook for you. There are plenty of photos and loads of tips, so you won't get lost at all.