21 October 2007

Cherry Lime Bread


I've made a few of Nic's great recipes before, but this one is probably my new favorite of her baked stylings. I made a few alterations to her original recipe beyond substituting agave nectar for sugar. But, like her experience, this quick bread far exceeded my expectations (and those of a few friends who served as tasters for this recipe).

Zesting the limes was fun. The kitchen smelled fresh, and I had the opportunity to use my favorite tools (my Global utility knife and my Microplane grater).


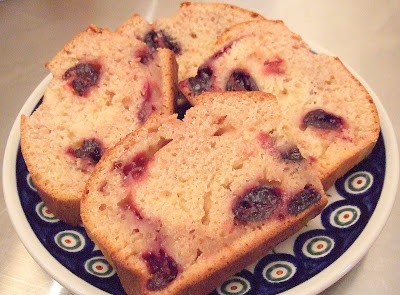
Interestingly, the frozen cherries were hard for the tasters to discern as cherries. However, the recipe proved flexible enough to use different fruits, so I might just try it with peaches next time. This soft, tasty bread is excellent alone or spread with whipped cream cheese (I enjoy Temptee).

Here's the recipe as I made it:

Ingredients:

1 cup all-purpose flour
1 cup white whole wheat flour
1/2 teaspoon baking soda
1/2 teaspoon baking powder
1/2 teaspoon salt
1/2 cup freshly squeezed lime juice
1 cup agave nectar
1 1/2 tablespoon lime zest
2 tablespoons melted butter
1 large egg, beaten
1 cup frozen cherries

Directions:

1. Preheat oven to 325 and butter a 9 x 5 in. loaf pan.
2. Mix together the dry ingredients in a medium bowl.
3. Mix together the wet ingredients in a large bowl.
4. Mix the dry ingredients into the wet ingredients until just blended.


5. Fold in the cherries.


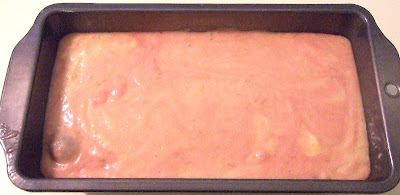
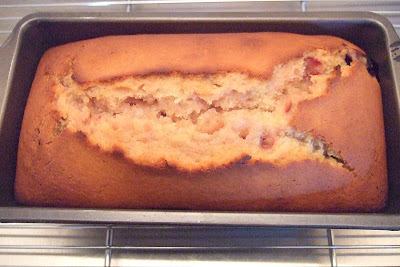
6. Pour the batter into the loaf pan and bake for 40-45 minutes, covered with foil for the first 20 minutes.


A toothpick inserted into the center should come out clean when it's done. It should be golden brown (not quite as brown as the one below).


7. Cool on a rack for 10 minutes, then turn out onto a wire rack to cool completely before serving.


By the way, this quick bread also makes a great host/hostess gift, especially if you're spending the night. Bring along some spreads, and you'll be the life of the party!

14 October 2007

Pistachio Apple Peach Pie


Since apples are very much in season here, I've been making pies. More importantly, I've been experimenting in fun ways with the pies.

Typically, I'll use my agave variation of Elise's All-Butter Crust. While I did keep the recipe handy this time, I took a big departure with the recipe, using pistachio nuts for the almonds and splitting the flour three ways between white whole wheat, all-purpose, and coconut. The result was one truly tasty, cookie crust.

The key, I think, was using really good pistachios (from Trader Joe's).


These were roasted and lightly salted, so I used unsalted butter in the crust, but still had the nice, sweet/salty flavor profile.


The dough itself was tougher to roll out, so I wound up pressing it into the pie dish, then adding a bit more ap flour when making the apple cut-outs for the top.

For the filling, I used 3 lbs of gala apples, 1/2 lb of Trader Joe's dried peaches,


4 teaspoons of corn starch, 2 tablespoons of agave nectar, a variety of spices, and the juice of one lemon.


To make the peaches usable, I chopped them in the food processor, then rehydrated them with boiling water. I mixed the soaked peaches and the other ingredients with the apples until they were well coated.


Then, I filled the pie shell and covered the filling with tiny apple cut-outs to form the top crust.


I lightly glazed the pie crust with Elise's recommended cream and egg yolk glaze, then baked it until it was lightly browned.


The pie was gone in seconds when I brought it to my friends' gathering. My friend Monika said I have to make that one again soon. I told her that I try not to repeat recipes often, but I'll think about it.

12 October 2007

Weight Loss Progress Update -- Big Milestone

Back in August, I shared with you the progress I've made in my weight loss plan since I started it on 17 July. Since August, I've only lost another 5 lbs (and finally broken into the 130s after more than three years). But, I dropped 2 in. off my waist, 1 in. off my hips, 1 in. off my chest, and 1 in. off my thigh (I only measure the left one since I exercise both)! My guess is that I've built some muscle, which weighs more than fat.

Importantly, I've dropped my body fat percentage by 4 points, down to 32%. Body fat estimators (this one is done purely on measurements of the neck, waist, and hips, along with height) are not necessarily the way to go. But since I don't have a little digital estimator or one of those fancy labs, I have to use the U.S. Marine Corps Height and Circumference method.

All that progress is great, but I still have a long way to go -- 14 more lbs and 10 more body fat percentage points to lose. Dropping the inches is rewarding, though. Earlier this week, I wore clothes I haven't worn in more than a year. And they fit the way they should, not tightly!

So, I'm still keeping up with the exercise, but I haven't been as dedicated on the calorie counting. Back to it!

Another possible explanation for the size change is that I had more than my share of dental work in the past few weeks. Those visits to the dentist always put me on smaller portions and really soft food (read: non-fat yogurt, low-calorie soups, and pureed beans and squash). More than likely, that helped.

The end of the year is coming up quickly. Hope I can make my goal!

09 October 2007

Perfect Vanilla Creamy Goodness


David Lebovitz wasn't kidding when he called his book "The Perfect Scoop." I know I'm a bit late to the table with my review and recipe alteration, since he released the book earlier this year, but better tasty and late than never.

Reading David Lebovitz's gorgeous ice cream (and desserts, mix-ins, and more) cookbook, I was so happy to see that he included great little stories to go along with each recipe. He gives great tips and instructions in the beginning (after a very well-written introduction), so you'll be hard pressed to fail in your efforts to make your own perfect scoop. "The Perfect Scoop." makes for an excellent read even before going into the kitchen to try a recipe or two. It's a definite must-read for anyone with an ice cream maker.

For my first try at a David Lebovitz recipe, I thought John's favorite, Vanilla, would be a good choice. Since I was unsure how the agave nectar for sugar substitution would work out, I halved the recipe. It was definitely enough for multiple servings (especially when you add mix-ins).

Here's the recipe as I made it, with two substitutions (agave and half and half for heavy cream):

Vanilla Ice Cream (inspired by David Lebovitz's "The Perfect Scoop.")

Ingredients:

1/2 cup whole milk
A scant 1/2 cup agave nectar
1 cup half and half
Pinch of salt
1/2 vanilla bean split lengthwise
3 large egg yolks
1/2 teaspoon vanilla extract

Directions:

1. Warm the milk, agave nectar, 1/2 cup of the half and half and salt in a medium saucepan.
2. Scrape the seeds from the vanilla bean into the saucepan and add the bean.


3. Stir the mixture, turn off the heat and cover for 30 minutes.


4. Pour the remaining half and half into a bowl and set a strainer on top of the bowl.
5. Whisk the egg yolks in a separate bowl.


6. Slowly, whisk the vanilla mixture into the eggs. Do not stop whisking until it is all evenly incorporated.


7. Pour the warmed egg yolk/vanilla mixture back into the saucepan and turn the heat on medium. With a silicone spatula, stir the mixture constantly until it thickens and coats the back of your spatula.


8. After it thickens, take it off the heat and pour the mixture through the strainer, into the cream. You may need to stir it in the strainer to get all the custard through. Stir the mixture well.
9. Stir in the vanilla extract.
10. Place the bowl into an ice bath and stir until cool.


11. Chill the mixture in the refrigerator for up to 8 hours.
12. Freeze the mixture in your ice cream maker as directed by the manufacturer.


You could freeze it at this point, but I'd scoop out a serving first, then freeze the rest.

The agave nectar ensures that your ice cream will not become rock hard in the freezer. Depending on how sweet you like your ice cream, you may wish to use less.

Your final result should be wonderfully creamy, ultimately vanilla-tasting custardy ice cream. I enjoyed mine sprinkled with unsweetened carob chips. They make an excellent foil for the sweet cream.

04 October 2007

Not-Samoas

It's nice to be home after our vacation in Maine. Prior to our departure, I had made a batch of what I might call "Not-Samoas."

The primary reason for making drop cookies was to use a new utensil I recent bought:


The recipe comes from a vegan site, Where's the Revolution. However, I made only minimal changes, but had a very different resulting cookie. Please visit Bazu's site for the original recipe.

My alterations:

1. Used 1 1/2 cup white whole wheat and 1/2 cup whole wheat pastry flour.
2. Used unsweetened coconut.
3. Used 1/2 cup unsweetened carob chips in addition to the nuts.
4. Added 1/2 teaspoon vanilla.
5. Used 1 cup of agave nectar for the sweetener.
6. Used canola oil instead of coconut oil.
7. Baked the cookies at 325 degrees F.
8. With the scoop, my yield was 45, more than twice Bazu's. I'm guessing she meant tablespoons instead of "spoonfuls." But, I could be wrong.


My cookies did not spread at all. Hers spread quite a bit, she said. I baked mine for 6 minutes before turning the pan, then another 6 minutes.


Finally, they didn't taste like samoas at all to me. Just tasty, nutty, a-bit-on-the-hard-side oatmeal cookies. I followed the directions, careful not to overmix or over bake.


On the other hand, they were popular with my friends, who don't normally like carob. I might noodle around with this one a bit more.

19 September 2007

Of New Tools, New Year's, and New Locales


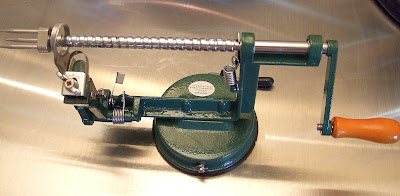
In honor of the Jewish New Year (late last week), I bought an apple, peeler, slicer device from Bed, Bath and Beyond. John and I receive those ubiquitous 10% and 20% coupon mailers nearly every week, and I was ready to take advantage of a deal. Normally, these things sell for about $30 elsewhere. However, this store has them for $19.99. I wound up getting mine for about $16.

The symbolism about eating apples and honey for the holiday is said to be tied to wishing people a sweet and healthy new year. Since I'm no longer a honey-eater, my holiday honey would be agave nectar.


I'd thought about bringing an apple pie to Mom's for dessert, but since John and I have been preparing daily for our road trip to Maine, we haven't had all that much time to do anything else. So, I searched for a very easy apple recipe. I found this one at epicurious. While it doesn't live up to it's name "Heavenly Apple Cake," it was enjoyed at Mom's nonetheless. Please refer to the original (linked above) when you make the alterations below.

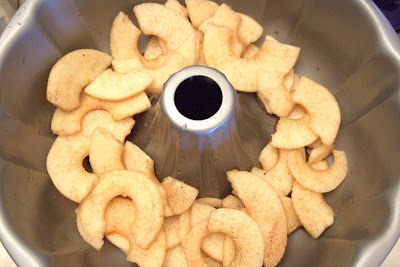
My alterations were pretty extensive, down to the style of cake itself. I turned it into a tri-layer, upside-down apple cake, hence the apples on the top. To make this again successfully, I'd probably just keep the top layer and mix the apples in with the batter to get a more even consistency. Layering them this way (in a Bundt pan, no less) led to gaps. I'm not sure I'd use a Bundt pan again either, and now understand why the original recipe called for a 9-inch springform pan. But I didn't feel like digging out my springform pan from the cabinet by the fridge. It's just one of those cabinets with too many items in it. You know how it is. In the next house...

Here are my changes to the original:

1. 2 cups of all-purpose flour and 1 cup of whole wheat instead of 3 cups of ap
2. Oat bran for the wheat germ
3. 4 large Braeburn apples for the 6 small Rome, Granny Smith or Yellow Delicious apples
4. 2/3 cup of canola oil for the 1 cup of vegetable oil
5. 1 2/3 cups of agave nectar for the 2 cups of sugar (next time, I'd use 2 whole cups, the cake could have been a little sweeter, even with the sweet apples)
6. 1/4 cup of pineapple juice for the 1/2 cup orange juice
7. Baked at 325 degrees F for 55 mins instead of at 350 degrees F for 1 1/4 hours. In fact, I'd probably bake it for five fewer minutes next time, just because it would make the cake moister yet.

Here's my process:

Peel,
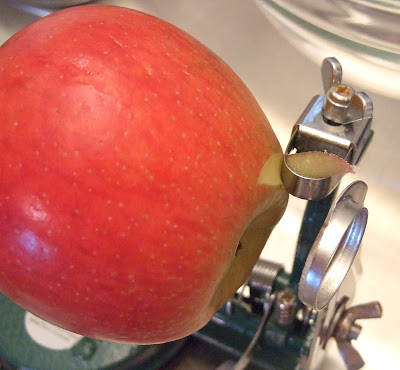


core,


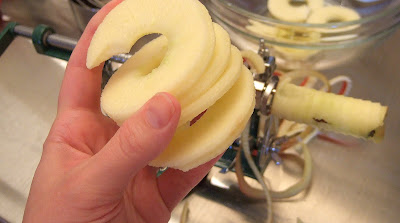
and slice the apples. (I'm so impressed with this simple device! It took just minutes to peel, core and slice 4 apples. Just wish I knew how to slice them thinner. If you have any tips on this, please post them in the comments.)


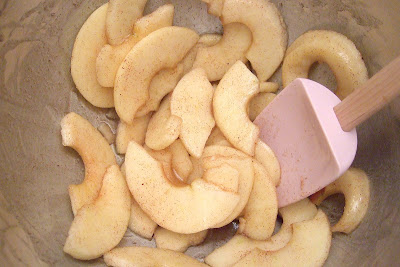
Sprinkle with lemon juice, mix well, then add 1/4 cup of the agave nectar and the sugar. Make sure that the apples are completely coated. Set aside.


Mix the dry ingredients.


In a separate bowl, beat the eggs until foamy.
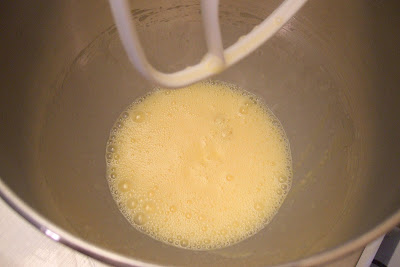


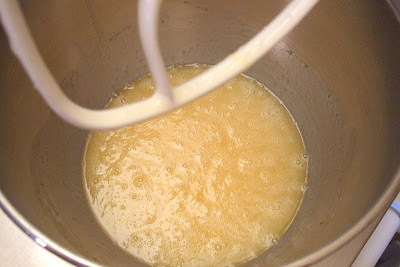
Add the oil, vanilla and the remaining agave nectar. Mix well.


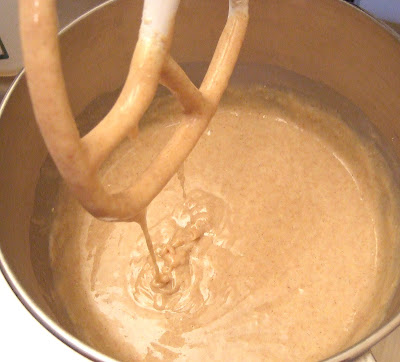
Add the dry mixture to the wet, alternating with the juice, until the batter is well blended.


In a prepared pan, place a layer of the apples.


Then, add the cake batter.
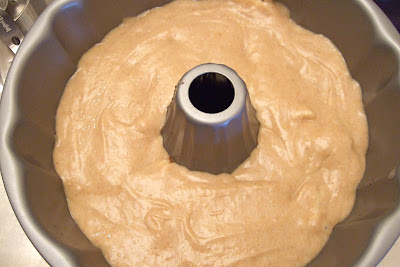


Then, another layer of apples.


Bake until golden brown and a wooden skewer comes out clean.
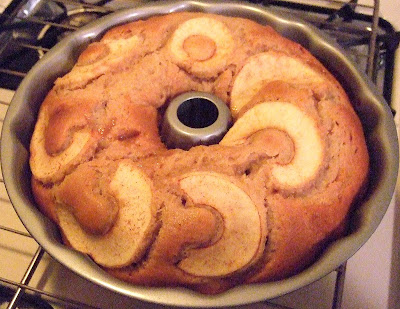


Let cool in the pan for at least an hour before turning the cake out onto a rack to cool completely.


The top should have a carmel-like quality to it around and on top of the apples. When the cake is cool, slice and serve. Oh, and enjoy!
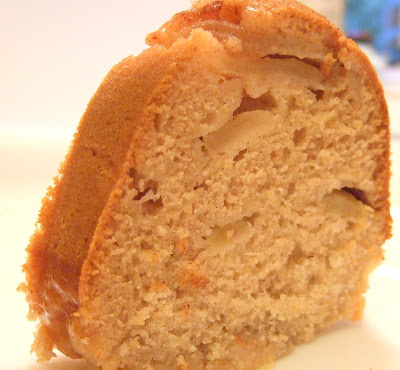


The cake has a very tender crumb, cinnamony flavor and delicious apple bits throughout. It's a great cake to bring to any party because it's light, healthy and tasty.

Just as an aside, no posts next week since we'll be in Maine, specifically on Mount Desert Island. Yes, it's a great name, but it's pronounced Mount "Dessert" Island. We've been there before, and had a lovely time. Here's our photo journal from our last trip (you'll have to scroll down just a tiny bit to get to the Maine part). I hope you'll enjoy it while I'm away.

Have a great week!

P.S. If you're keeping up with the weight loss story, I'm still losing -- 15 lbs total!

15 September 2007

Summitting My Own Everest


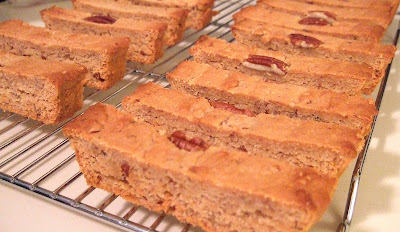
Yes, indeed, after much noodling with many recipes, I have conquered the Everest that is shortbread. If you're new to this blog, my main challenge is to alter recipes, specifically desert recipes, to fit within my dietary restrictions. Where this comes into play with shortbread is in the ingredients. Traditional shortbread does not contain any liquid ingredients (butter is still solid at room temperature, and sugar, while considered a liquid ingredient in the most technical sense, still behaves as a dry ingredient in terms of strict liquid/dry ratios).
So, how did I manage those gorgeous shortbread slices above? Well, I turned once again to one of my favorite cookbooks, Sundays at Moosewood Restaurant. If you've been here before, you might remember the Moosey Hamantaschen I altered. Given the success rate with Moosewood recipes, I thought I ought to give their "Halvah Shortbread" a try.

I grew up (for the most part) with my Dad. When my Mom would come to pick me up for a visit, sometimes we'd drive into Caldwell, NJ (not far from Dad's) to the local cheese shop for a treat. That treat was fresh halvah, a sesame treat made with honey and sometimes nuts. The shop owner would carve a thick slice from a giant wheel and pack it in stiff white paper before handing it to me for safekeeping until we could sit somewhere and enjoy it.

When I initially saw the recipe, I put it aside because it seemed like a winter treat. But the nights are growing chillier these days, and I had a hankering for some halvah.

I made quite a few substitutions and changes to get the recipe just right:

1. Cut the butter by 1/4.
2. Used 1 cup of agave nectar instead of 1 1/4 cups of brown sugar
3. Used 1 1/2 cups whole wheat pastry flour instead of 2 cups unbleached pastry flour.
4. Used 1/2 cup coconut flour.
5. Reduced the oven heat to 325 degrees F, and baked it for nearly an hour.
6. Used one tart pan instead of two pie plates, and made mine super-thick (hence the extended baking time).

Just a warning: These are very rich, yet not too buttery so they can become habit forming. The tahini gives the cookies an other-worldly flavor that people just can't put their fingers on when they try them without knowing it's the sesame paste. In short, I think they're heavenly.

When I brought these to a gathering last week, they were snapped up pretty quickly (even though I was late, and folks had already had other cookies). The highest compliment came from actions, not words. As soon as I'd placed the container with the other goodies and took my seat, a friend quickly rose to his feet and headed over for a taste before anyone else could grab a shortbread slice. I guess I'm getting a reputation from my baked goods.

Here's the recipe as I made it:

Ingredients:

1/2 cup butter, softened at room temperature
1/2 cup tahini (I strongly recommend Maranatha brand organic tahini. It's superb.)
pinch of salt
1 cup agave nectar
1 1/2 cups whole wheat pastry flour
1/2 cup coconut flour
1/2 cup toasted pecans, ground
1/4 cup pecan halves (for decorating)

Directions

1. Preheat the oven to 325 degrees F. Butter a tart pan.
2. Cream the butter with the tahini.
3. Mix in the salt and agave nectar until smooth.


4. Slowly add the flours until well incorporated.


5. Mix in the nuts. Your dough should be creamy, but very thick.
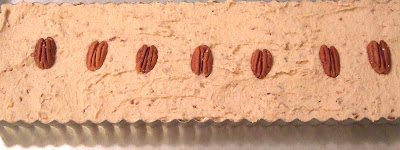
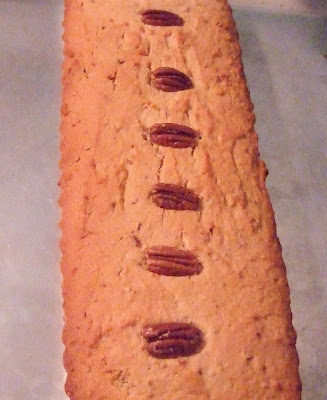
6. Spread the mixture into your prepared tart pan and decorate with the pecan halves.


6. Bake in the center of the oven for an hour, but check it every 15 minutes so that it doesn't become too brown.


7. When the edges begin to brown, use a piece of aluminum foil to cover the edges. An easy way to do this is to measure out a piece the size of your pan, fold it in half and cut out a center section an inch or two from the edge, so your middle section can brown in peace.


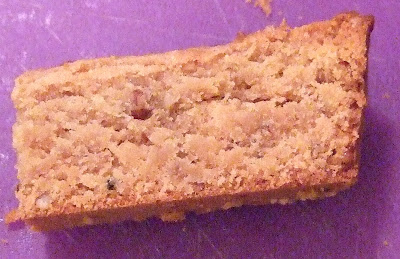
8. Let it cool in the pan for 20 minutes (it should still be pretty warm, if not hot), then remove it by putting a flat surface (like a cutting board) on top and upending the tart pan so that your flat surface is now on your counter and the pan is face down on top of it. Remove the pan and cut into 1/4 in. slices. Cool the slices on a rack.


9. And, for Pete's sake, try one while it's still warm!


These are now my favorite cookies. Let me know how yours turn out!