02 February 2011

Lidia's Onion-Tomato Focaccia

From February 2011

While I don't have permission to reprint the recipe here yet, I can certainly talk about the wonderful Onion-Tomato Focaccia shown in the photo above. Since I've been baking some pretty complex breads lately thanks to The Bread Bakers Apprentice and Peter Reinhart's Whole Grain Breads, I decided to give myself (and John) a break by giving the focaccia from Lidia's Italy a try.

From February 2011

It's an incredibly easy and quick recipe for something so tasty. Although, I did away with some of the olive oil since the bread was fairly swimming in it. I'd also try making it again using a mix of half bread and half all-purpose flour (the recipe is all AP) to be able to roll it out for pizza.

Because it takes twice the typical amount of yeast for regular breads, it rises like mad. The dough is lovely. Soft and stretchy with lots of nice, small holes. It's downright tender, yet nice and crunchy at the crust.

Here's the upskirt:
From February 2011

The onions and tomatoes are marinated in olive oil and a little salt while the dough rises. I can't wait to try this with sliced mushrooms and diced eggplant. The herb on top is dried oregano, but I suppose you could use rosemary or thyme and get wonderful results. Overall, you need to be a fan of olive oil - good, fruity, high-quality olive oil - because as an ingredient, it's front and center on this focaccia.

It definitely takes favorite status in my bread ratings. I'll never buy focaccia again.

27 January 2011

Hanna's Yummy Apple Spice Cake

From January 2011

I've long enjoyed Hannah Kaminsky's Bittersweet blog for its recipes as well as the gorgeous photographs. But prior to the blog, I knew her from My Sweet Vegan, her book of delectable desserts. This recipe, Apple Spice Cake, comes from page 80 of that cookbook.

My substantive changes to the recipe were considerably smaller than most of the recipes I alter: 1. used currants for raisins (it's just what I do -- I prefer the tang), and 2. made one layer and used the rest of the batter to make muffins. The cake was very moist, tasty, and not overly sweet at all. The main reason for that is that Hannah's recipe called for apple juice concentrate as the sweetener. It impressed me as more of an apple oat cake than a spice cake, but either way, both the cake and muffins were greatly appreciated by my friends who had them for breakfast. Just perfect for chilly and snowy winter days.

From January 2011

I also omitted the topping. The cake is awesome on its own.

Apple Spice Cake, page 80, My Sweet Vegan, by Hannah Kaminsky 2007. (I abbreviated the directions to keep this short, and I formatted them into my style. Otherwise, they're hers, so make sure you tell her when you try it out.)

Yield: 2 8-in. round cakes or 1 8-in. round cake and 12 muffins

Ingredients

2 cups whole wheat pastry flour
2 cups rolled oats
2 teaspoons ground cinnamon
1/2 teaspoon ground nutmeg
1/2 teaspoon ground cloves
1 teaspoon baking powder
1 1/2 teaspoons salt
1/2 cup margarine (I used Smart Balance buttery sticks.)
1 1/3 cups apple juice concentrate, thawed and undiluted
1/2 cup unsweetened applesauce
2 teaspoons vanilla
2 apples peeled, cored, and diced
1 cup raisins
1 cup chopped walnuts

Directions

1. Preheat the oven to 350 degrees F and grease an 8-in. round cake pan and a muffin pan (or another cake pan). (I actually save this for after the batter is mixed -- saves energy.)
2. In a large bowl, mix the dry ingredients together.
3. In another bowl, cream the margarine by itself to soften before adding the juice, apple sauce, and vanilla. Mix well.
4. Mix the wet ingredients into the dry until everything is moistened. Add the remaining ingredients into the batter by hand, folding gently.
5. Spread the batter into the pans and bake for 25 to 30 minutes, or until a tester comes out clean.
6. Let cool in pans for at least an hour, then take out of the pans to cool completely on a wire rack.
7. Top as you see fit, or leave plain. It will taste wonderful either way.

10 January 2011

Book Review: Appetite for Reduction

From January 2011

As always, I am a fan of all books written by Isa Chandra Moskowitz, and Appetite for Reduction is no exception. In fact, it's my new favorite. Like many of us who blog about food, Isa admits to having put on a few pounds, especially during the writing and testing of her cookie and cupcake books (written with Terry Hope Romero). Consequently, she wrote a low-fat vegan cookbook.

For my review, I selected two recipes that were (as advertised) very quick and easy to make. First, I made the Scallion Potato Pancakes. I made two more pancakes (had slightly more potatoes on hand) than the yield listed in the book, but didn't change anything otherwise. I enjoyed them greatly with an agave-mustard dipping sauce that fit the bill exactly. When I tasted the pancakes without the sauce, they needed a little salt. But otherwise, I was very happy with the result.


The second recipe, Garlicky Mushrooms & Kale, was a huge success. I've long sauteed kale with olive oil and garlic, but hadn't yet added mushrooms. I swapped portobello mushrooms for the creminis, but otherwise stayed loyal to the recipe. It was very garlicky and tasty. I'd probably opt for adding some hot pepper seeds for more zip next time, or some fresh ginger.

Both delicious recipes were very low in fat, but very high in flavor. One of the great additions to Appetite for Reduction is the use of the nutritional information accompanying the recipes. I especially like the vitamin and mineral percentages. Although they don't include many, they do count Vitamins A and C as well as calcium and iron. You don't often see those in cookbooks.

I would like more photos, but I can understand the costs of publishing prohibit the use of many photos if you want to keep the price low (which it is at $11.42 on Amazon). Last, but not least, one of my biggest pet peeves is when recipes run onto the next page and I must flip the page for more directions. Both recipes ran over into the next pages, so I'll just say that I hope the designers can work on that issue for the next book.

I've requested permission to reprint the recipes, so if I get it, I'll update this posting with them.

07 December 2010

Vegan Cranberry Jammy Thumbprints

From December 2010
These are habit-forming to say the least. Based on the Cranberry Walnut Thumbprint cookies by Isa Chandra Moskowitz and Terry Hope Romero in Vegan Cookies Invade Your Cookie Jar, mine are a bit cakier and don't rely on pre-made, jellied cranberry sauce.

These delicious two biters are best eaten on the day they are made. You can definitely make the dough a day or two ahead of time if you're planning to take these to a party.

Ever since I discovered the joy and ease of making my own jam, I can't resist applying the same principles to other fruits. In this case, I took advantage of the great sales on cranberries and purchased a hefty quantity. I also have been enjoying the marvelous honeycrisp apples making their way to the co-op, so there's a bin full of them in the fridge as well. The resulting cranberry jam is a gorgeous red hue and an excellent tart foil for the buttery taste of the cookies.

Since I made some pretty sizeable changes to the recipe, I'm including my version below. However, that shouldn't stop you from getting your own copy of

Here's my quickie cranberry jam recipe that you'll need to make the cookies.

Deb's Quick Cranberry Jam
In a blender, empty the contents of one pint package of fresh cranberries, one cored and chopped honeycrisp apple, and one quarter cup of agave nectar. Don't bother skinning anything. You'll only be wasting nutrients and time. Blend until just small pieces show. Empty the blender into a medium saucepan and heat on medium until lightly bubbling. Stir frequently, heating until the mixture thickens. Turn off the heat and let cool while you make the cookies. (By the way, you'll have extra jam. I recommend it spooned over your favorite vanilla frozen dessert or on freshly toasted whole grain bread. Yum!)

Vegan Cranbury Walnut Thumbprints

Yields 3 dozen very tasty cookies.

Ingredients:

1/2 very good olive oil
3/4 cup agave nectar
1/4 cup unsweetened vanilla almond milk
1 1/2 teaspoons vanilla
1 2/3 cups whole wheat pastry flour
1/4 cup coconut flour
1 teaspoon baking powder
1/2 teaspoon cinnamon
1/4 teaspoon freshly grated nutmeg
1/4 teaspoon salt
1 1/4 cups finely chopped walnuts
Freshly made cranberry jam (see recipe above)

Directions:

1. In a mixing bowl, mix together the oil, agave nectar, almond milk, and vanilla until really well incorporated.
2. In another bowl, sift together the flours, baking powder, and spices.
3. Mix the dry ingredients into the wet ones until well incorporated.
4. Place some plastic wrap over the bowl and chill the dough for 1 hour.
5. In the meantime, clean up the kitchen and line three baking sheets with parchment paper.
6. After the dough is nicely chilled, spread the walnuts into a dinner plate. Use a small cookie scoop to scoop the dough into balls and roll the balls around in the walnuts until you have a nice coating on the outside. Place the balls onto the cookie sheets.
7. Preheat your oven to 325 degrees F.
8. Using the second knuckle of your index finger (counting from the hand, not the tip of the finger) (or if you need a device, use a spoon) to make a 1/2 teaspoon-sized indentation into the cookie. It also helps to flatten it out a bit.
9. Spoon 1/2 teaspoon of the homemade cranberry jam into each indentation. You'll need to smooth it out a little because it won't "melt" in that much.
10. Bake the cookies at 325 degrees F for 10 minutes, then turn the cookie sheets and switch their positions. Bake for another 8 to 10 minutes or until they are just turning golden. Bake the last sheet the same way.
11. Let cool on the sheet for 10 minutes, then transfer to wire racks to cool completely.
12. Enjoy!

24 November 2010

Just in case you aren't already elbow deep in flour, cranberries, and other Thanksgiving preparations, here's a savory classic (originally posted on November 8, 2009) just in time:

Vegan Pumpkin Cornbread

From October 2009 Photos

Yep, that's me sneaking a piece of this incredibly delectable, moist cornbread. The original recipe (pre-Altered Plates version shown above) comes from the fabulous Debbie McDuffee's site CliqueClack Food. I made all kinds of changes to the recipe in order to veganize it and make it Deb-friendly. But the result was wonderful.

All the folks at the George Street Co-op who tried the cornbread were very happy with the moistness and the flavors that paired so well -- mainly the corn and the pumpkin. It was a karmic return for the organic pumpkin which I had bought at the co-op while it was on sale. For those of you who may think that organic doesn't make a difference, try organic pumpkin. It's a completely different experience. You can actually smell and taste how squash-y it is. It also has a very realistic color. I ate the leftover pumpkin with some pumpkin pie spice and just a 1/2 teaspoon of agave. It was delightful.

From October 2009 Photos

Just like a typical cornbread, this one is made in a cast-iron skillet. I prepped the pan by oiling it with some grapessed oil and then letting it heat in the oven while it preheated to 375 degrees F. I recommend making it this way because it does two things: 1. It give the crust a nice crunch, and 2. you can't beat how nicely the bread comes out of the pan. Here, I'll show you:

From October 2009 Photos

From October 2009 Photos

Just a note about sweetness, I like my cornbread on the sweet side, unless it features savory ingredients like green onions (heaven!). So, if you're like Debbie and want it to be less sweet, cut the amount of agave nectar.

Finally, sometimes baked good improve over time in a tightly sealed container. The spices take their time melding with the other ingredients, the moisture changes, etc. I wish I could say that I knew for sure that this is one of those recipes, but the batch only lasted two days. You'll let me know, won't you?

Here's the recipe as I made it:

Pumpkin Cornbread (greatly inspired by Debbie McDuffee's recipe of the same name)

Yields 18 wedges

Ingredients:

1 cup whole wheat pastry flour
1 tablespoon baking powder
1 teaspoon baking soda
1 teaspoon salt
1 teaspoon Pumpkin Pie Spice
1 cup cornmeal (next time, I'm using corn flour for a smoother finish)
1 cup pure pumpkin puree
1/4 cup agave nectar
1 tablespoon flaxmeal
1/3 cup olive oil
1 tablespoon apple cider vinegar

Directions:

1. In a large bowl, sift together the flour, baking powder, baking soda, salt, and spice.
2. Mix the cornmeal into the dry ingredients until well blended.
3. In a medium bowl or a very big measuring cup (10 cups or more), beat together the pumpkin, agave nectar, flaxmeal, olive oil, and apple cider vinegar until well incorporated.
4. Add the wet ingredients to the dry mixture and mix until well blended. It will be very thick.
5. Let the batter rest while you oil your cast iron pan and let it heat up with the oven to 375 degrees F.
6. Once the oven is hot, using potholders, take the pan out of the oven and place it on a heat-proof surface. Scoop the batter into the hot pan (please be careful!) and spread it evenly across the pan. It won't fill the pan. It also won't rise much.
7. Bake the cornbread for 20 minutes or until a bamboo skewer comes out clean.
8. Let the cornbread cool in the pan until the pan cools down. Turn it out by placing a flat surface on top of the pan and inverting both. The cornbread should come out cleanly.
9. Cut into wedges and enjoy!

17 November 2010

Yummy Vegan Date-Pecan Coffee Cake

From November 2010

My inspiration for this gigantic cake of deliciousness is the Date-Pecan Coffee Cake on pages 218-220 of The Angelica Home Kitchen. It is truly one of my favorite cookbooks. The recipes can stand a huge amount of tinkering, and are consistently tasty and healthy.

It's a giant cake when you make it in a 9-in. springform pan, as instructed. More than likely, next time I make it, I'll be pouring the batter into cupcake cups.

From November 2010

From the (less than optimal) photo, you can see that the date-pecan-ness is really a ribbon of sweet and crunchy flavor between two very tasty cake layers (you also can see my poor job of unmolding it from the pan). It's almost like a crumb cake, with the soft crumb topping, but with much more flavor. The original recipe calls for maple sugar, but I used agave nectar and some barley malt (which I'll leave out next time, but someone asked me to try it so I did). I also used less agave nectar for the maple syrup, and it worked out just fine. The only other alteration I made was to use Cake Spice instead of cinnamon. But you could easily use Five Spice powder in a 1:3 ratio with cinnamon and get a similar effect.

From November 2010

Since I didn't make that many changes to the recipe, I don't feel right about republishing it here without permission. Instead, I'll strongly recommend that you borrow The Angelica Home Kitchen from your local library (Inter Library Loan, if they don't have it) or buy it online, if you've got the $$$. You could also ask for it as a holiday gift from someone who might need a great gift idea.

Happy Thanksgiving to my American readers!

24 October 2010

Book Review: Fresh and Fast Vegan

From October 2010

Raise your hand if you like rice pudding! (Raising both hands and a foot.) Well, you're really going to like this one from Fresh and Fast Vegan, the newest cookbook from Amanda Grant. I noodled with it a great deal to make it work for me, given my ingredients and budget, but you'll find it quite the tasty pudding.

I'm not sure I'd call it rice pudding, actually. It's more like almond pudding with a big handful of rice thrown in for texture. Speaking of handfuls, Ms. Grant provides a few measurements in terms of handfuls, which I found to be very amusing given the range of hand sizes in folks I know. For instance, 1/2 handful of dried apricots in my hand equals 3.5 apricots. I'm sure my friend Richard's hands would hold more of the dried fruit than that. Come to think of it, I probably would have done well using Richard's hands for these measurements since the end result might have been even more delicious.

This is the second recipe I tried from the book. The first was a butternut squash pie with a crust that turned out very oily for my and Teresa's tastes. However, the pie was gone by the end of the day when I brought it to the Plainfield Public Library for the librarians. I'm hoping they'll enjoy this sweet dessert as well.

The recipe says it serves 4, but I'm not sure that's correct. I ended up with a LOT of pudding, which I estimate at 12 servings. Since my version of the recipe is a bit different than the original, I'm going to post mine here for you to try, with notes on my changes. The next time I make this, I'm definitely using brown rice and more of it. I'd also use more dried fruit just for fun. Otherwise, I'd keep this as is.

Serving note -- the original recipe recommends serving it chilled. After setting, I'd recommend warming it slightly in the microwave. It's better warm.

As far as the recipes go, there's a lot of leeway in the measurements, and the instructions could use a bit more detail. I also found the cooking and prep times to be much quicker than my experience. Teresa said she wanted photos and doesn't like cookbooks without them. However, the recipes are creative and interesting, which is always a plus for a vegan cookbook.

Moroccan Spiced Rice Pudding (my reworking of the recipe originally published on page 182 of Fresh and Fast Vegan by Amanda Grant).

Ingredients

2 tablespoons dried currants (The original says 1/2 handful of raisins.)
2 tablespoons chopped dried apricots (see above for measurement)
3 drops Fiore di Sicilia (The original calls for soaking the dried fruit in orange-flower water, so I made "creamsickle" flower water by using this amazing flavoring.)
3 oz filtered, boiled water
4 cups unsweetened vanilla almond milk (The original uses soy milk.)
4 tablespoons jasmine rice (The original says 3.5 to 5 T, which seems a bit nebulous to me.)
2 tablespoons brown rice flour (The original doesn't specify.)
2 tablespoons filtered water
2/3 scant cup agave nectar (I used light for this, but you could use dark, too. The original calls for 1 cup of turbinado sugar.)
1/2 teaspoon vanilla
1 1/4 cups almond flour (The original calls for ground almonds, but I made flour in my coffee grinder because I had a feeling the consistency might be too grainy otherwise. I'm glad I did.)
1/2 teaspoon Baking Spice (The original calls for sprinkling a little cinnamon on top before serving. I don't like dry cinnamon on anything, so I mixed the spice into the cooked pudding right before turning off the heat, and it worked like a charm.)

Directions
(My directions are loosely based on the original, but I tried to provide more guidance while keeping them simple. All feedback is welcome.)

1. In a small bowl, add the dried fruit, the Fiore di Silicia, and the boiled water and stir. Set aside to let the fruit soak up the flavor.
2. In a medium saucepan, boil 3 of the 4 cups of almond milk. Save the remaining milk for later.
3. As soon as the milk boils, add the rice, cut the heat to a gentle simmer, stir, then cover for 10 minutes. Bring the heat down to low so that the pan won't boil over.
4. Meanwhile, in a medium bowl, mix the rice flour with the 2 tablespoons of water until you have a paste. Whisk in the remaining milk.
5. When the rice is just tender, pour the rice/milk mixture into the saucepan and stir well. Raise the heat to bring the mixture to a low boil.
6. Gently whisk in the agave nectar, vanilla, almond flour, and the fruit. Lower the heat a little so the pan doesn't boil over. You may get some lumps from the almond flour, but whisking will break these up in about 2 minutes. If your pudding hasn't begun to thicken, just keep the heat on medium low and keep stirring until it does (shouldn't take longer than 5 minutes).
7. Stir in the Baking Spice and turn off the heat.
8. Put a trivet on your counter, and place a large glass bowl on top of it. Gently pour the pudding from the saucepan into the bowl and let cool for 20 minutes. Cover, then set in the refrigerator for at least an hour.
9. Serve warmed. (Although you could eat it cold, but it's far superior warm.)

18 October 2010

Vegan Banana Nut Muffins

From October 2010

Boy it's good to be back baking in my own kitchen again! Which is not to say that being in Utah for months wasn't fantastic, because it was. But 1. I haven't gotten the hang of high-altitude baking yet, and 2. I'm quite fond of my kitchen, especially the mixer, the food processor, and the oven.

Since I've been home, I haven't had much time to bake, but I did develop a vegan banana nut muffin recipe that has all kinds of tasty surprises, like carob chips and coconut. I brought a dozen of them to a birthday party where they had a giant cake from BJ's. While some folks tried the cake, the muffins were very popular. I didn't tell my pals that they were doing themselves a favor by eating one -- getting a nice dose of fiber and good fats from the flaxmeal, walnuts, whole grains, and olive oil. But seeing how much my friends enjoyed these moist, yet cakey muffins was enough to spur me to share this recipe with you.

From October 2010

Vegan Banana Muffins
Yields 12 standard muffins and 8 mini muffins

Ingredients

2 teaspoons flaxmeal
3 tablespoons water
1/4 cup olive oil (the fruitier the better)
1/2 cup agave nectar
1 teaspoon vanilla
3 desperately ripe bananas
1/2 cup walnuts
1/2 cup dried, unsweetened coconut
1/2 cup vegan carob chips
2 cups whole wheat pastry flour
1/2 teaspoon salt
1 teaspoon baking powder
1/2 teaspoon baking soda
1 teaspoon Baking Spice (from Pensey's)

Directions

1. Whisk together the flaxmeal and the water, then let stand while preparing the other ingredients.
2. In a large bowl, blend together the olive oil, agave nectar, vanilla, and bananas until well incorporated.
3. In a small bowl, chop the walnuts, and mix them with the coconut and carob chips.
4. In yet another bowl (sorry about that!), mix together the remaining ingredients.
5. Add the nut mixture to the dry ingredients and combine well.
6. Add the flax mixture to the wet ingredients and combine well.
7. Add the dry mix to the wet mix and combine well.
8. Preheat the oven to 345 degrees F and put muffin cups into your pans.
9. Scoop the batter into the cups. They will puff up, so fill the cups only 3/4 full.
10. Bake the muffins at 345 degrees F for 10 minutes, then drop the temperature to 335 degrees F another 10 minutes for minis and 20 for large muffins or until a tester comes out clean.
11. Let cool in pans for 10 minutes before taking the muffins out and letting them cool completely on a wire rack.
12. Enjoy!

04 September 2010

Agave Currant Freezer Jam

From August 2010

Greetings from Utah, where the farmers' markets yield gorgeous fruits, including currants that look more like jewels than edibles. I bought three pounds of these locally grown, magical currants in red, black, and white, fully intending on eating them as is. Then, I was inspired to try making my own freezer jam using agave nectar instead of sugar.

I've read some blog posts on how to do it, but I wasn't sure how to make it work without pectin. I remembered reading once about how apples have their own pectin, and how my mixed fruit pies always benefited from a few chopped apples.

Keeping it very simple, I blended each pound of currants with half an apple and a plum (because they needed to be eaten). Then I scooped the fruit into a small saucepan with about 1/4 cup of agave nectar. I brought the mixture to a boil and simmered it for about 5 minutes before moving it to a container to cool for 5 minutes. Next, I froze the jam for 30 minutes before covering it and freezing it overnight.

From August 2010

I suppose you could strain the stuff prior to freezing it, especially if you really mind the seeds. But I was really looking forward to trying the jam. After letting the jam thaw in the fridge, I could see that it set up just like regular jam, but without all the work.

It's just sweet enough without spoiling the natural tartness of the currants. My favorite was the red -- ruby-colored jam that was a bit more tart than the others. I love it spooned over vanilla Rice Dream. It cuts the rich sweetness perfectly.

Now that I've made my own and discovered how simple it is, I won't be buying unsweetened fruit spreads any more!

01 August 2010

More Fruit-Filled Delights

From July 2010

I'm calling this one the Muesli Pie. It's an experiment of sorts that turned out to be much tastier than I thought it would be.

From July 2010

I started by chopping up a cup and a half of muesli in an attachment to the immersion blender. Moving that to a bowl, I mixed in 2 tablespoons of olive oil and about 3 tablespoons of agave nectar until I had a good crumble going. Then, I patted down a layer of the crumble into the bottom of the pie dish.

I didn't think I'd have enough crumb for the top, so I mixed in about 2/3 cup of unbleached white flour and a bit more oil and agave nectar to moisten the mixture.

From July 2010

I chopped up a green apple, a peach, some strawberries, a handful of Ranier cherries, and some black raspberries, and tossed in some blueberries for good measure. I loaded up the pie plate with the fruit and pressed the crumb mixture onto the top of the pie.

I baked it until it was light golden brown (I probably could have baked it about 10 more minutes) at 325 degrees F, for fear of burning the agave nectar.

From July 2010

It's crunchy and nutty from the seeds and nuts in the muesli, and just sweet enough from the agave nectar (I erred on the less-is-more side because the cereal had dates and raisins in it), and just tart and wet enough from the fruit.

Next time, more fruit, less crumble, and a longer baking time to make the blueberries burst.

11 July 2010

Winner Innards (But I vote no on phyllo)

From July 2010

Over the July 4th weekend, I tried a recipe in a new book by Neal Barnard, called The Get Healthy, Go Vegan Cookbook. The recipe I tried was "Baked Apples in Phyllo Dough."

Since I'm out in Utah at the moment, I had a tough time with the phyllo (Utah's a desert, so it was rough going trying to keep it pliable). But I'm game, so I tried the recipe. Just so you know, I didn't quite follow the directions concerning the innards, but I did follow the folding instructions (which I'd recommend not following given the outcome of the extra-thick, many-layered, dry bottom). First, I cut up two apples (the recommended ones were Jonathan or Rome, but I used Granny Smith because they're such tasty apples when baked), then I mixed in 1/4 cup chopped walnuts, 2 tablespoons of raisins, and about 1 1/2 teaspoons of pumpkin pie spice (because the spices used were all in my pumpkin pie spice).

Then I drizzled 2 tablespoons of agave nectar over the mixture and mixed it until well incorporated. Next came the folding, which I won't repeat here. What I will do is suggest that you leave out the phyllo and just cook the stuff in a small, covered casserole dish in the oven at 350 degrees F for 20 minutes or cook it on top of the stove until the apples are just soft. Then, spoon the tasty filling over your favorite vegan frozen dessert (I like Vanilla Rice Dream for this).

Other options: substitute fruit-sweetened cranberries and toasted almonds instead of the raisins and walnuts; add a little vanilla or orange juice for flavor; make a vegan pie shell, then triple this recipe and use it as a pie filling.

As you can see from the photo, there's quite a surplus of phyllo dough under the fruit packet. But the innards were lovely. I recommend using as little of the agave nectar as possible, since my testers and I thought the end result was a bit sweet.

Overall, there are some pretty interesting recipes and great menu ideas toward the back of the book. There are some ideas I disagree with in the front of the book, but Dr. Barnard's heart's in the right place when he tries to convince folks that vegan choices are great for losing weight and adding more vitamins and nutrients to their diets.

06 May 2010

Good News and Slightly Bad News

My Altered Plates friends, I'm about to become one of those people who say, "I've got some good news and some bad news. Which do you want first?"

Since I typically rip the bandage off all at once, here's the "bad" (not bad, really, just not great for fans of this blog) news -- Altered Plates will be on hiatus for the next few months.

Why? Well, that's where the good news starts. A couple of months ago, I applied for a short-term, very cool position at a great museum, and landed the gig. Yay! So, while I focus my energies on living the exciting life of a working archivist, I'll be taking a break from baking and making homemade desserts.

In the meantime, I'll resurrect my other blog, Here and There, with periodic updates and photos of the upcoming adventure. John keeps calling it an adventure, and he tends to be right about these things, so I've adopted his name for it. Frankly, I'm just so excited and grateful for the opportunity that I sometimes forget it's going to be great fun.

Yesterday, in my last cataloging class, the professor asked how many of us were graduating. About 7 of us raised our hands. Then she asked how many of us had a job. No one raised a hand (I was so caught up in seeing what folks said that I forgot to raise my hand!). All that to say, I'm very fortunate to land even this short-term work in today's iffy job market.

I'll miss my experiments in food chemistry, but I hope that you'll check in with me on my grand adventure now and then on Here and There. Until then, I hope you all have a marvelous summer!

20 April 2010

The Perfect Vegan Scoop (again)

This post originally ran on Oct. 22, 2007. Even after time, the recipe still stands up.Also, if you don't have Mimicreme, you can use coconut milk.

The Perfect Vegan Scoop


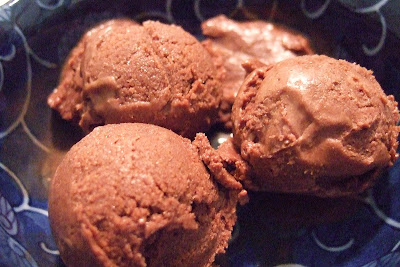
This is a double review of sorts, although not so much a review of "The Perfect Scoop," as much as a confirmation of its recipes' flexibility. I was able to completely veganize and make a carob version of David Lebovitz's "Chocolate Ice Cream, Philadelphia Style" without much of a fuss at all. More importantly, I was able to produce a rich, fudgy carob ice cream that is just about the tastiest dessert I've had in a while.

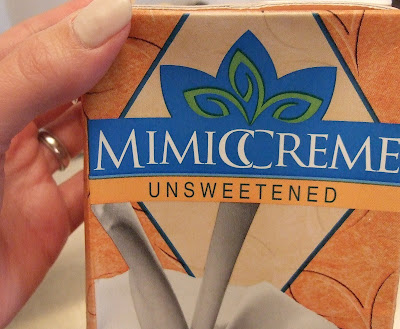
To do this, I used Mimicreme, a new non-soy, non-dairy cream substitute and almond milk for the dairy products. According to the Mimicreme site, the ingredients of the unsweetened version I used comprise: Purified Water, Almonds, Cashews, Bicarbonate Soda, Rice Starch, and Salt. After trying this recipe, I have to say that for the ice cream trial, Mimicreme lived up to its promises. I plan to try it in different applications soon since I have a bit of it left over from this recipe. Any requests for trial recipes??


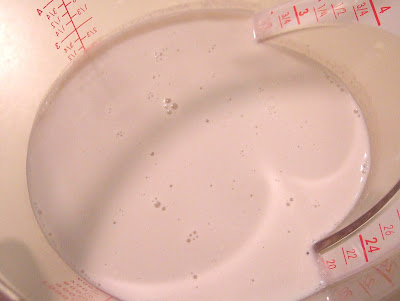
At first, I had my doubts about Mimicreme since it appeared so gray.


But, I poured out some almond milk and saw that it was around the same hue, and I realized that the color would be completely carob-y when all was said and done. Thus, I stopped fretting about Mimicreme.


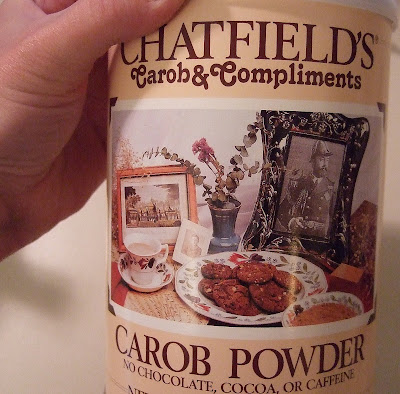
One of the primary reasons this recipe is so rich and fudgy is that it contains both carob powder (Dutch process cocoa in the original) as well as unsweetened carob chips. It's a pretty easy recipe, and the most time consuming part of it is waiting for the mixture to chill before freezing it in the ice cream maker. That always takes too long for my taste, so it's best to make it before going to bed, so you can chill your soon-to-be vegan frozen delight over night.

Here's the recipe as I made it:

Ingredients:

2 1/4 cups Mimicreme
6 tablespoons sifted carob powder
3/4 cup agave nectar
Pinch of salt
6 oz unsweetened carob chips
1 cup unsweetened vanilla almond milk
1 teaspoon vanilla paste

Directions:

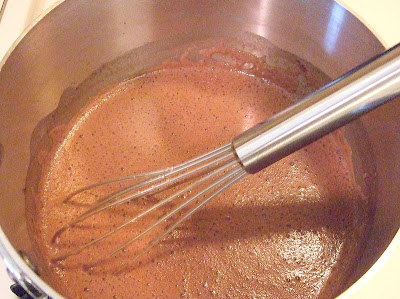
1. Whisk together the Mimicreme, carob powder, agave nectar, and salt in a large saucepan, heating until it just boils.


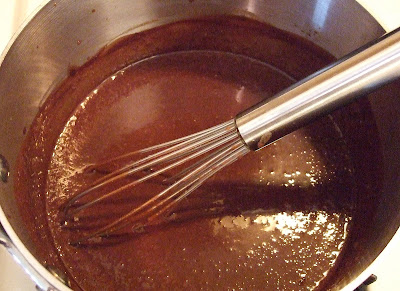
2. Cut the heat and whisk in the carob chips until they melt completely. Make sure you use a silicone spatula to get the carob that might stick in the corners of your saucepan.


3. Whisk in the milk and vanilla until completely incorporated.
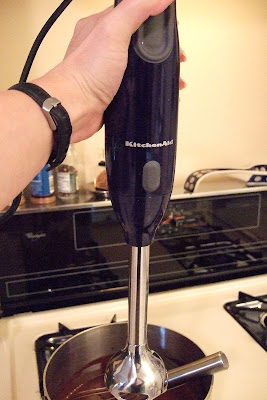
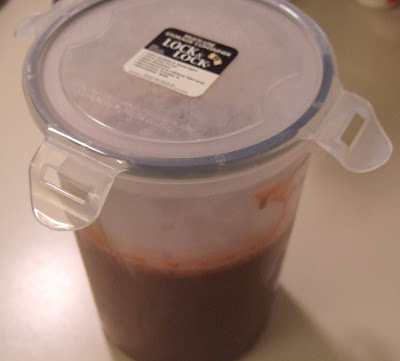
4. Using an immersion blender or a regular blender, blend the mixture until completely smooth. (I used an immersion blender, but I poured my mixture into the container I would chill it in before blending.)


5. Chill the mixture for at least 6 hours.


6. Freeze according to your ice cream maker's instructions.


7. Enjoy!

13 April 2010

Agave MythBuster at Madhava

If you haven't seen it yet, you should definitely check out Madhava's newest resource on agave nectar, Agave MythBuster. Go now, tell your friends!

11 April 2010

Light As Air Cherry Fig Not-ins

From April 2010 photos
As I've said many times, one of my favorite cookbooks is Vegan with a Vengeance by Isa Chandra Moskowitz. My copy is well worn, especially on pages I've used to make Altered Plates versions of dishes. I've also started to write my alterations on the pages because the slips of paper with my notes sometimes slip out or I make additional changes later.

In the photo above, you can see the outcome of my tinkering with Isa's Fig Not-ins. In my youth, I ate my share of Fig Newtons. These were quite different from the dense cookie of my past. My agave-nectar sweetened cookies were light and fluffy, more cakey than cookie, but lovely.

From April 2010 photos

Because my version uses agave nectar, I was very careful about not letting them brown too much. I'm going to continue to noodle with these a bit because I read on Isa's blog that you could use the dough to make Hamantaschen. My dough was way too wet for that, and I'd like to use coconut oil instead of the shortening to achieve a more butter-like result (however coconutty it may taste).

The cookies have a definite vanilla flavor, but the filling is king. The cherries add a great fruity flavor, while the figs and dates pull it down to earth. These cookies make an excellent light dessert for a big meal or a nice snack on their own.

From April 2010 photos

The upskirt view (can you use that on other descriptions than pizza?) shows how light and cakey this bar cookie is.

From April 2010 photos

Here's a really nice shot of the filling. I used organic Turkish figs and organic Medjool dates from the co-op combined with my favorite dark sweet cherries from Trader Joe's, and omitted the lemon zest. I also used considerably less sweetener overall because the fruit was sweet enough. The most important step here is the blending. I added this because the filling was way too chunky otherwise. As you can see from the photo, I didn't quite divide my dough evenly between the top and bottom, so you might want to do this better than I did (although it didn't affect how tasty these were at all).

Another cookie I used to enjoy as a kid was raisin bars. My mom would by these flat packages of cellophane wrapped bars with a wavy score between each cookie (making them about 3 in. long once separated from their brothers). I'd like to try to replicate those, and will work on that over the summer.

Here is the recipe as I made it, greatly inspired by the Fig Not-ins recipe on page 202 of Vegan with a Vengeance.

Cherry Fig Not-ins
Yield: 24 big cookies or 36 small cookies

Ingredients:
1/2 cup dried sweet cherries (unsweetened), chopped
1/2 cup Medjool dates, pitted and chopped
3/4 cup dried Turkish figs, chopped
1 cup filtered water
2 tablespoons agave nectar

1/4 cup non-hydrogenated margarine
1/4 cup non-hydrogenated shortening
1/2 cup agave nectar
2 tablespoons arrowroot powder
1/4 cup almond milk
2 teaspoons vanilla
2 cups all-purpose or whole wheat pastry flour
1/2 teaspoon baking powder
1/2 teaspoon baking soda
1/2 teaspoon salt

Directions:
1. Combine the first 5 ingredients in a medium saucepan and stir while you heat it to medium.
2. When it starts to bubble, turn off the heat and either use an immersion blender (my choice, but be careful!) or a regular blender to blend all the big chunks out of the mixture. Set the filling aside to cool.
3. With a mixer in a large bowl, whip the fats with the agave nectar for at least 3 minutes, until they are well combined.
4. Mix in the arrowroot, almond milk, and vanilla until well combined. It will look a bit curdle-y, but that's alright.
5. In a separate bowl or a large measuring cup, combine the flour, baking soda, baking powder, and salt until all are incorporated.
6. Add the dry ingredients to wet mixture to form a light dough.
7. With well-floured hands on a well-floured surface, form the dough into a ball and split it into two. Wrap each dough ball in plastic and let it rest and chill in the fridge for at least an hour.
8. When the dough has cooled, take it out of the fridge and its wrapping, and flour a large piece of parchment paper, your hands, and your rolling pin. Take one of the dough halves and roll it until it is about 9 x 15 inches. You can leave this on the parchment paper because it will be your bottom layer. Place this layer on a cookie sheet (I used a pan with 1 in. sides just in case the filling oozed, which it didn't). Roll out your top layer the same way, but set it aside for a moment.
9. Spread the filling thickly, but evenly on top of the bottom layer in the pan.
10. Here's the tricky part, take your top layer, still on the parchment paper, and turn it paper side up on top of the filling layer. Then, gently peel the paper off the top layer.
11. With a pizza cutter, or a sharp, long knife, cut the cookies into the size bars you wish. Do not separate them now. It just makes them super-easy to cut once they are baked.
12. Preheat your oven to 325 degrees F. When the oven is at temperature, bake the cookies for approximately 20 minutes or until lightly browned.
13. Let them cool in the pan for 10 minutes, then using the edges of the parchment paper, lift the entire batch out of the pan and onto a wire rack to cool for an hour before cutting along the same lines you made earlier. Separate the cookies, then let them cool completely.
14. Enjoy!